Stikkord: halloween

HEKLET GRESSKAR- Gratis hekleoppskrift

HEKLET GRESSKAR- Gratis hekleoppskrift


DESIGN OG OPPSKRIFT: HEGE ESPELAND LYGRE – HELdesign.com
Vær snill å sett deg inn i vilkårene for bruk av mine hekleoppskrifter.


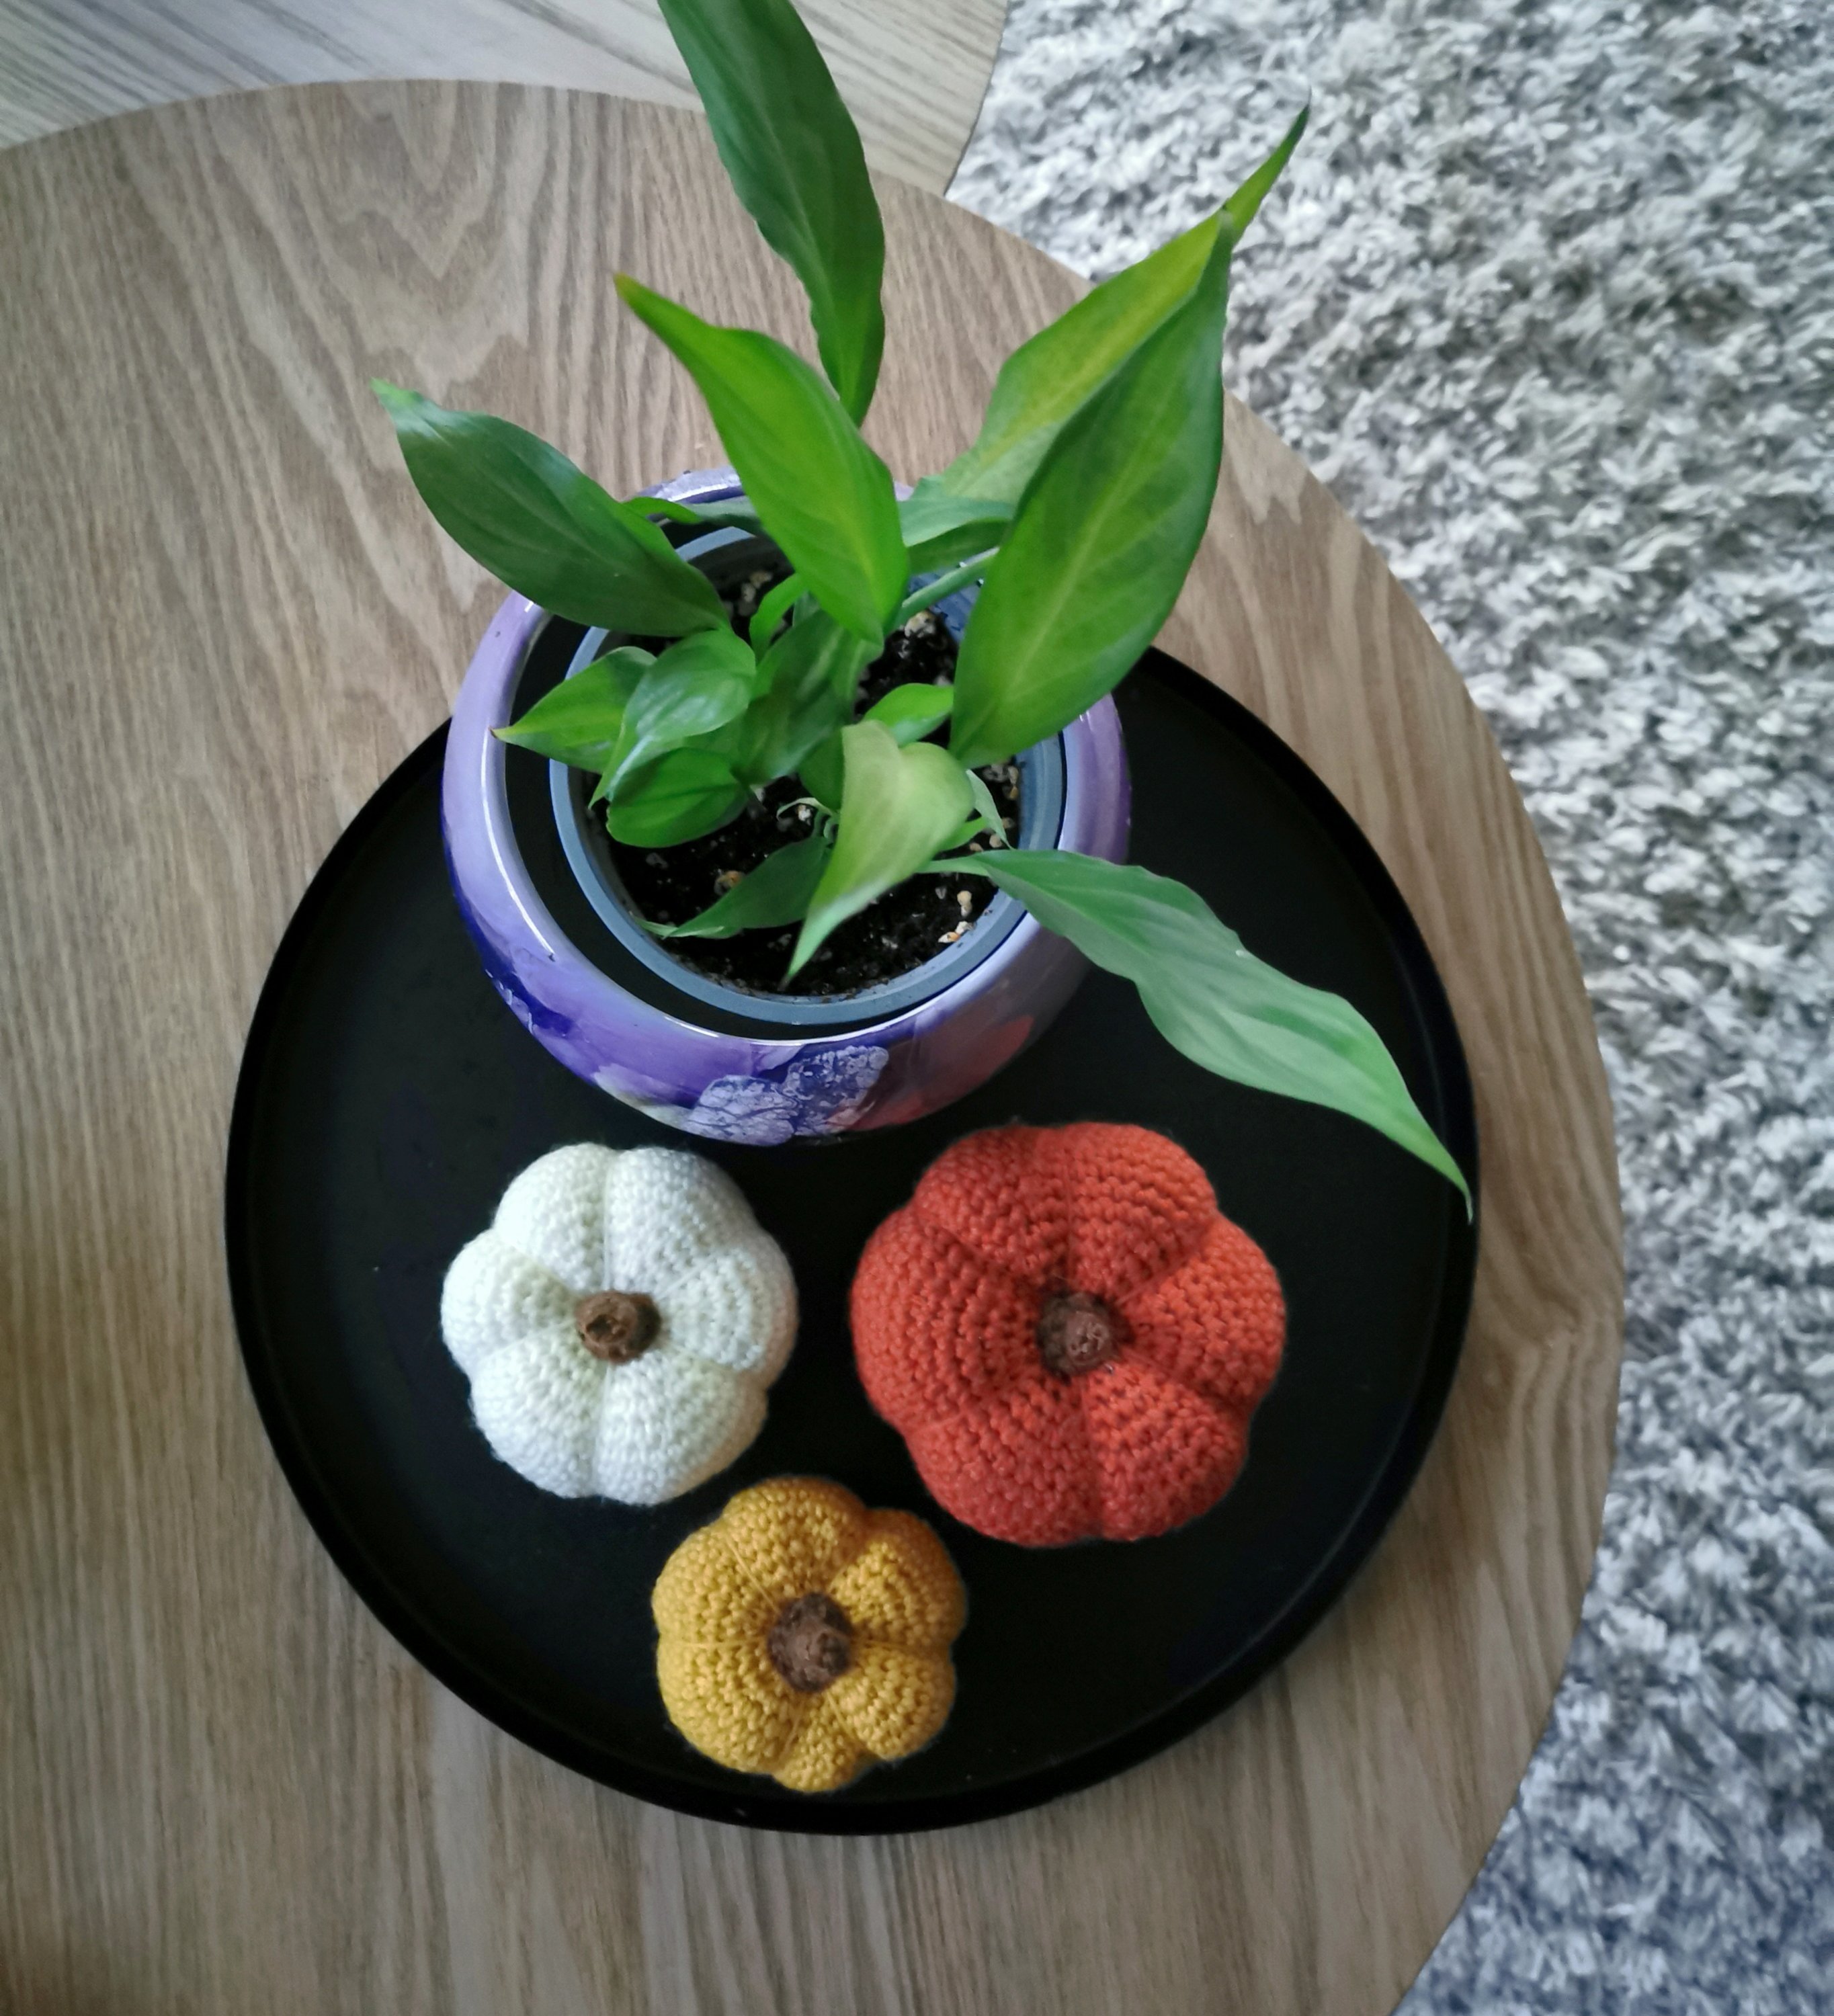
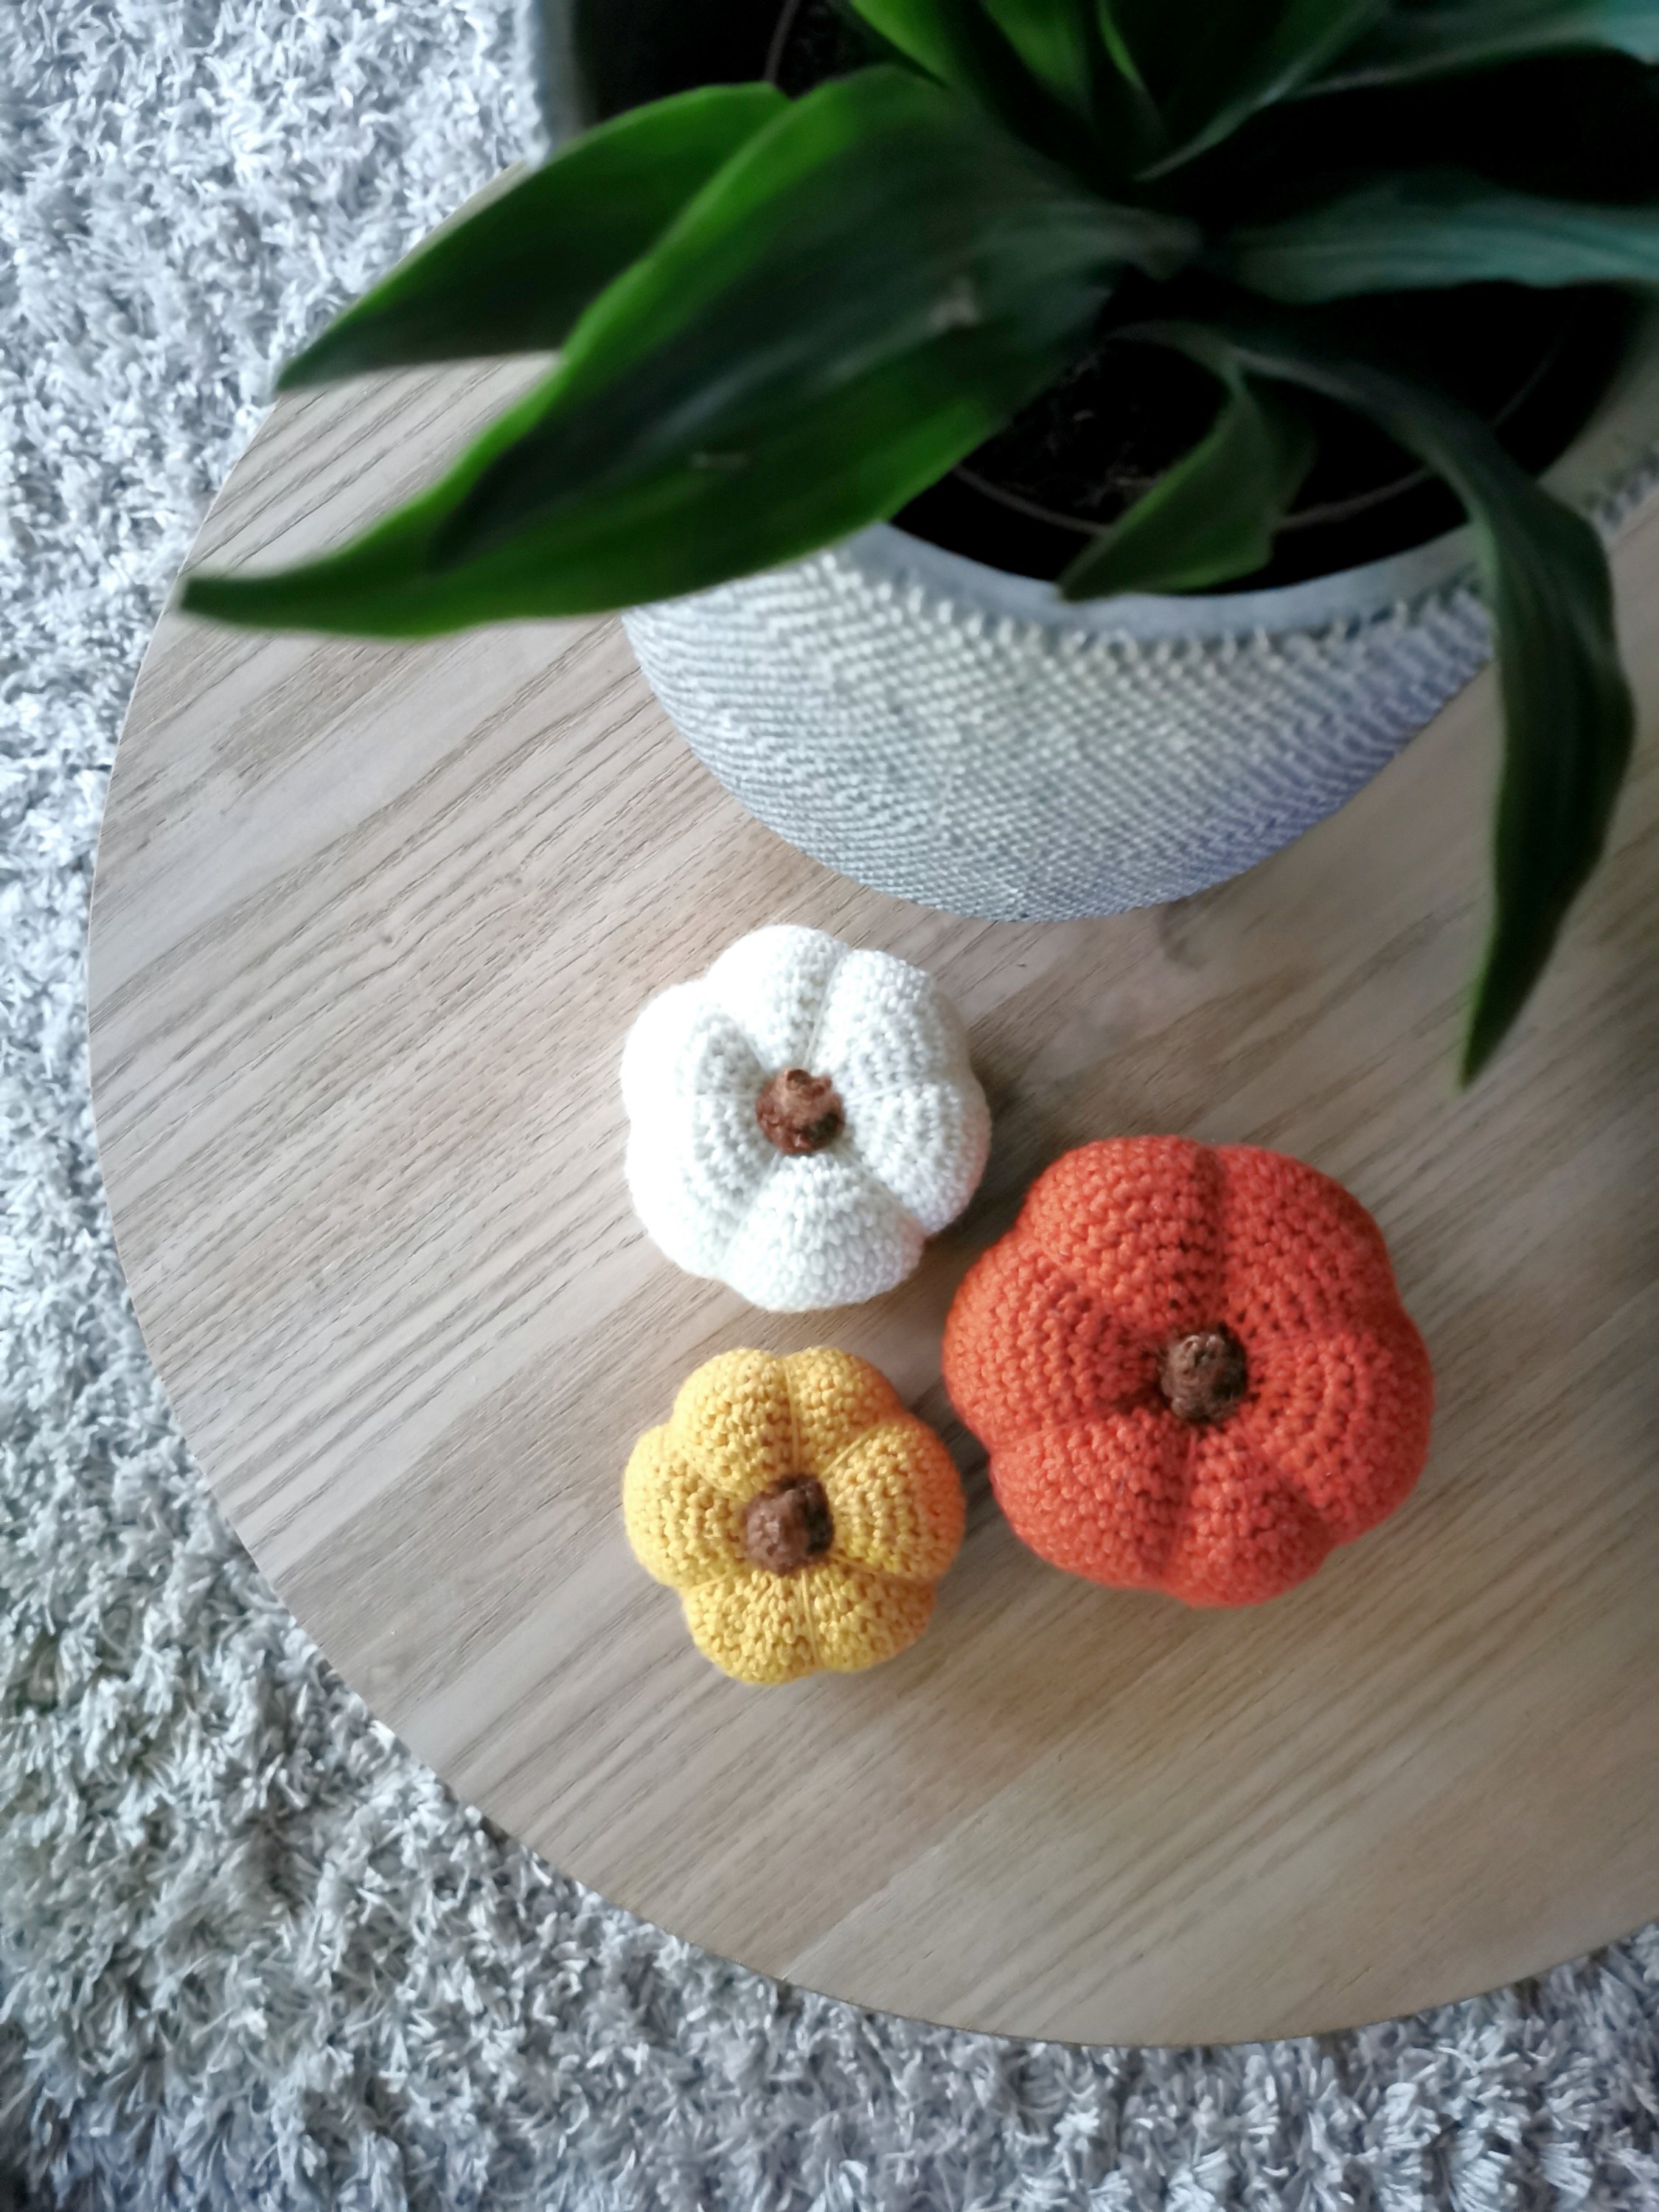
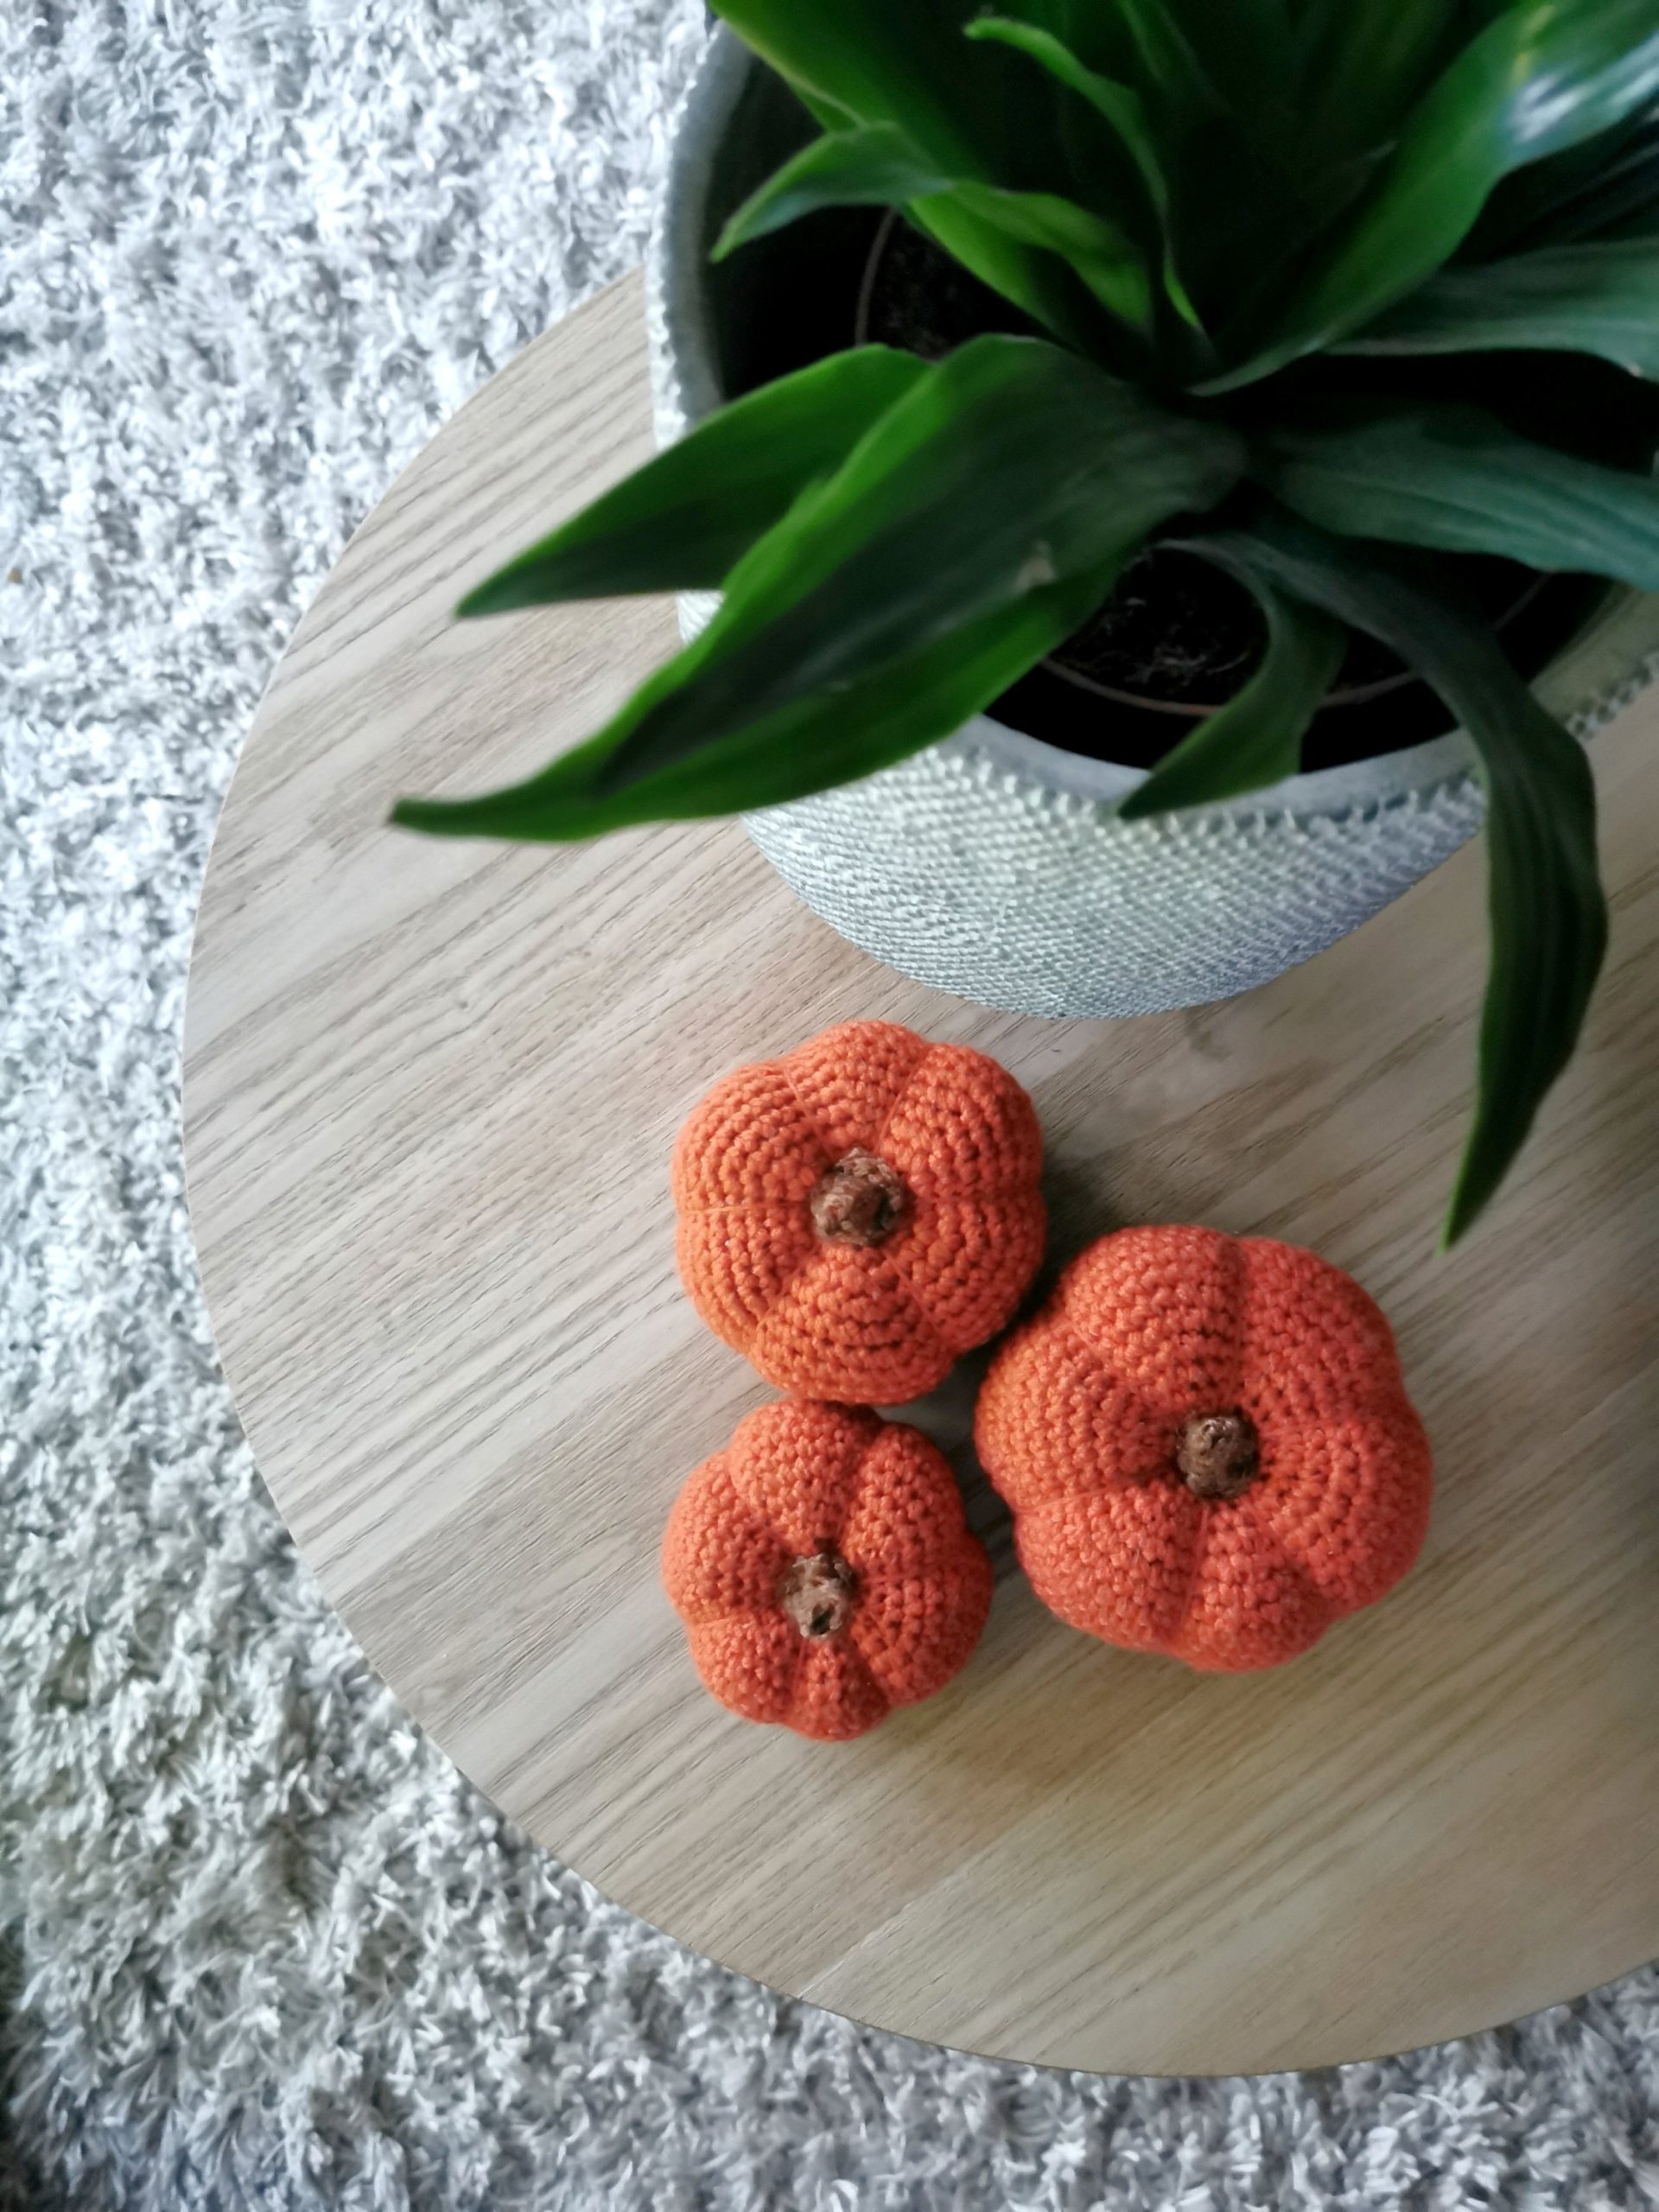
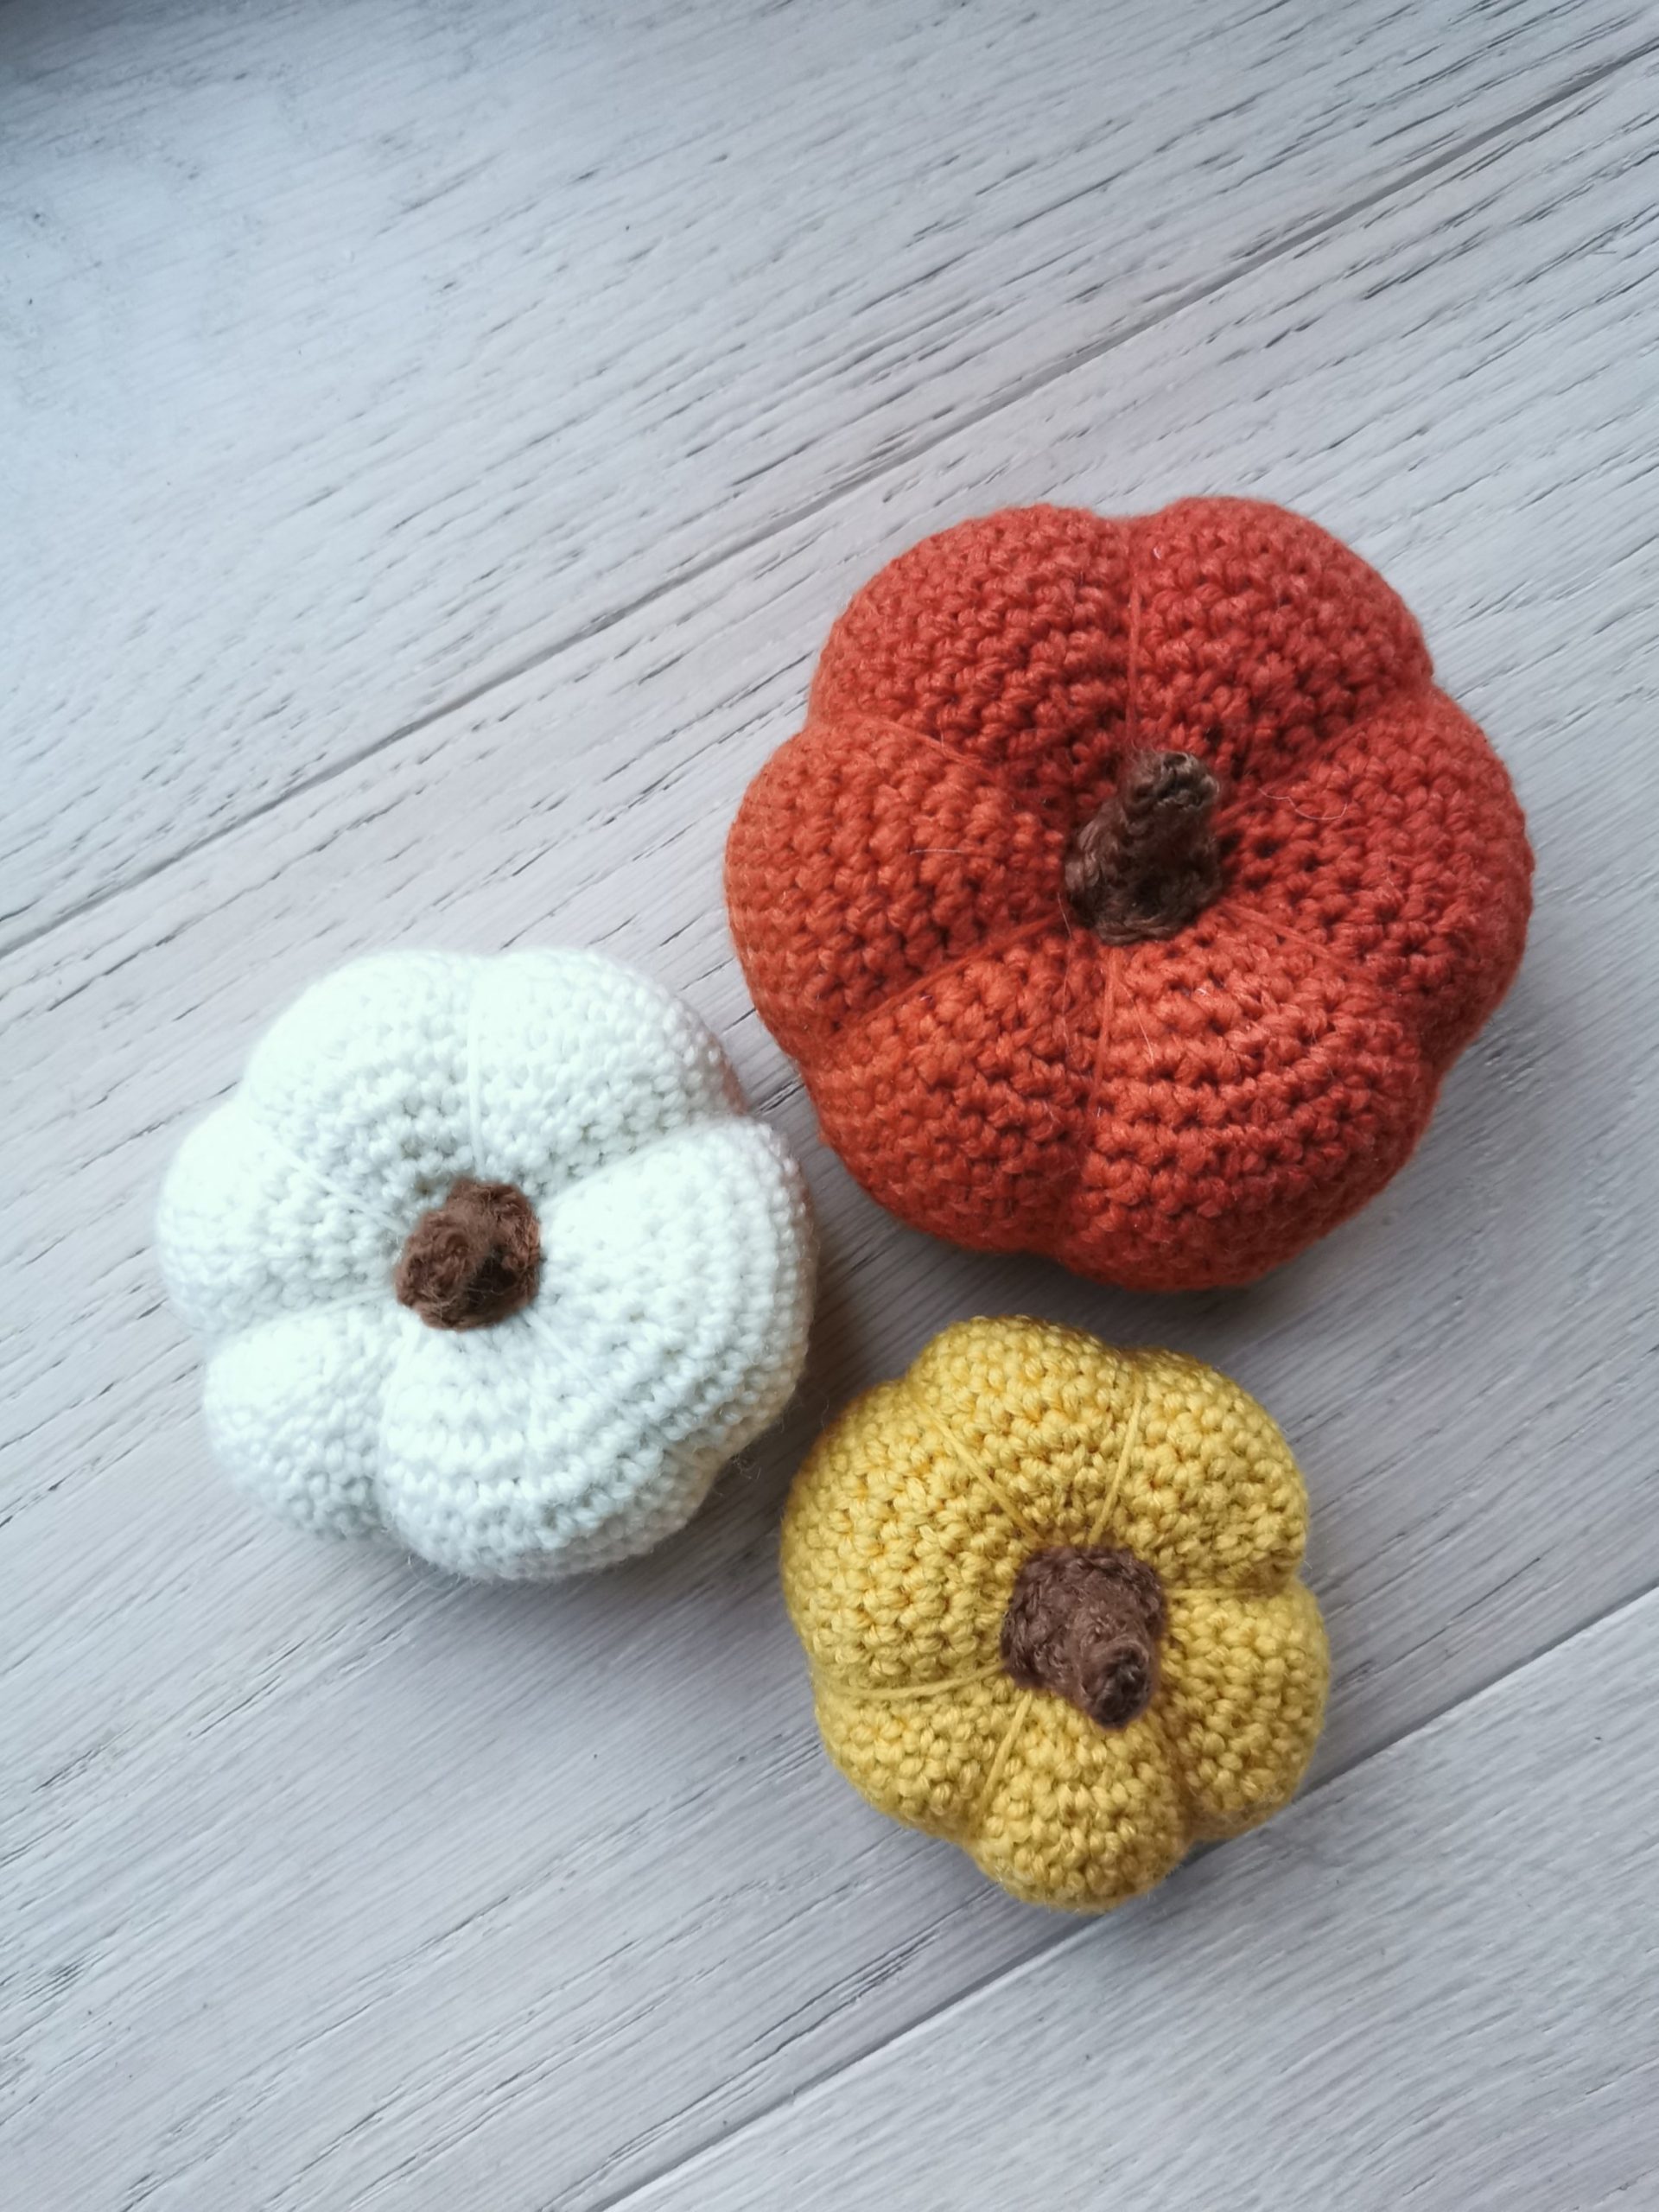
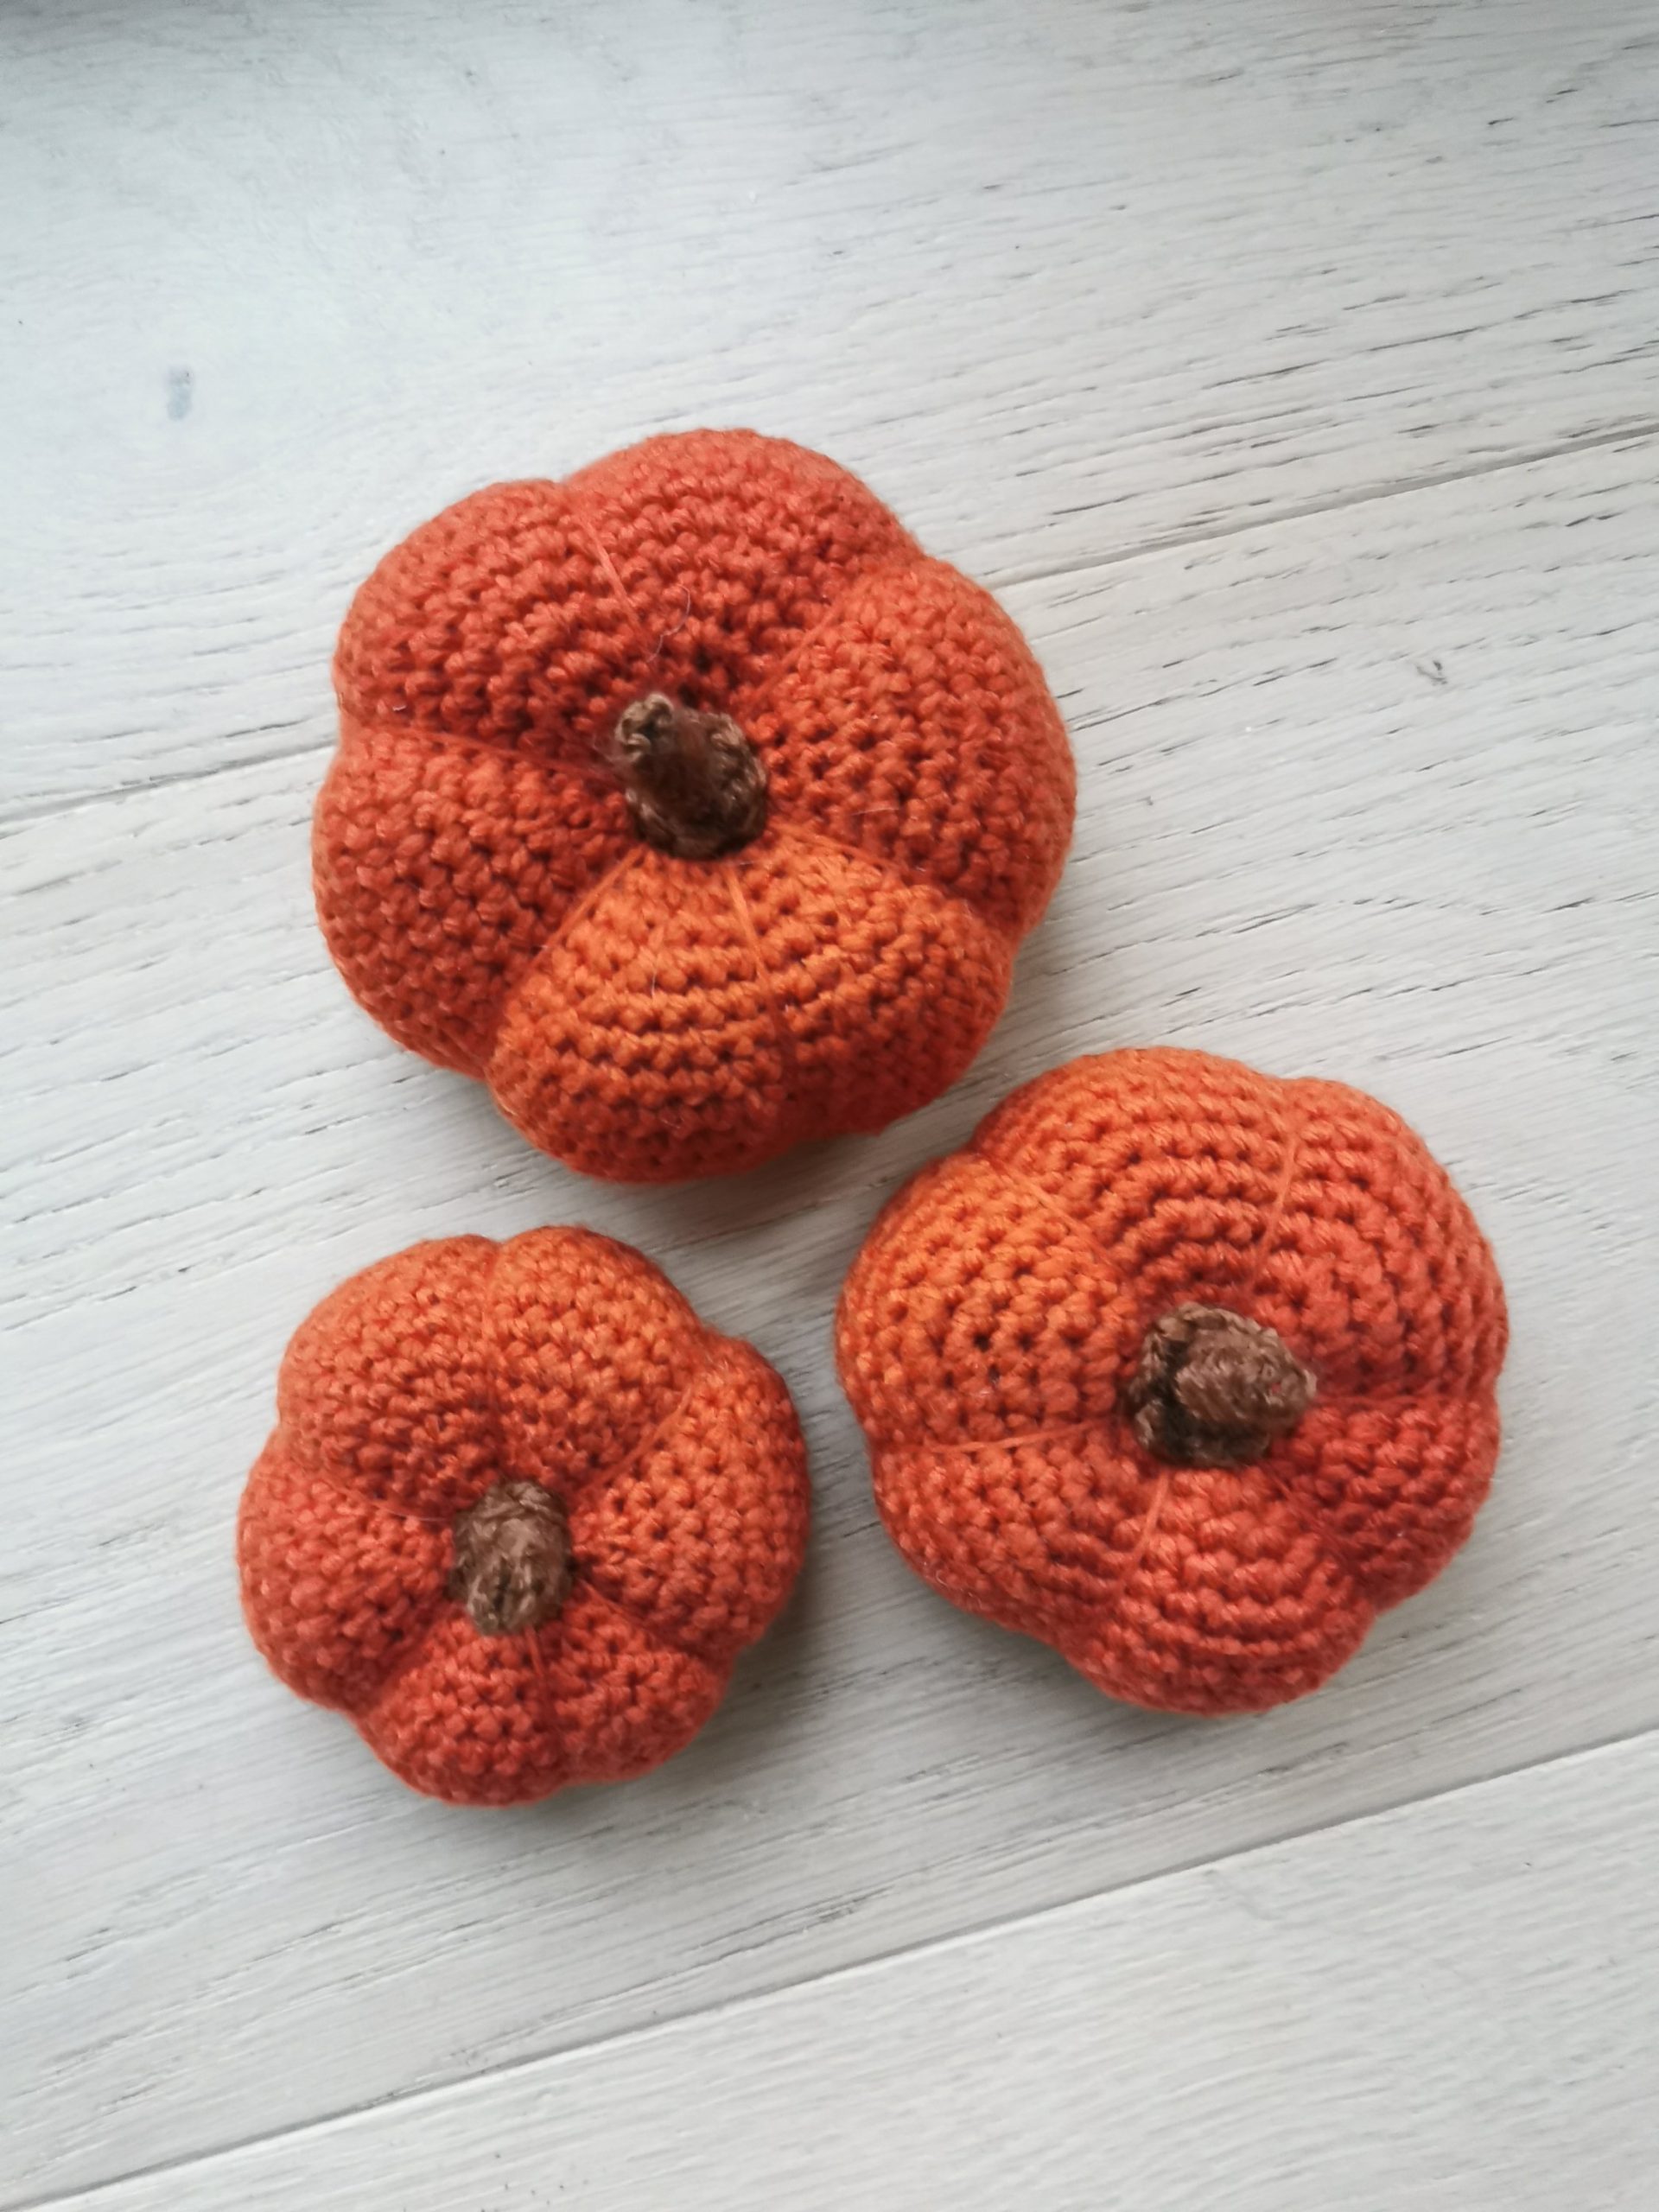
HEKLET GRESSKAR – stor, medium og liten

Når høsten kommer synes jeg det er så fint å pynte i huset med gresskar, og i fjor laget jeg en enkel oppskrift på et heklet gresskar i tre forskjellige størrelser. Det florerer av denne type hekleoppskrifter på internett, men jeg tenkte allikevel at jeg ville dele min med deg. Gresskarene kan hekles i hvilket som helst garn, så lek deg gjerne med både forskjellige farger, størrelser og også tykkelse på garnet. Og erstatt gjerne stilken med en liten grein (se bilde lengre nede i innlegget).


MATERIALER / UTSTYR

  • Garn – Gresskaret kan lages i hvilket som helst garn, så bruk det som passer for deg.
  • Heklenål – Størrelse som passer til garnet, pluss en størrelse mindre.
  • Fyllvatt
  • Monteringsnål
  • Saks

MASKER / FORKORTELSER

HEKLEFASTHET

  • Heklefasthet er ikke viktig i denne oppskriften, da det ikke er et plagg eller noe som behøver eksakte mål.

INFORMASJON

  • Les gjennom hele oppskriften før du starter.
  • Øking (eksempel): Når det står «2 fm, 2 fm i neste», så betyr dette at du skal hekle 1 fm i hver av de to neste m, deretter 2 fm i neste m (det hekles altså over 3 m i dette eksempelet hvor du ender opp med 4 m).
  • Felling (eksempel): Når det står «2 fm, 2 fm sm», så betyr dette at du skal hekle 1 fm i hver av de neste to m, og deretter skal du felle over de neste to maskene ved å hekle to masker sammen. Du hekler da over 4 m og står igjen med 3 m.
  • Når det hekles i ring er det vanskelig å se hvor hver runde starter og slutter, så bruk maskemarkør eller en tråd til å sette merke etter hver runde.
  • ** – Gjenta alt som står mellom * til * så mange ganger som oppskriften sier, eller ut omgangen.

OPPSKRIFT

Heklenål: Bruk den størrelsen som passer til det garnet du har.

HEKLET GRESSKAR – stor størrelse

R1: 6 fm i MR (6 fm).
Tips: ikke stram den helt til før du er ferdig med R2.
R2: 2 fm i hver m (12 fm)
R3: *1 fm, 2 fm i neste m* Gjenta fra * til * ut omg (18 fm)
R4
: *2 fm, 2 fm i neste* (24 fm)
R5:
*3 fm, 2 fm i neste* (30 fm)
R6:
*4 fm, 2 fm i neste* (36 fm)
R7: *5 fm, 2 fm i neste* (42 fm)
R8: *6 fm, 2 fm i neste* (48 fm)
R9: *7 fm, 2 fm i neste* (54 fm)
R10 – R18: 1 fm i hver m (54 fm)
R19: *7 fm, 2 fm sm* (48 fm)
R20:
 *6 fm, 2 fm sm* (42 fm)
R21: *5 fm, 2 fm sm* (36 fm)
R22: *4 fm, 2 fm sm* (30 fm)
R23: *3 fm, 2 fm sm* (24 fm)
R24: *2 fm, 2 fm sm* (18 fm). Fyll med vatt.
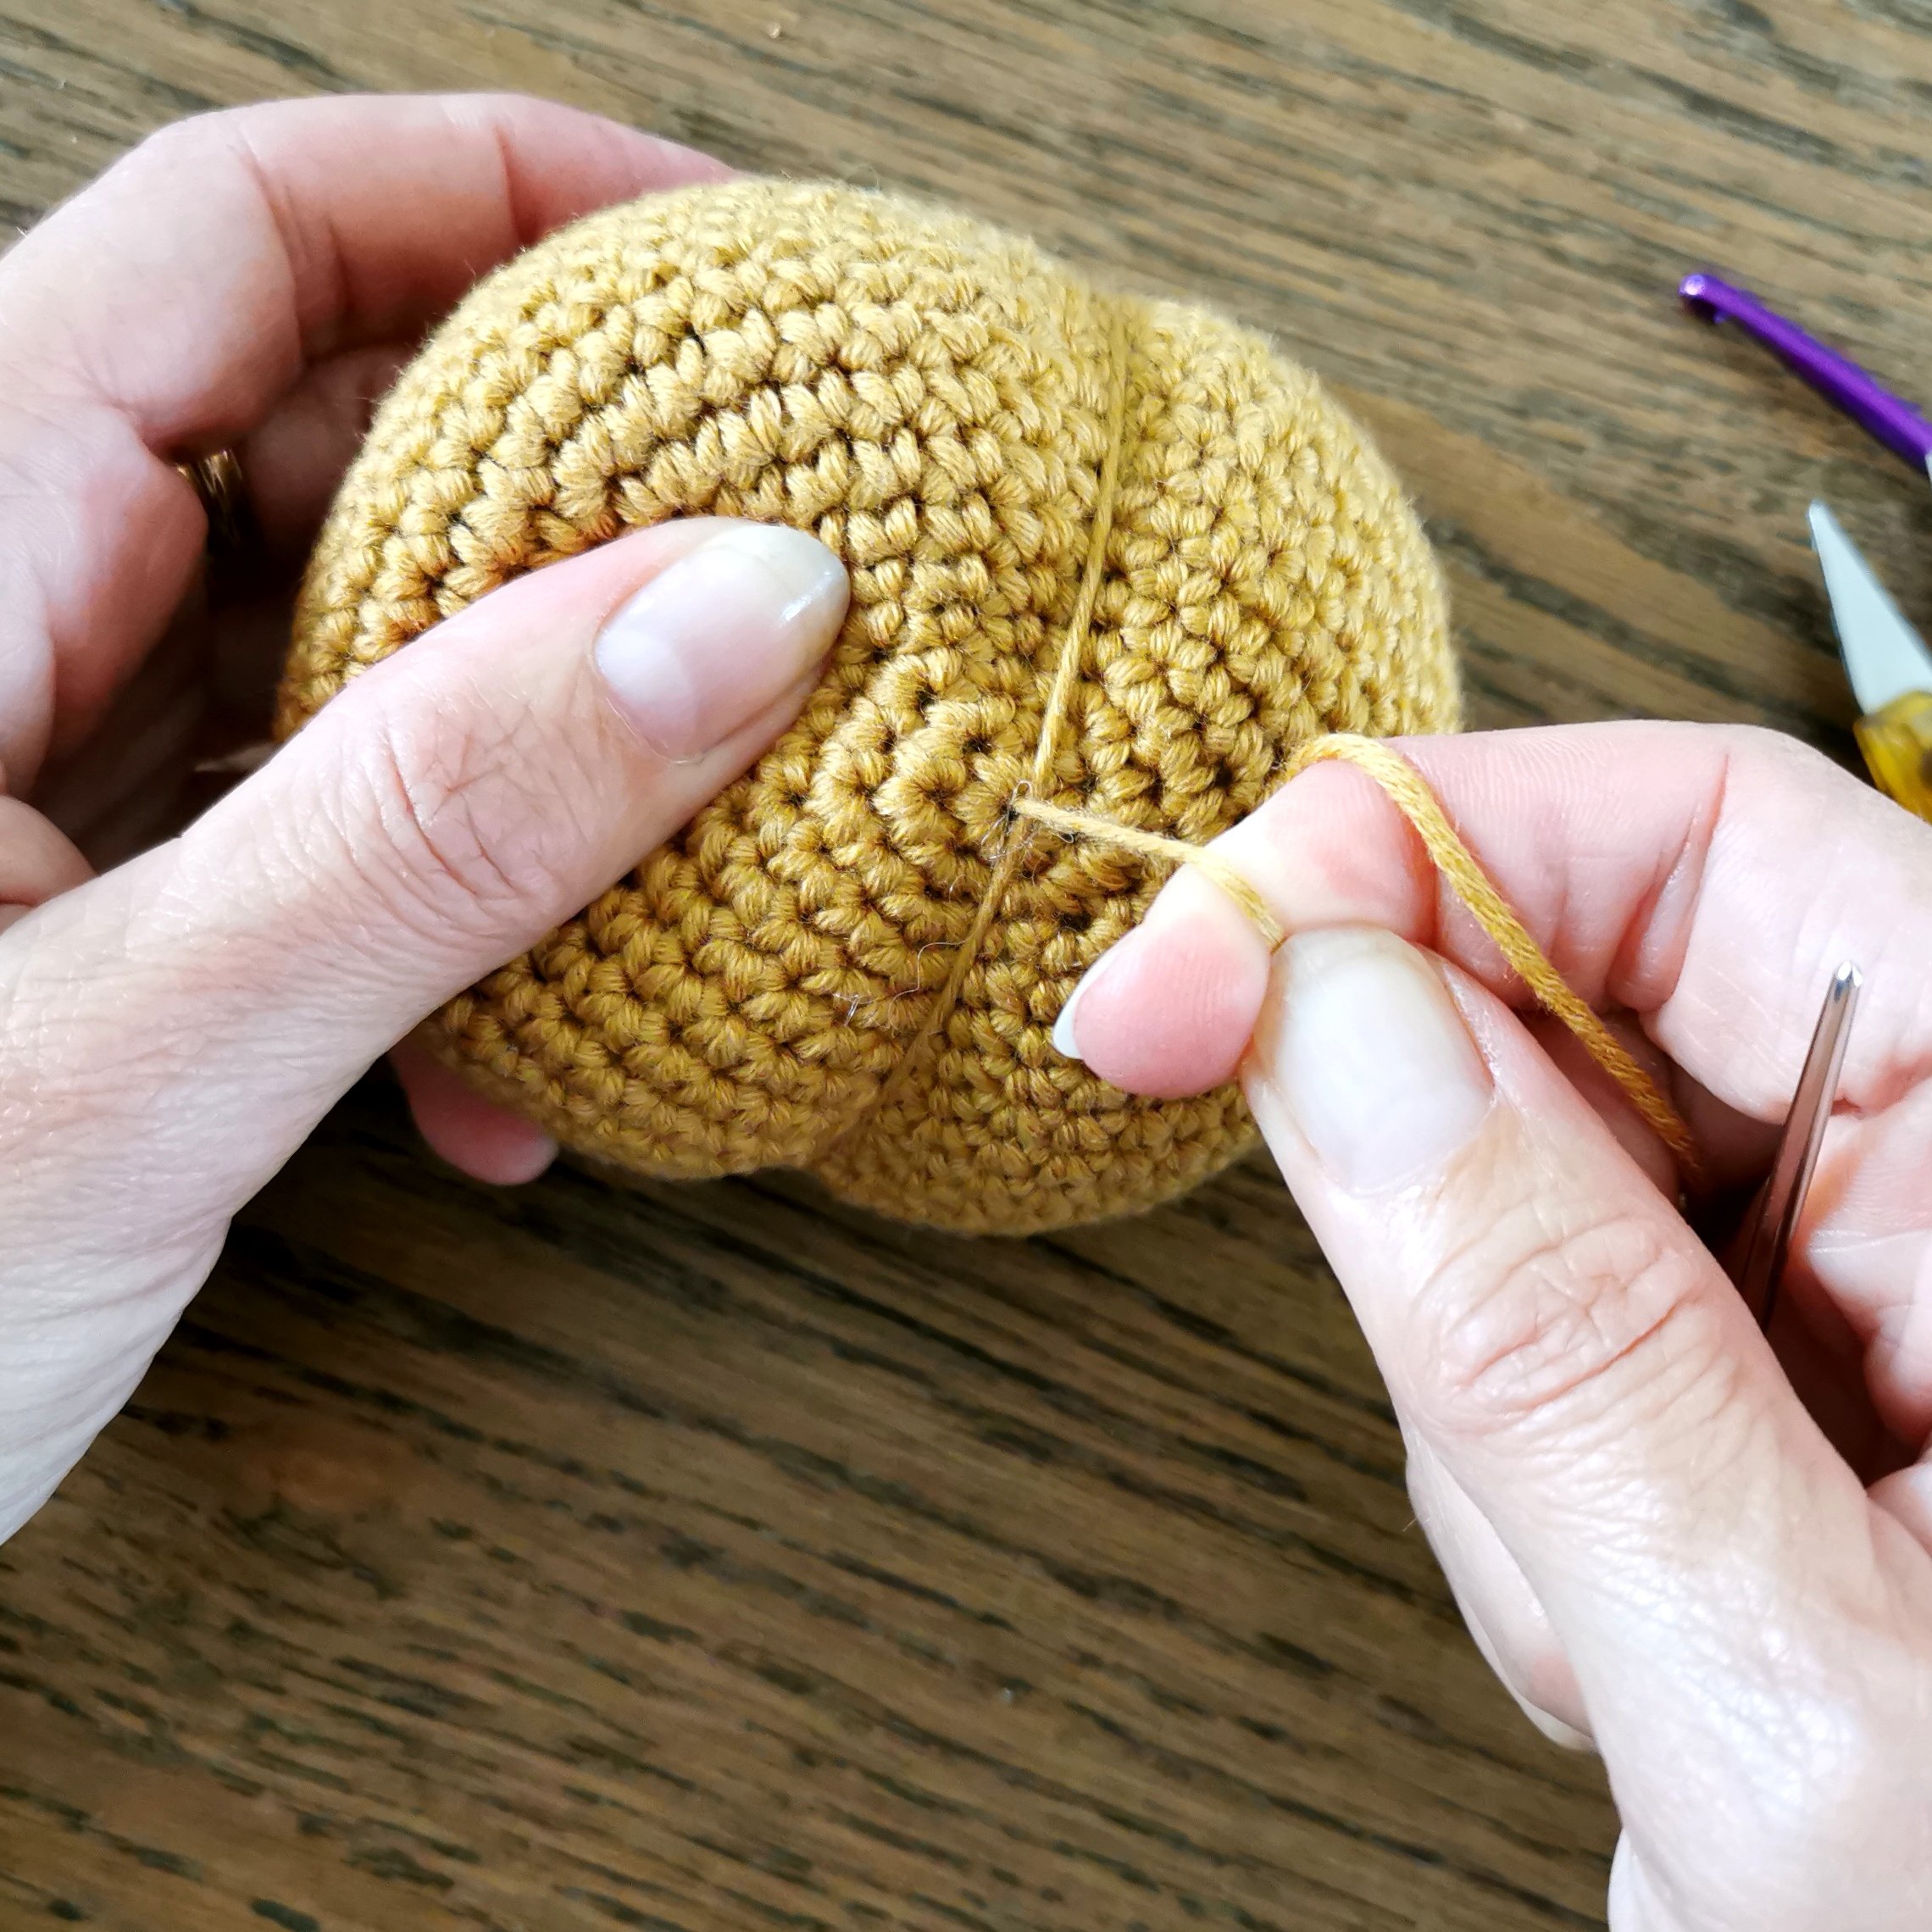
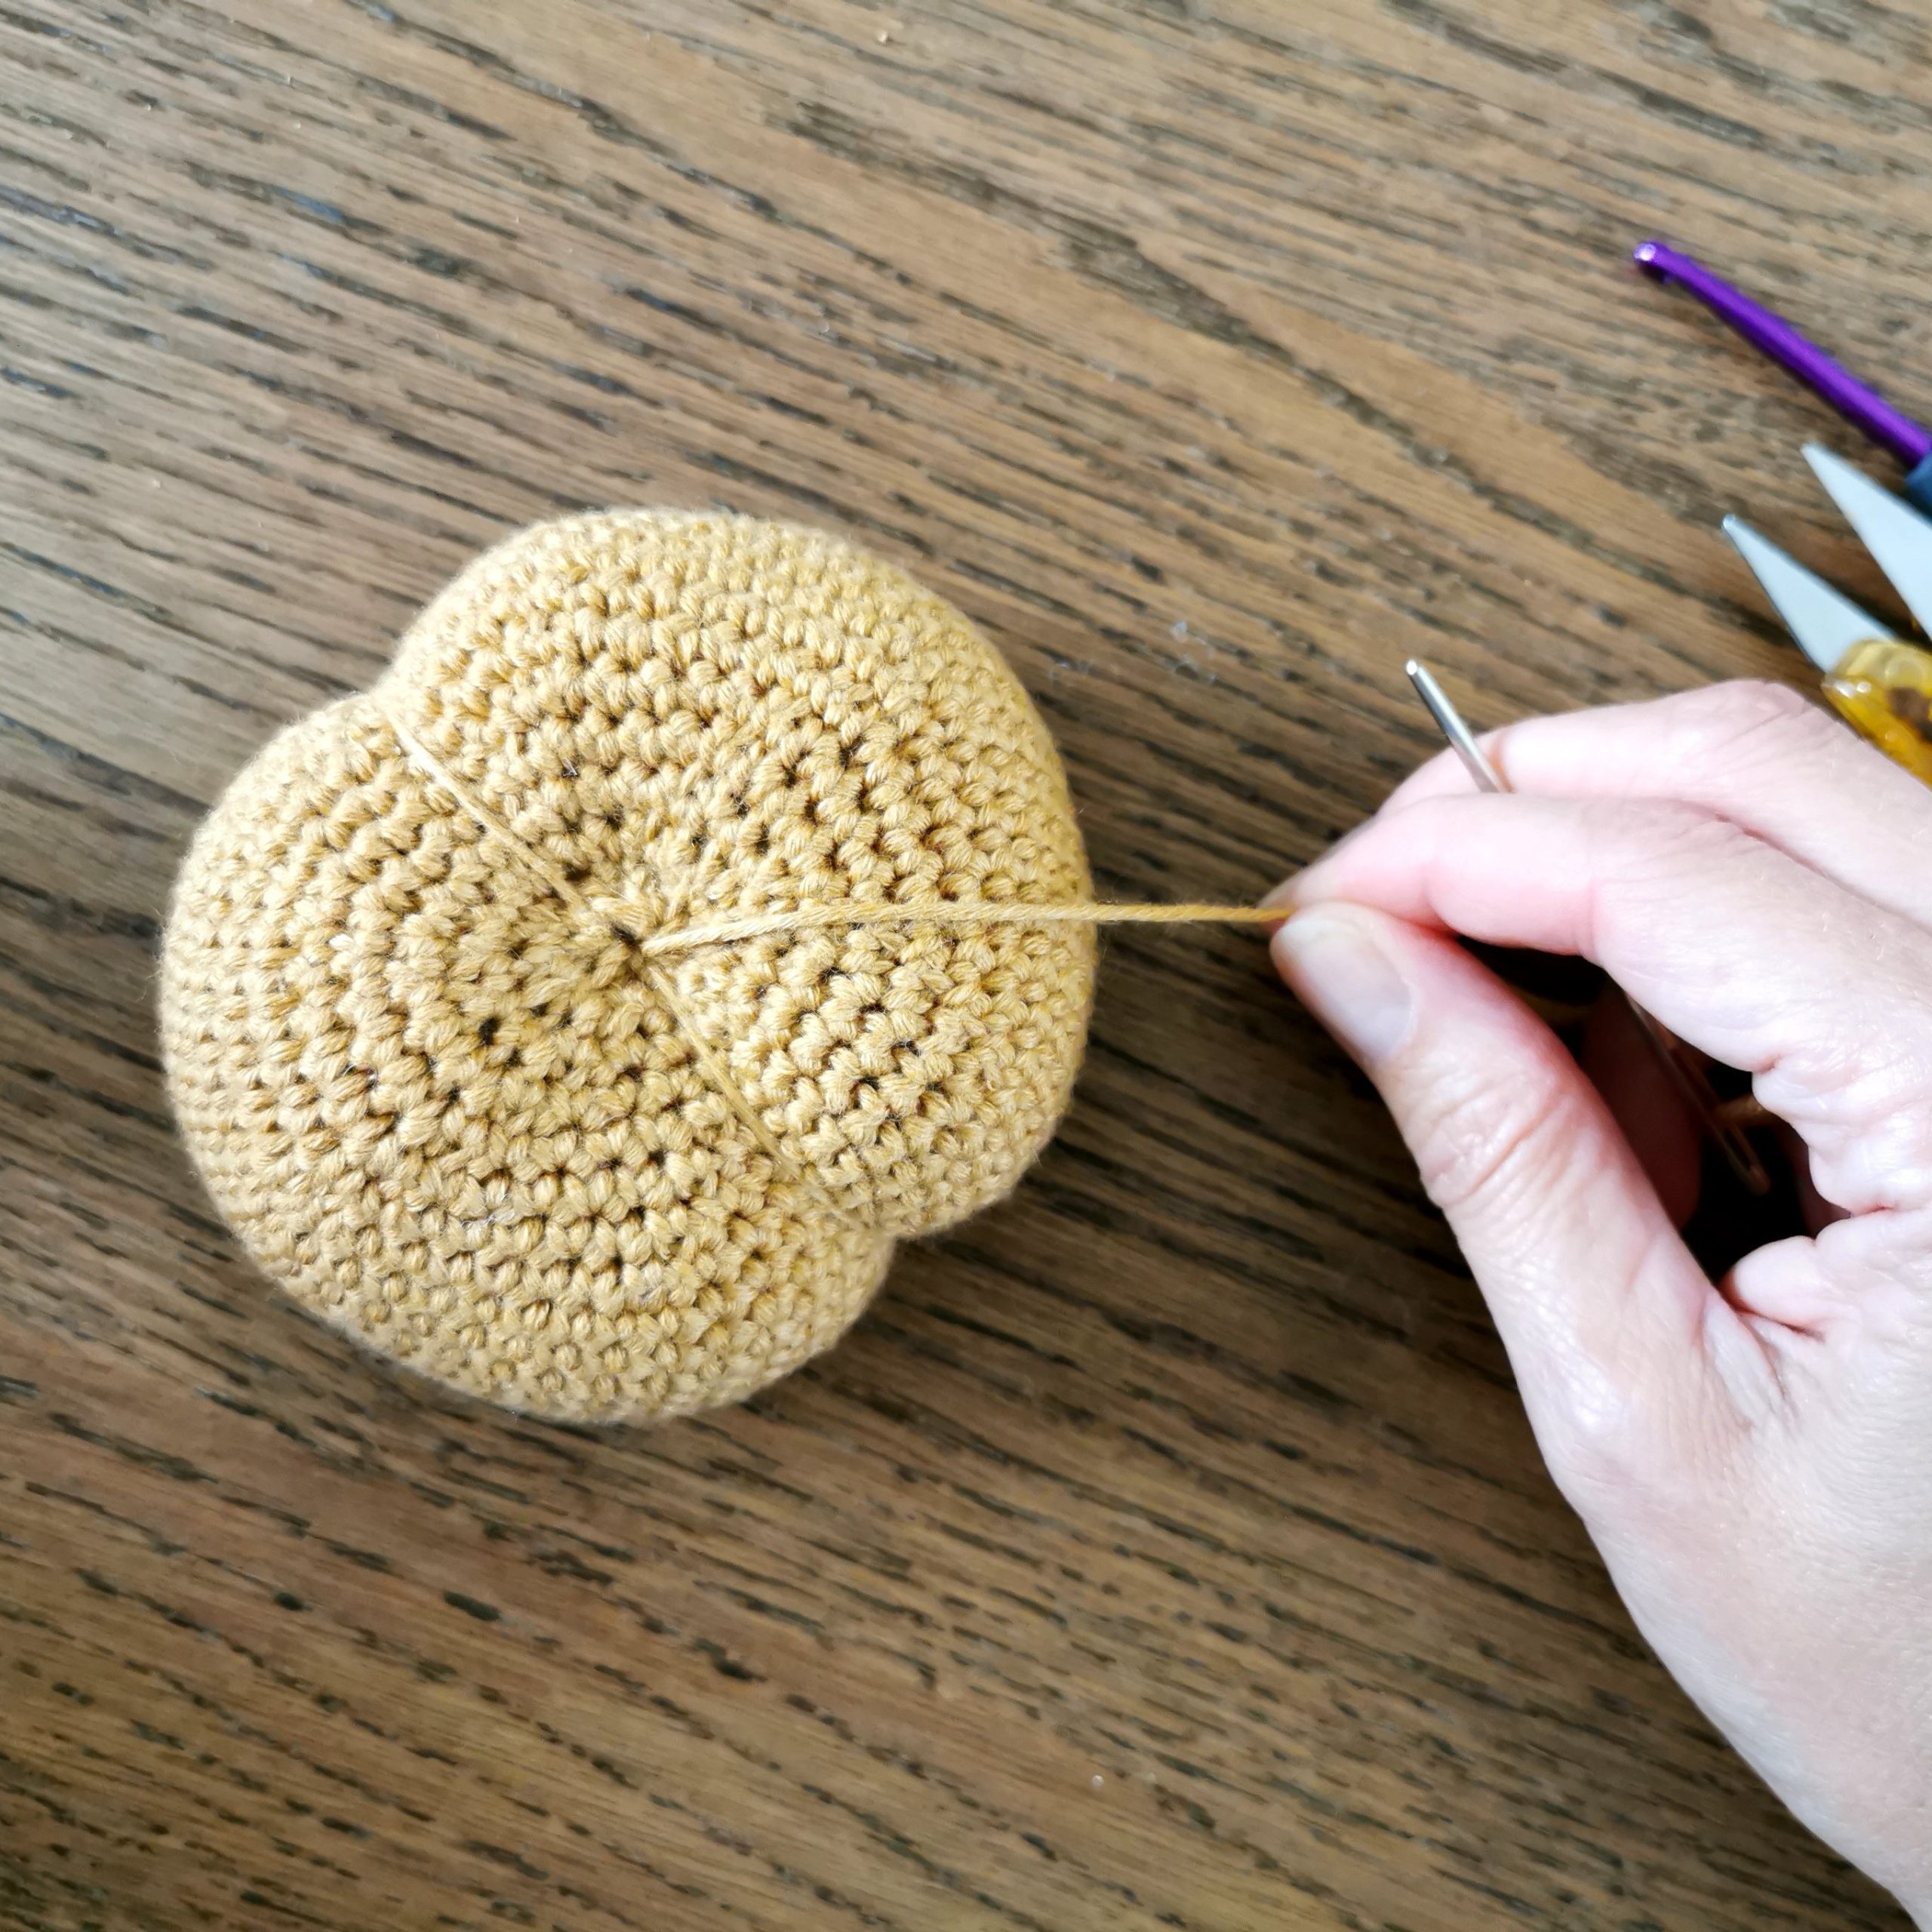
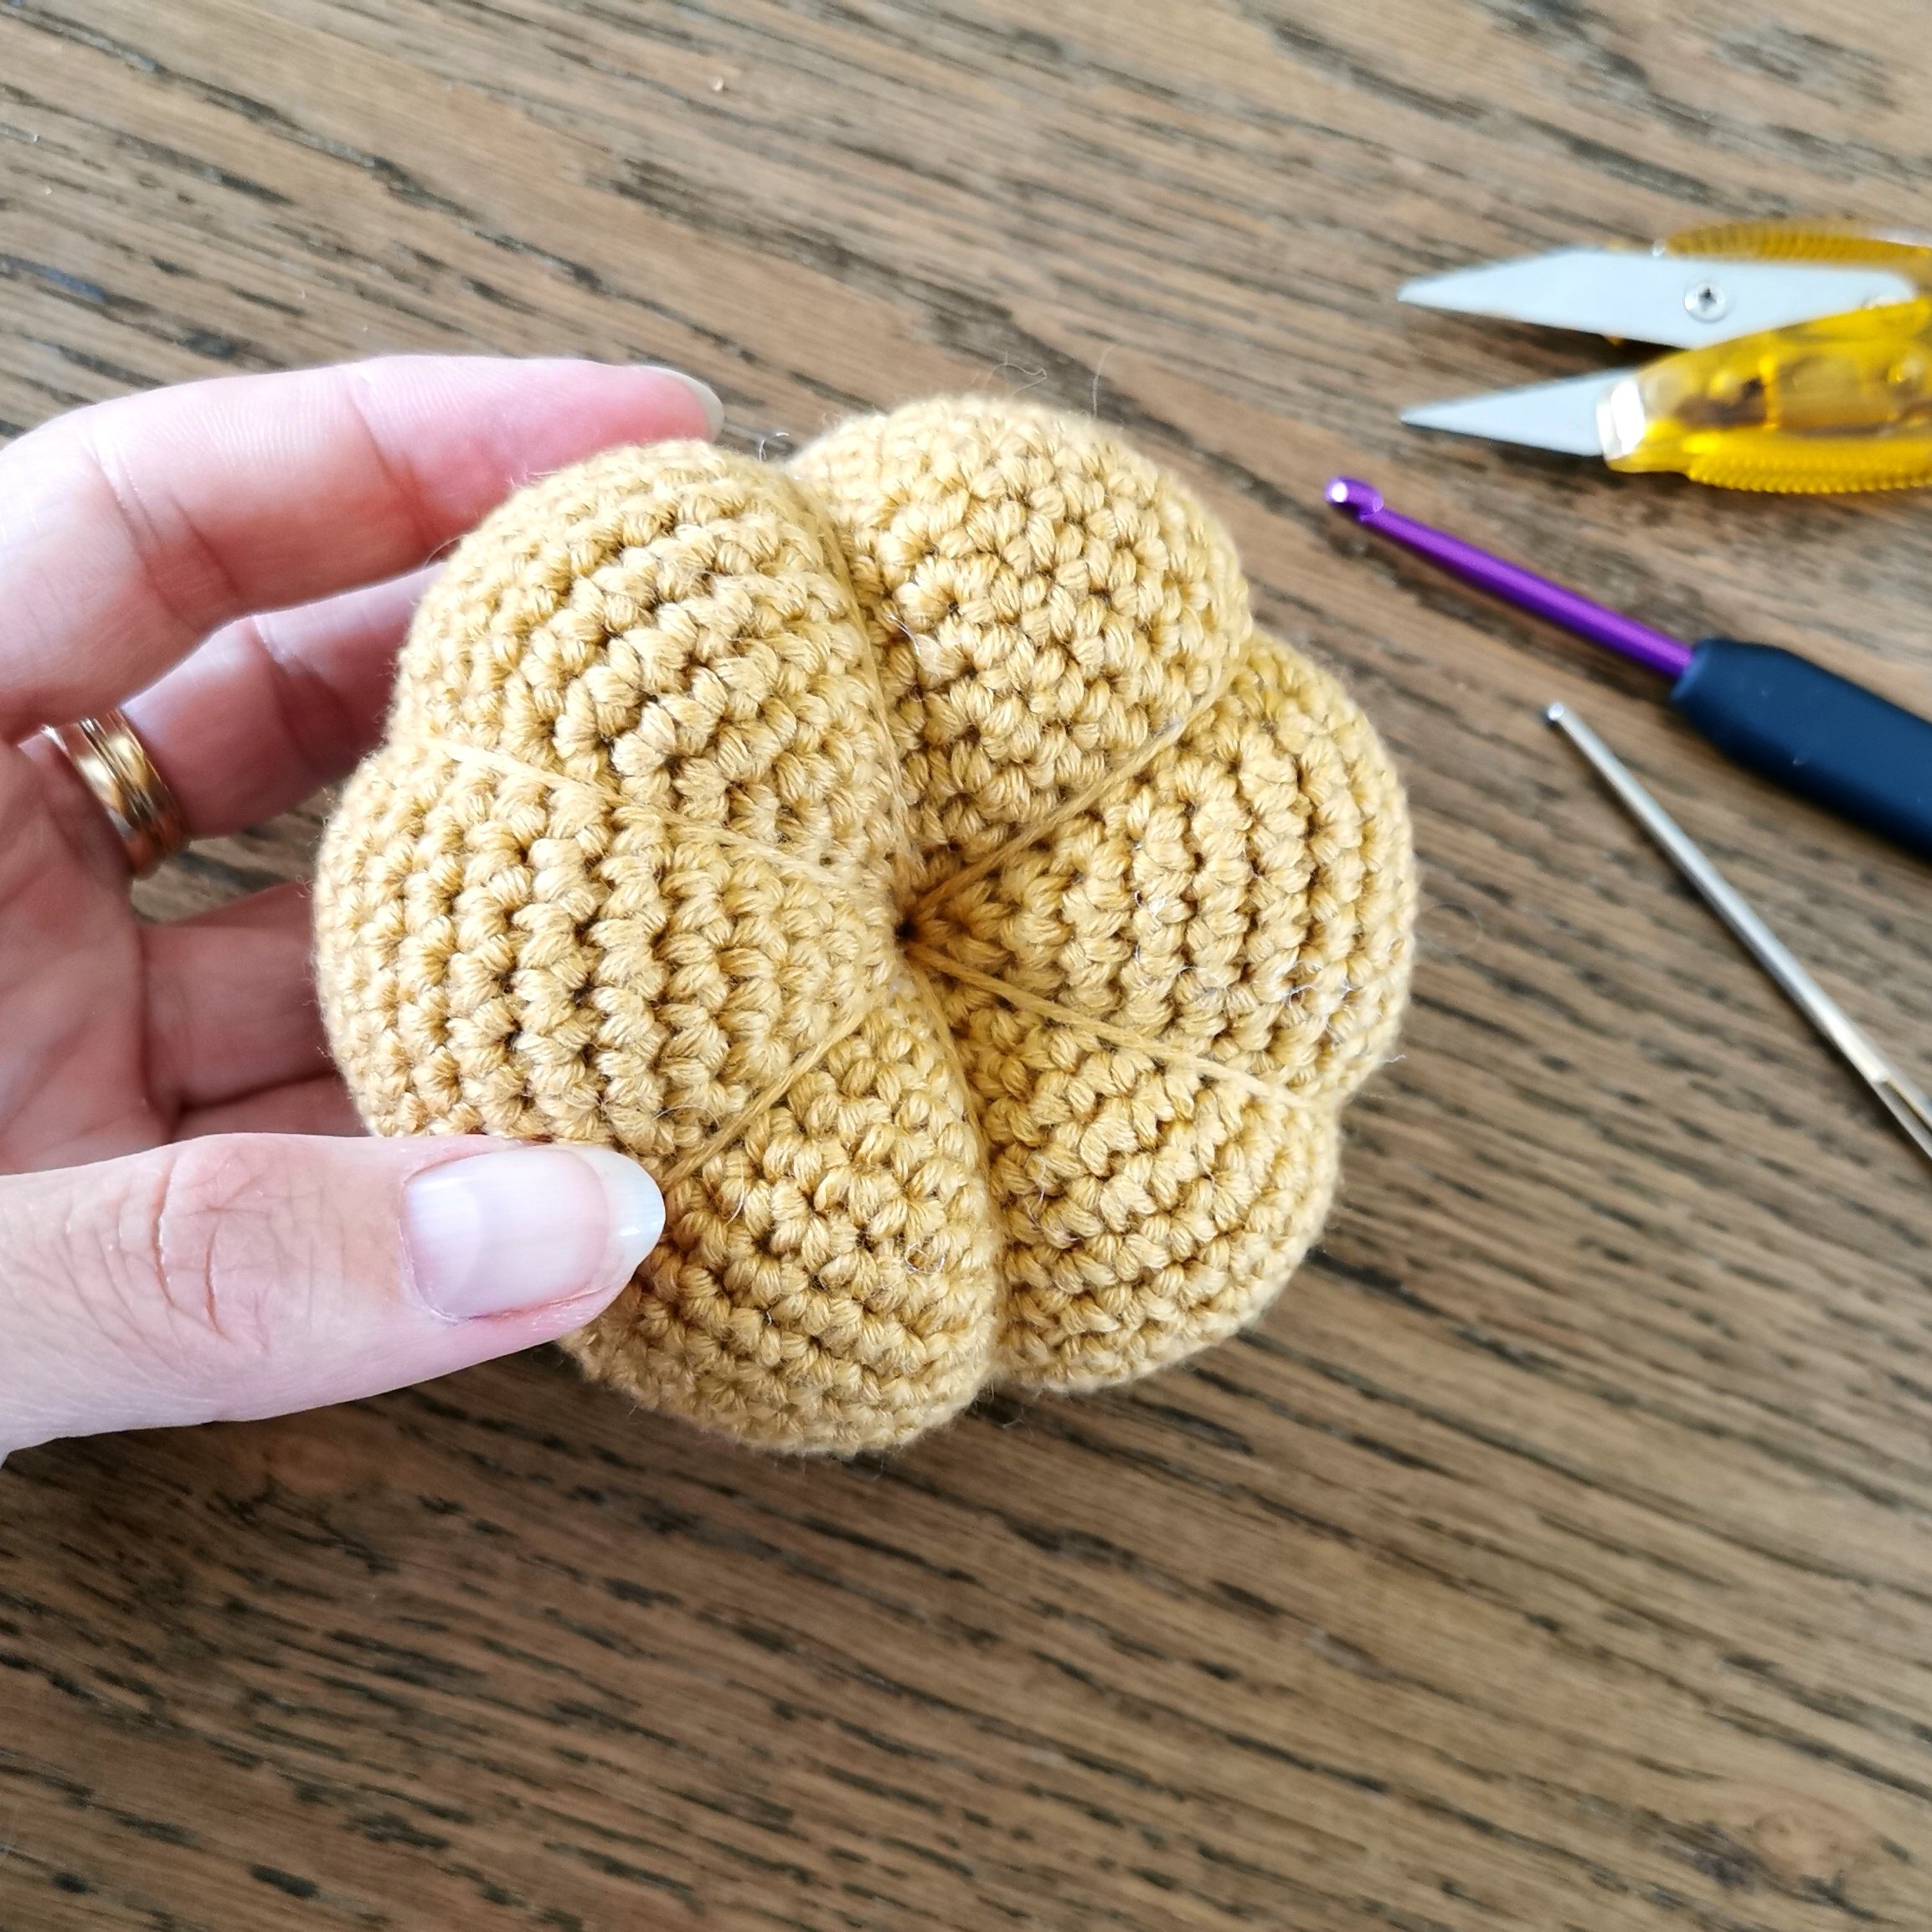
R25: *1 fm, 2 fm sm* (12 fm). La det være igjen en lang tråd til å forme gresskaret med (lang nok til å snurre rundt ballen ca. 3 ganger), klipp tråden og sy den gjennom de resterende 12 fm og snurp sammen.

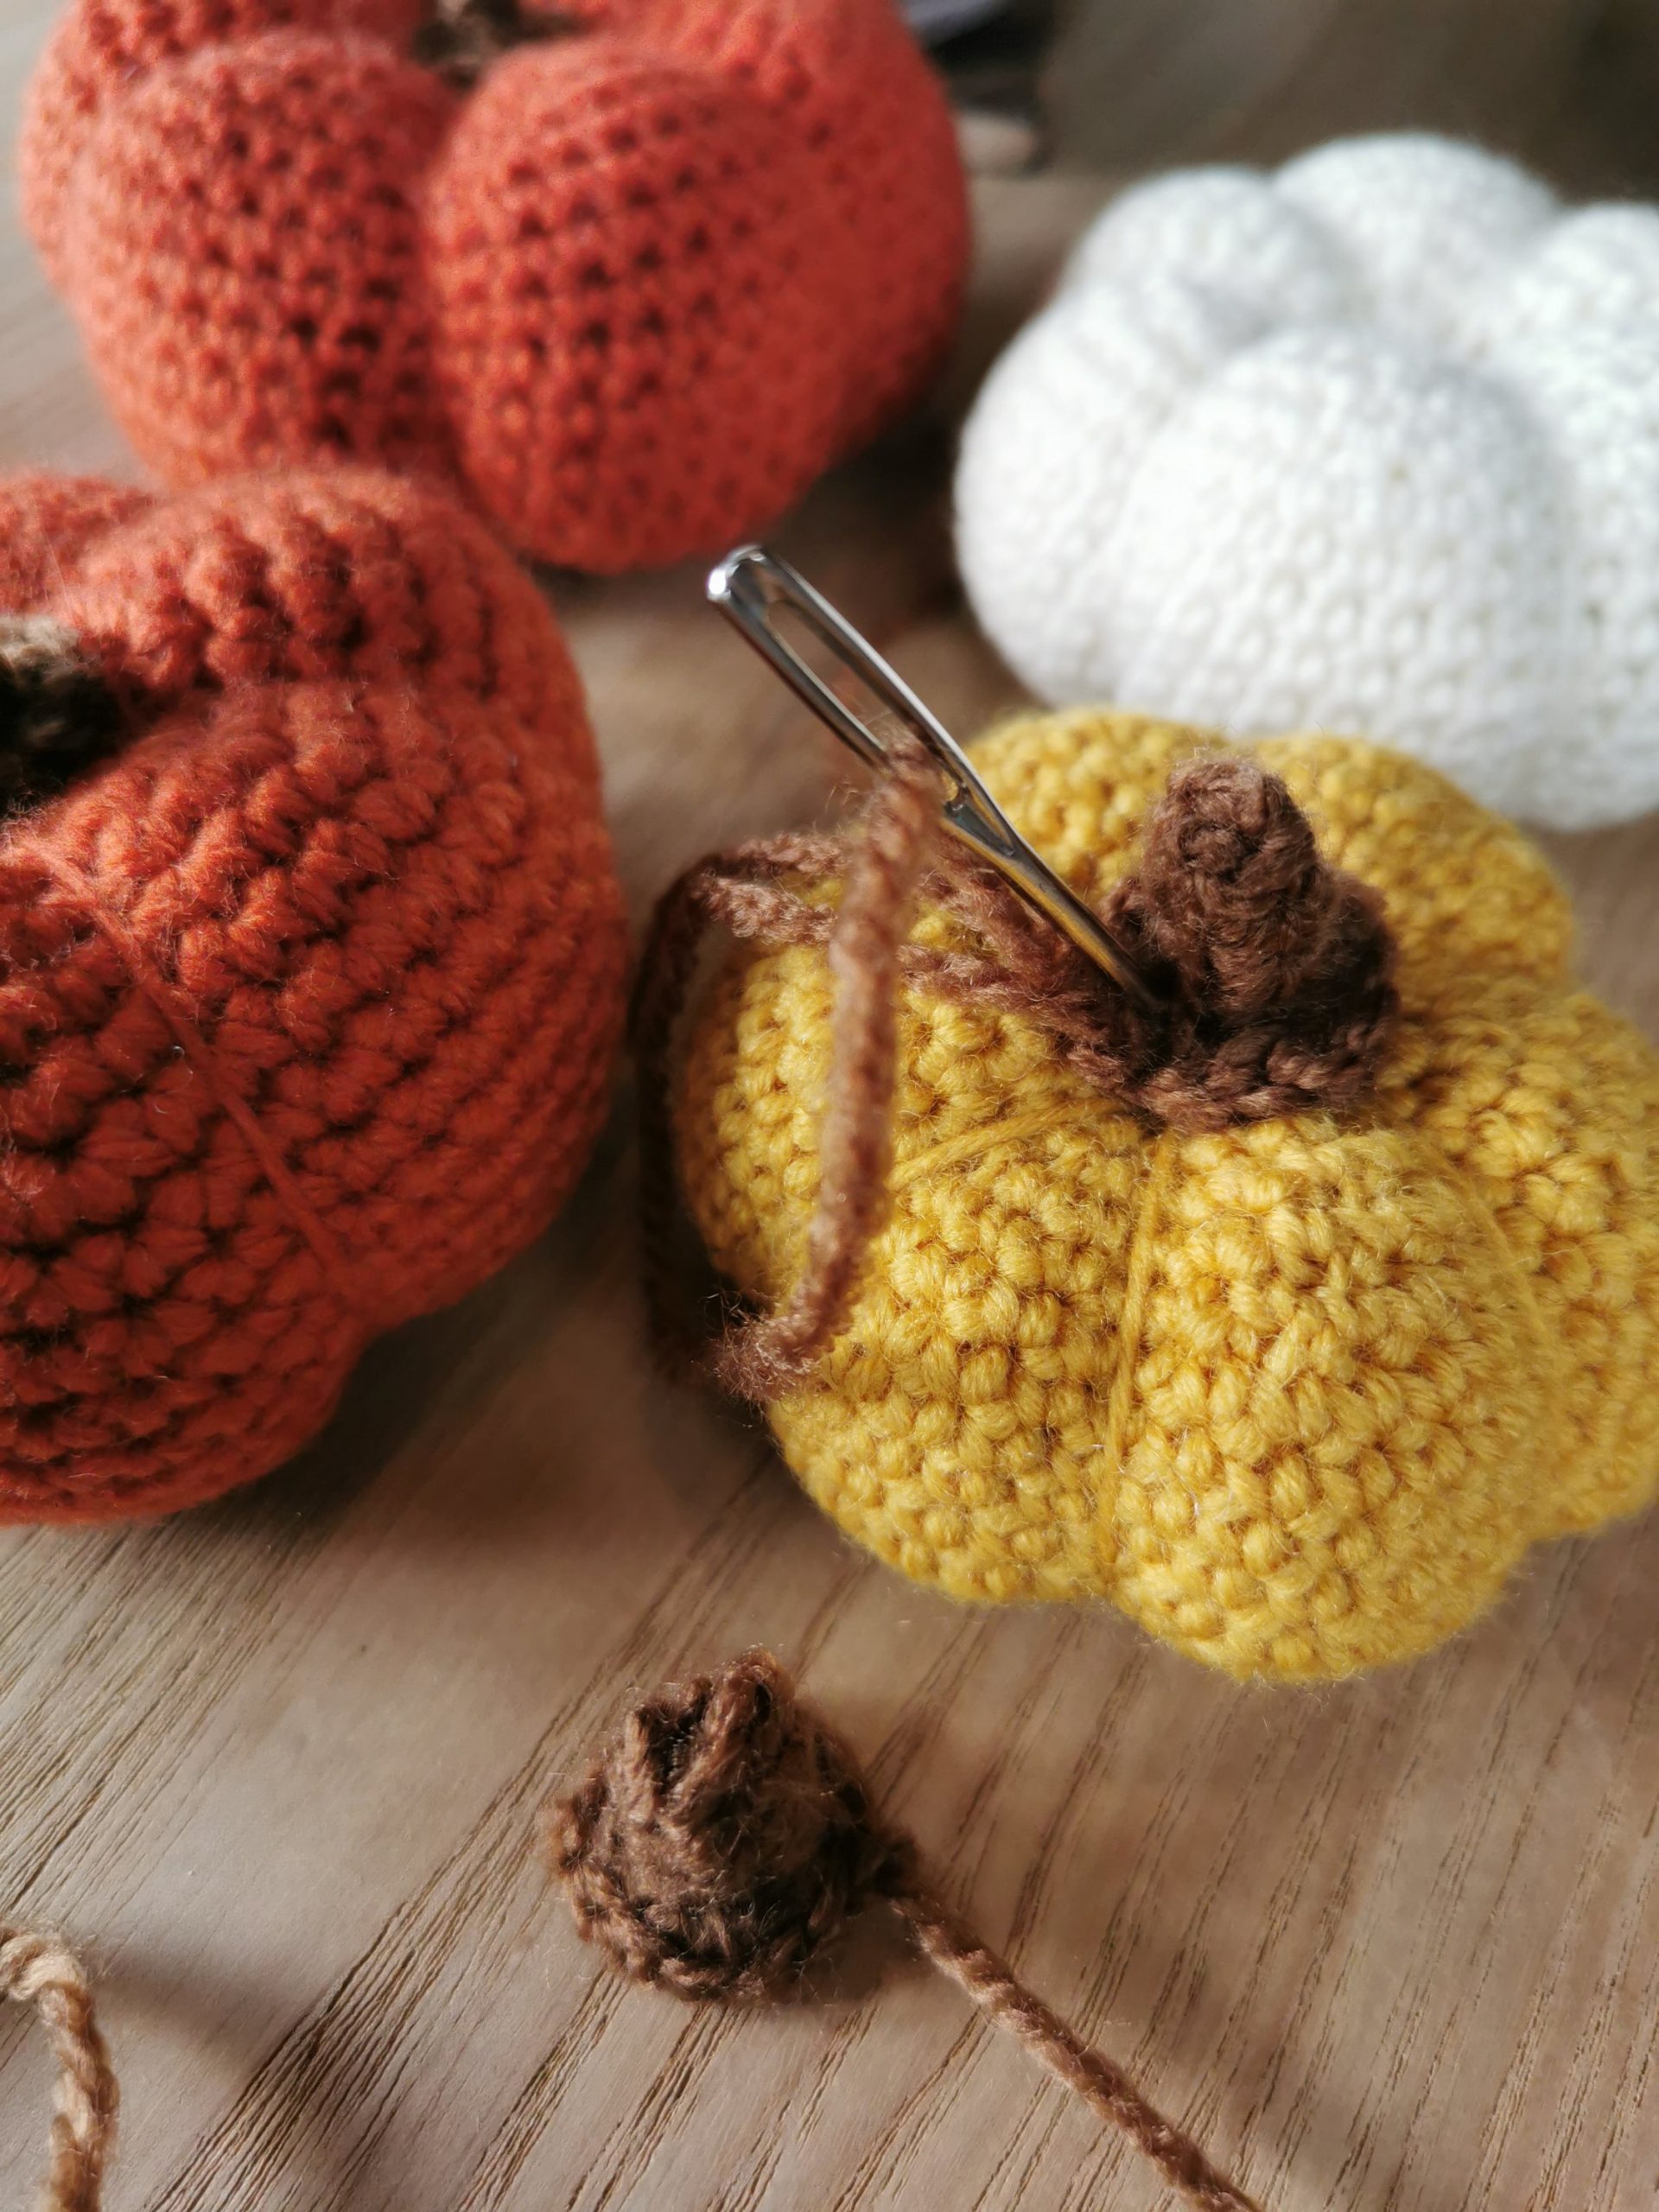
Form gresskaret som vist på bilder og video.


HEKLET GRESSKAR – medium størrelse

R1: 6 fm i MR (6 fm).
Tips: ikke stram den helt til før du er ferdig med R2.
R2: 2 fm i hver m (12 fm)
R3: *1 fm, 2 fm i neste m* Gjenta fra * til * ut omg (18 fm)
R4
: *2 fm, 2 fm i neste* (24 fm)
R5:
*3 fm, 2 fm i neste* (30 fm)
R6:
*4 fm, 2 fm i neste* (36 fm)
R7: *5 fm, 2 fm i neste* (42 fm)
R8: *6 fm, 2 fm i neste* (48 fm)
R9-R16: 1 fm i hver m (48) 
R17: *6 fm, 2 fm sm* (42 fm)
R18: *5 fm, 2 fm sm* (36 fm)
R19: *4 fm, 2 fm sm* (30 fm)
R20: *3 fm, 2 fm sm* (24 fm)
R21: *2 fm, 2 fm sm* (18 fm). Fyll med vatt.
R22: *1 fm, 2 fm sm* (12 fm). La det være igjen en lang tråd til å forme gresskaret med (lang nok til å snurre rundt ballen ca. 3 ganger), klipp tråden og sy den gjennom de resterende 12 fm og snurp sammen.

Form gresskaret som vist under stor størrelse.


HEKLET GRESSKAR – liten størrelse

R1: 6 fm i MR (6 fm).
Tips: ikke stram den helt til før du er ferdig med R2.
R2: 2 fm i hver m (12 fm)
R3: *1 fm, 2 fm i neste m* Gjenta fra * til * ut omg (18 fm)
R4
: *2 fm, 2 fm i neste* (24 fm)
R5:
*3 fm, 2 fm i neste* (30 fm)
R6:
*4 fm, 2 fm i neste* (36 fm)
R7: *5 fm, 2 fm i neste* (42 fm)
R8-R14: 1 fm i hver m (42) 
R15: *5 fm, 2 fm sm* (36 fm)
R16: *4 fm, 2 fm sm* (30 fm)
R17: *3 fm, 2 fm sm* (24 fm)
R18: *2 fm, 2 fm sm* (18 fm). Fyll med vatt.
R19: *1 fm, 2 fm sm* (12 fm). La det være igjen en lang tråd til å forme gresskaret med (lang nok til å snurre rundt ballen ca. 3 ganger), klipp tråden og sy den gjennom de resterende 12 fm og snurp sammen.

Form gresskaret som vist under stor størrelse.


STILK – hekle en til hver størrelse

Heklenål: Bruk en størrelse mindre enn den du brukte til gresskarene.
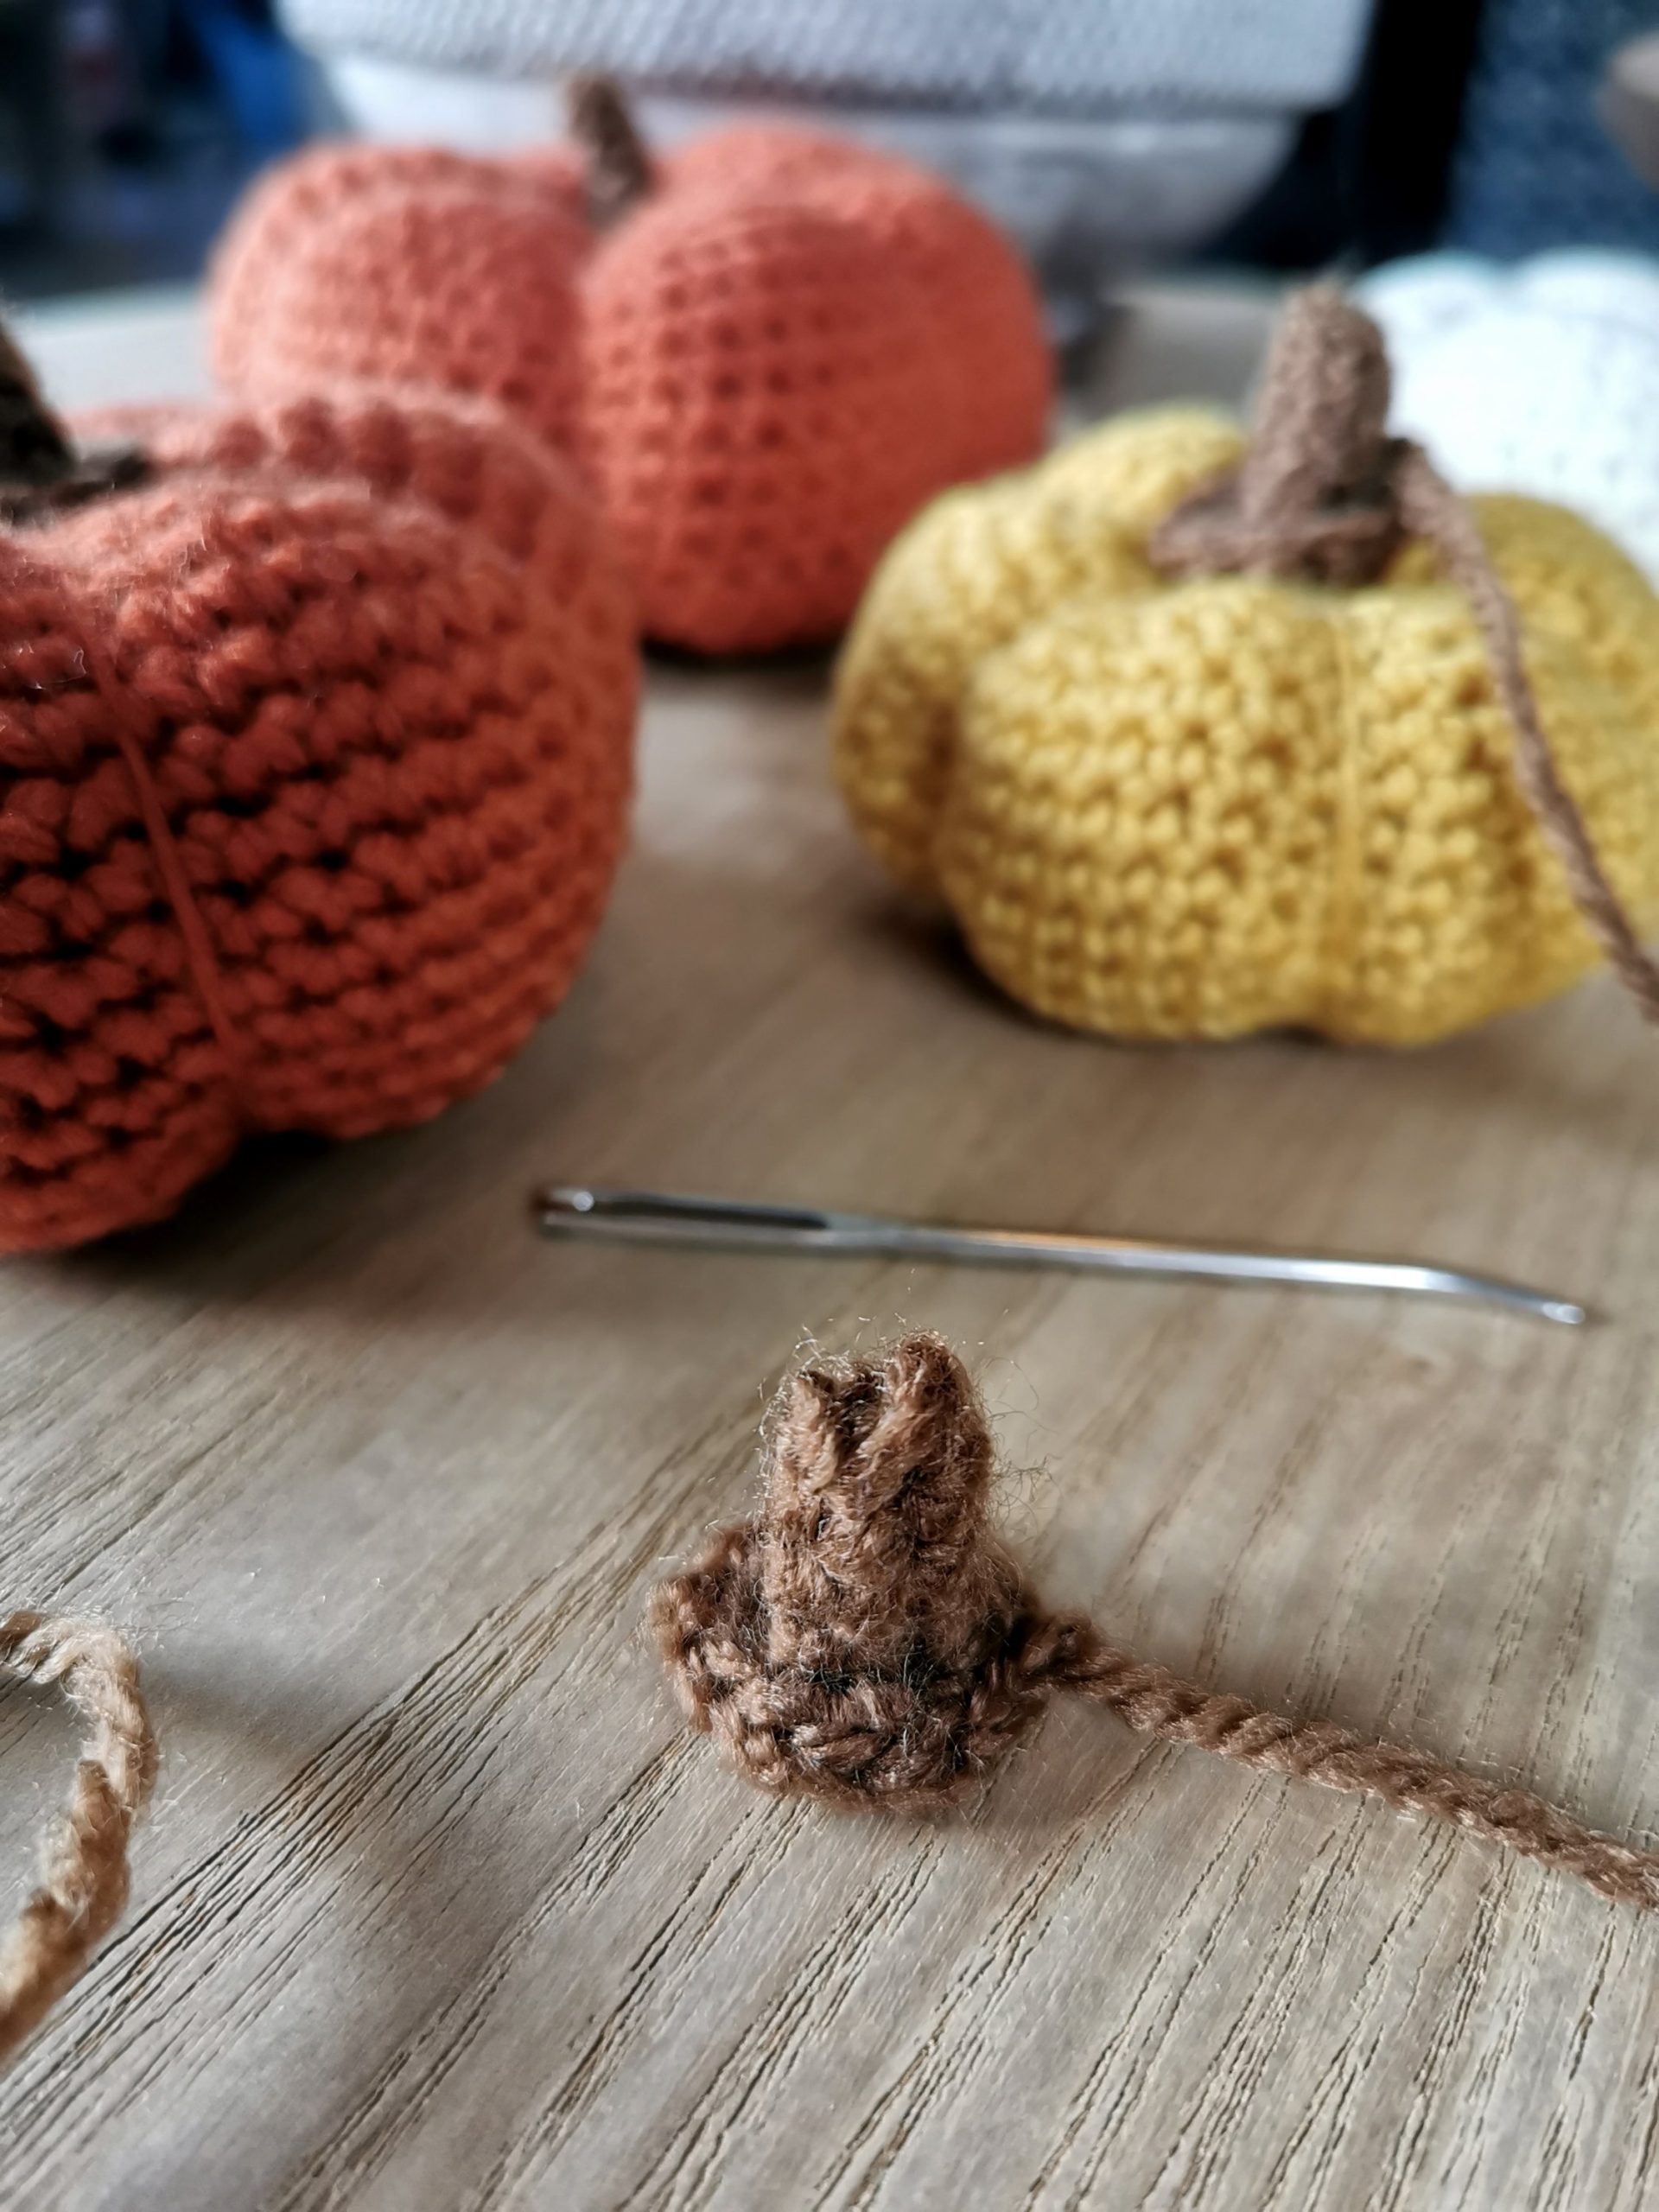
Legg opp 5 lm
R1: 1 fm i andre m fra nålen, 3 fm, snu (4 fm) 
R2-R4: 1 lm, 4 fm, snu (4 fm)

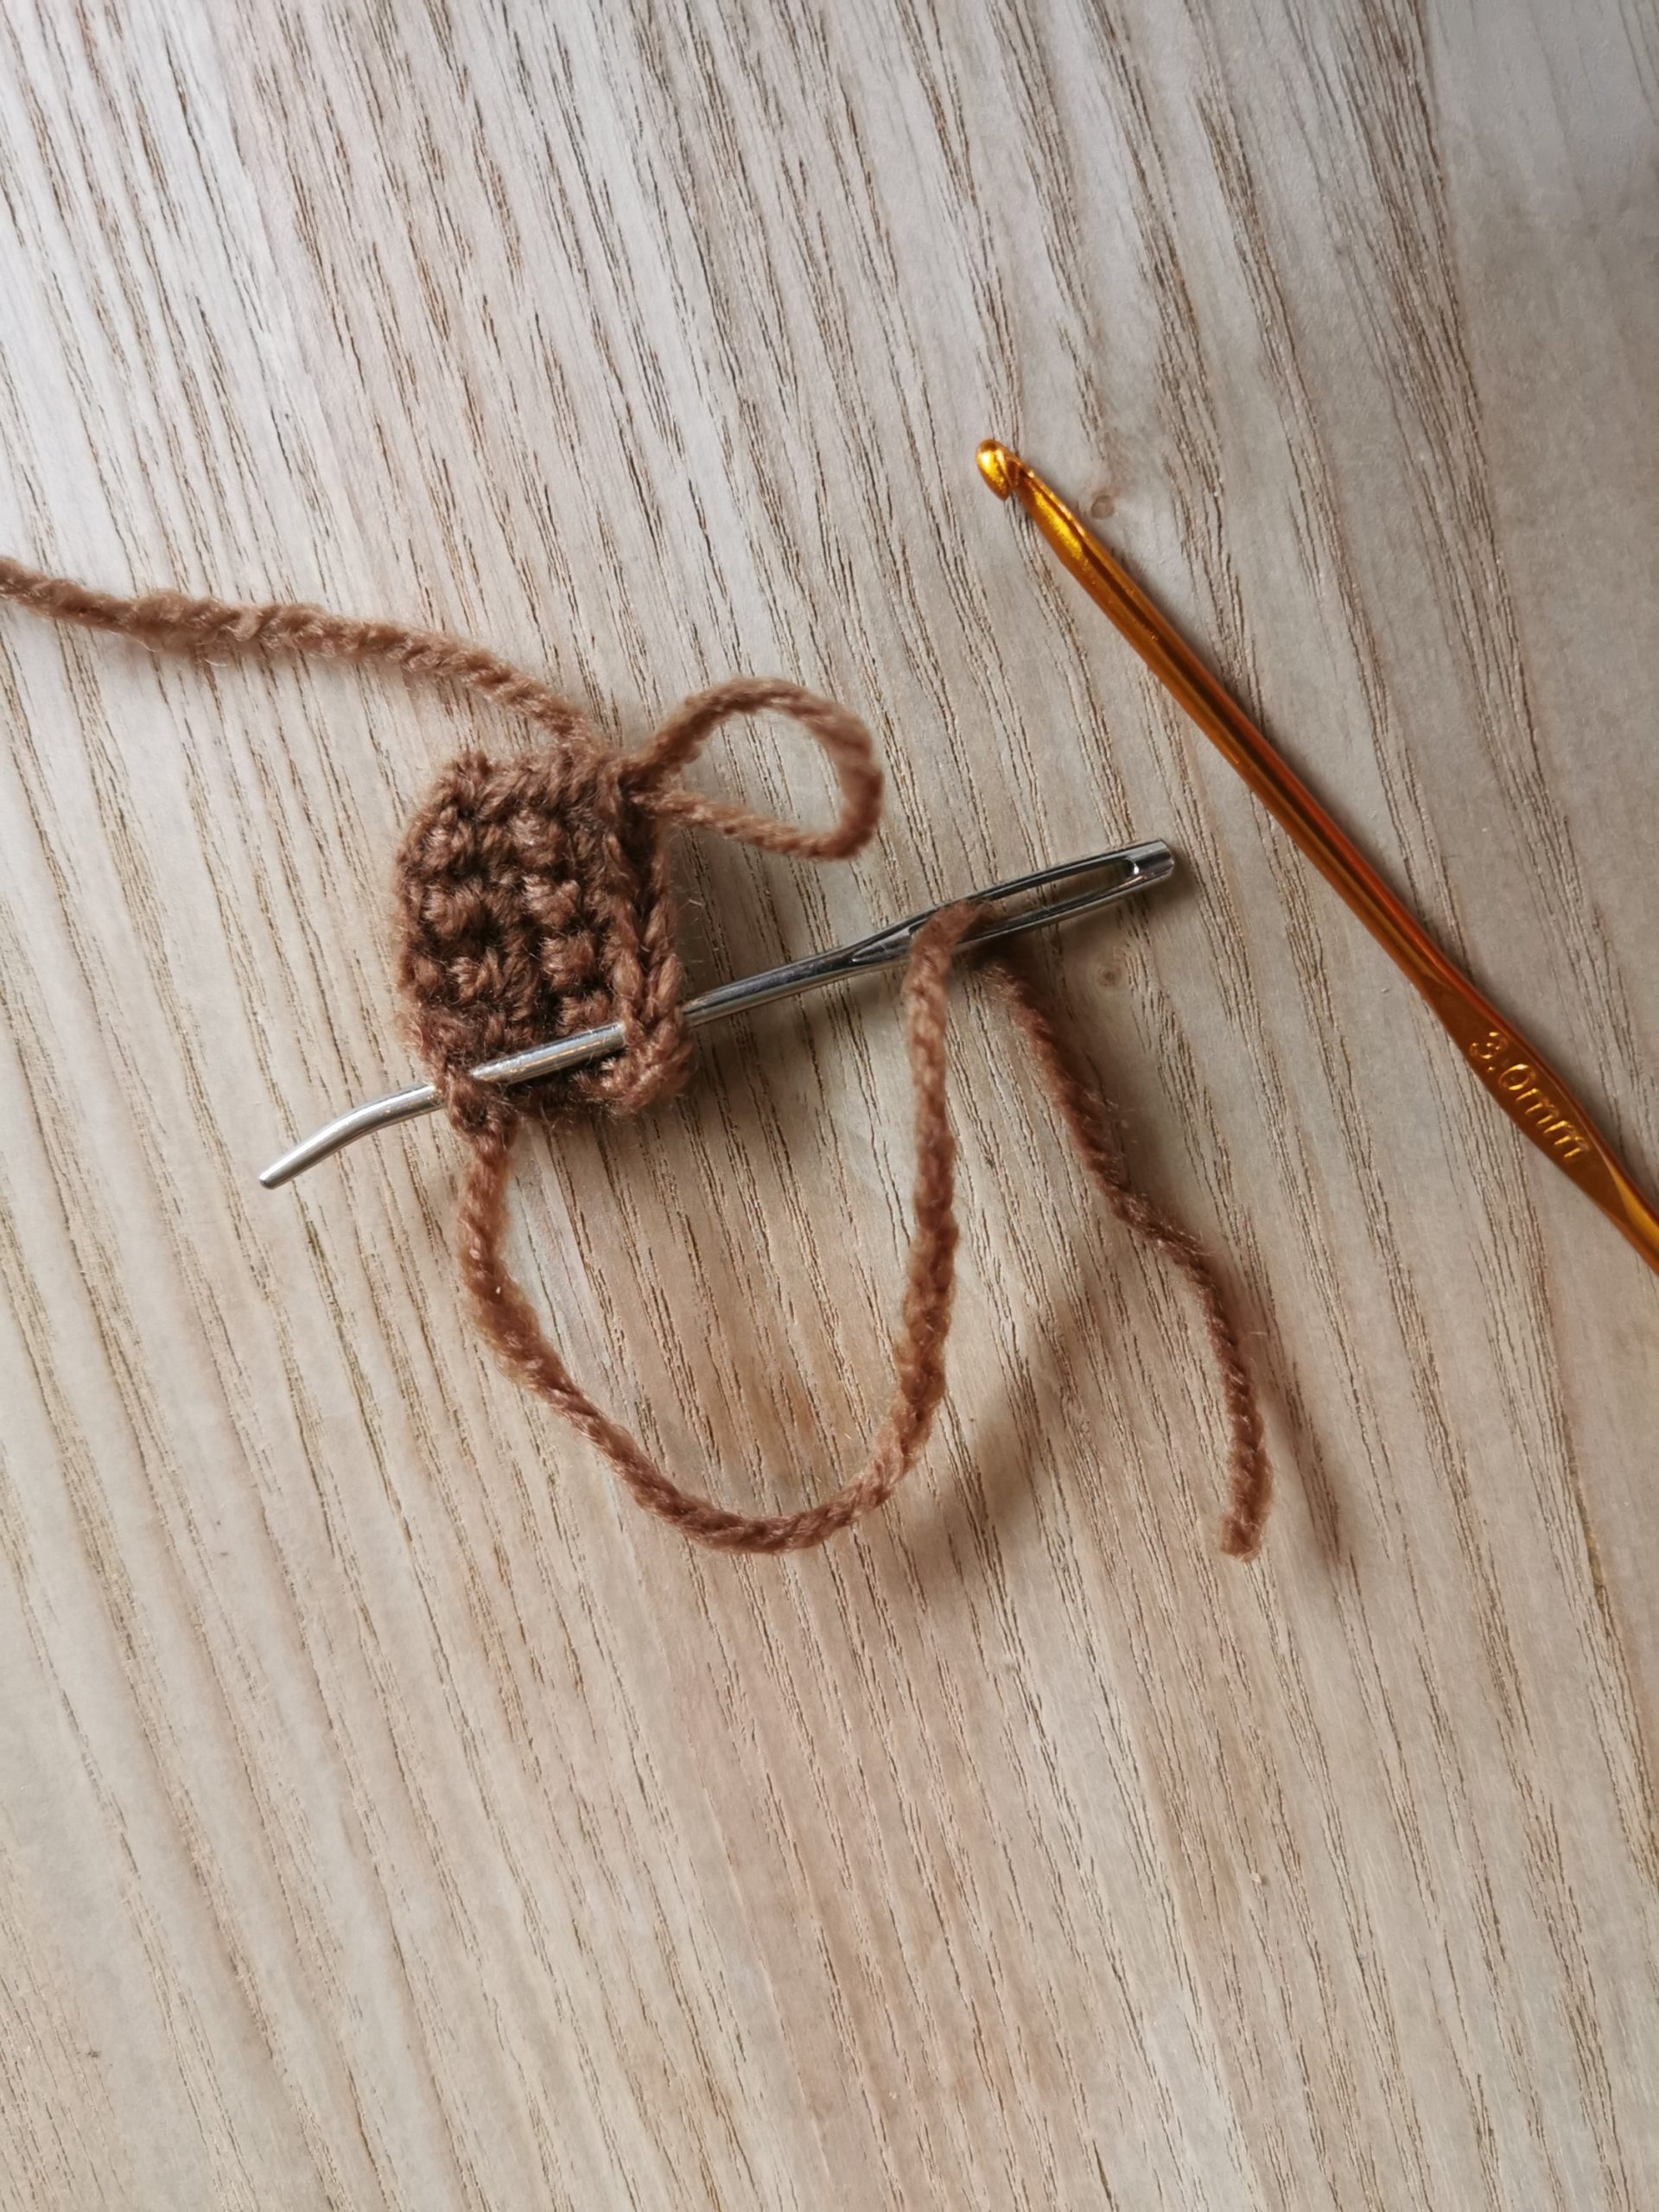
Ikke fest tråden, du skal hekle videre med denne etter at du har sydd sammen stilken (bilde 1). Med oppleggstråden, sy 4 sting ned langs siden gjennom første og siste rad samtidig (bilde 2). Fest tråden. 

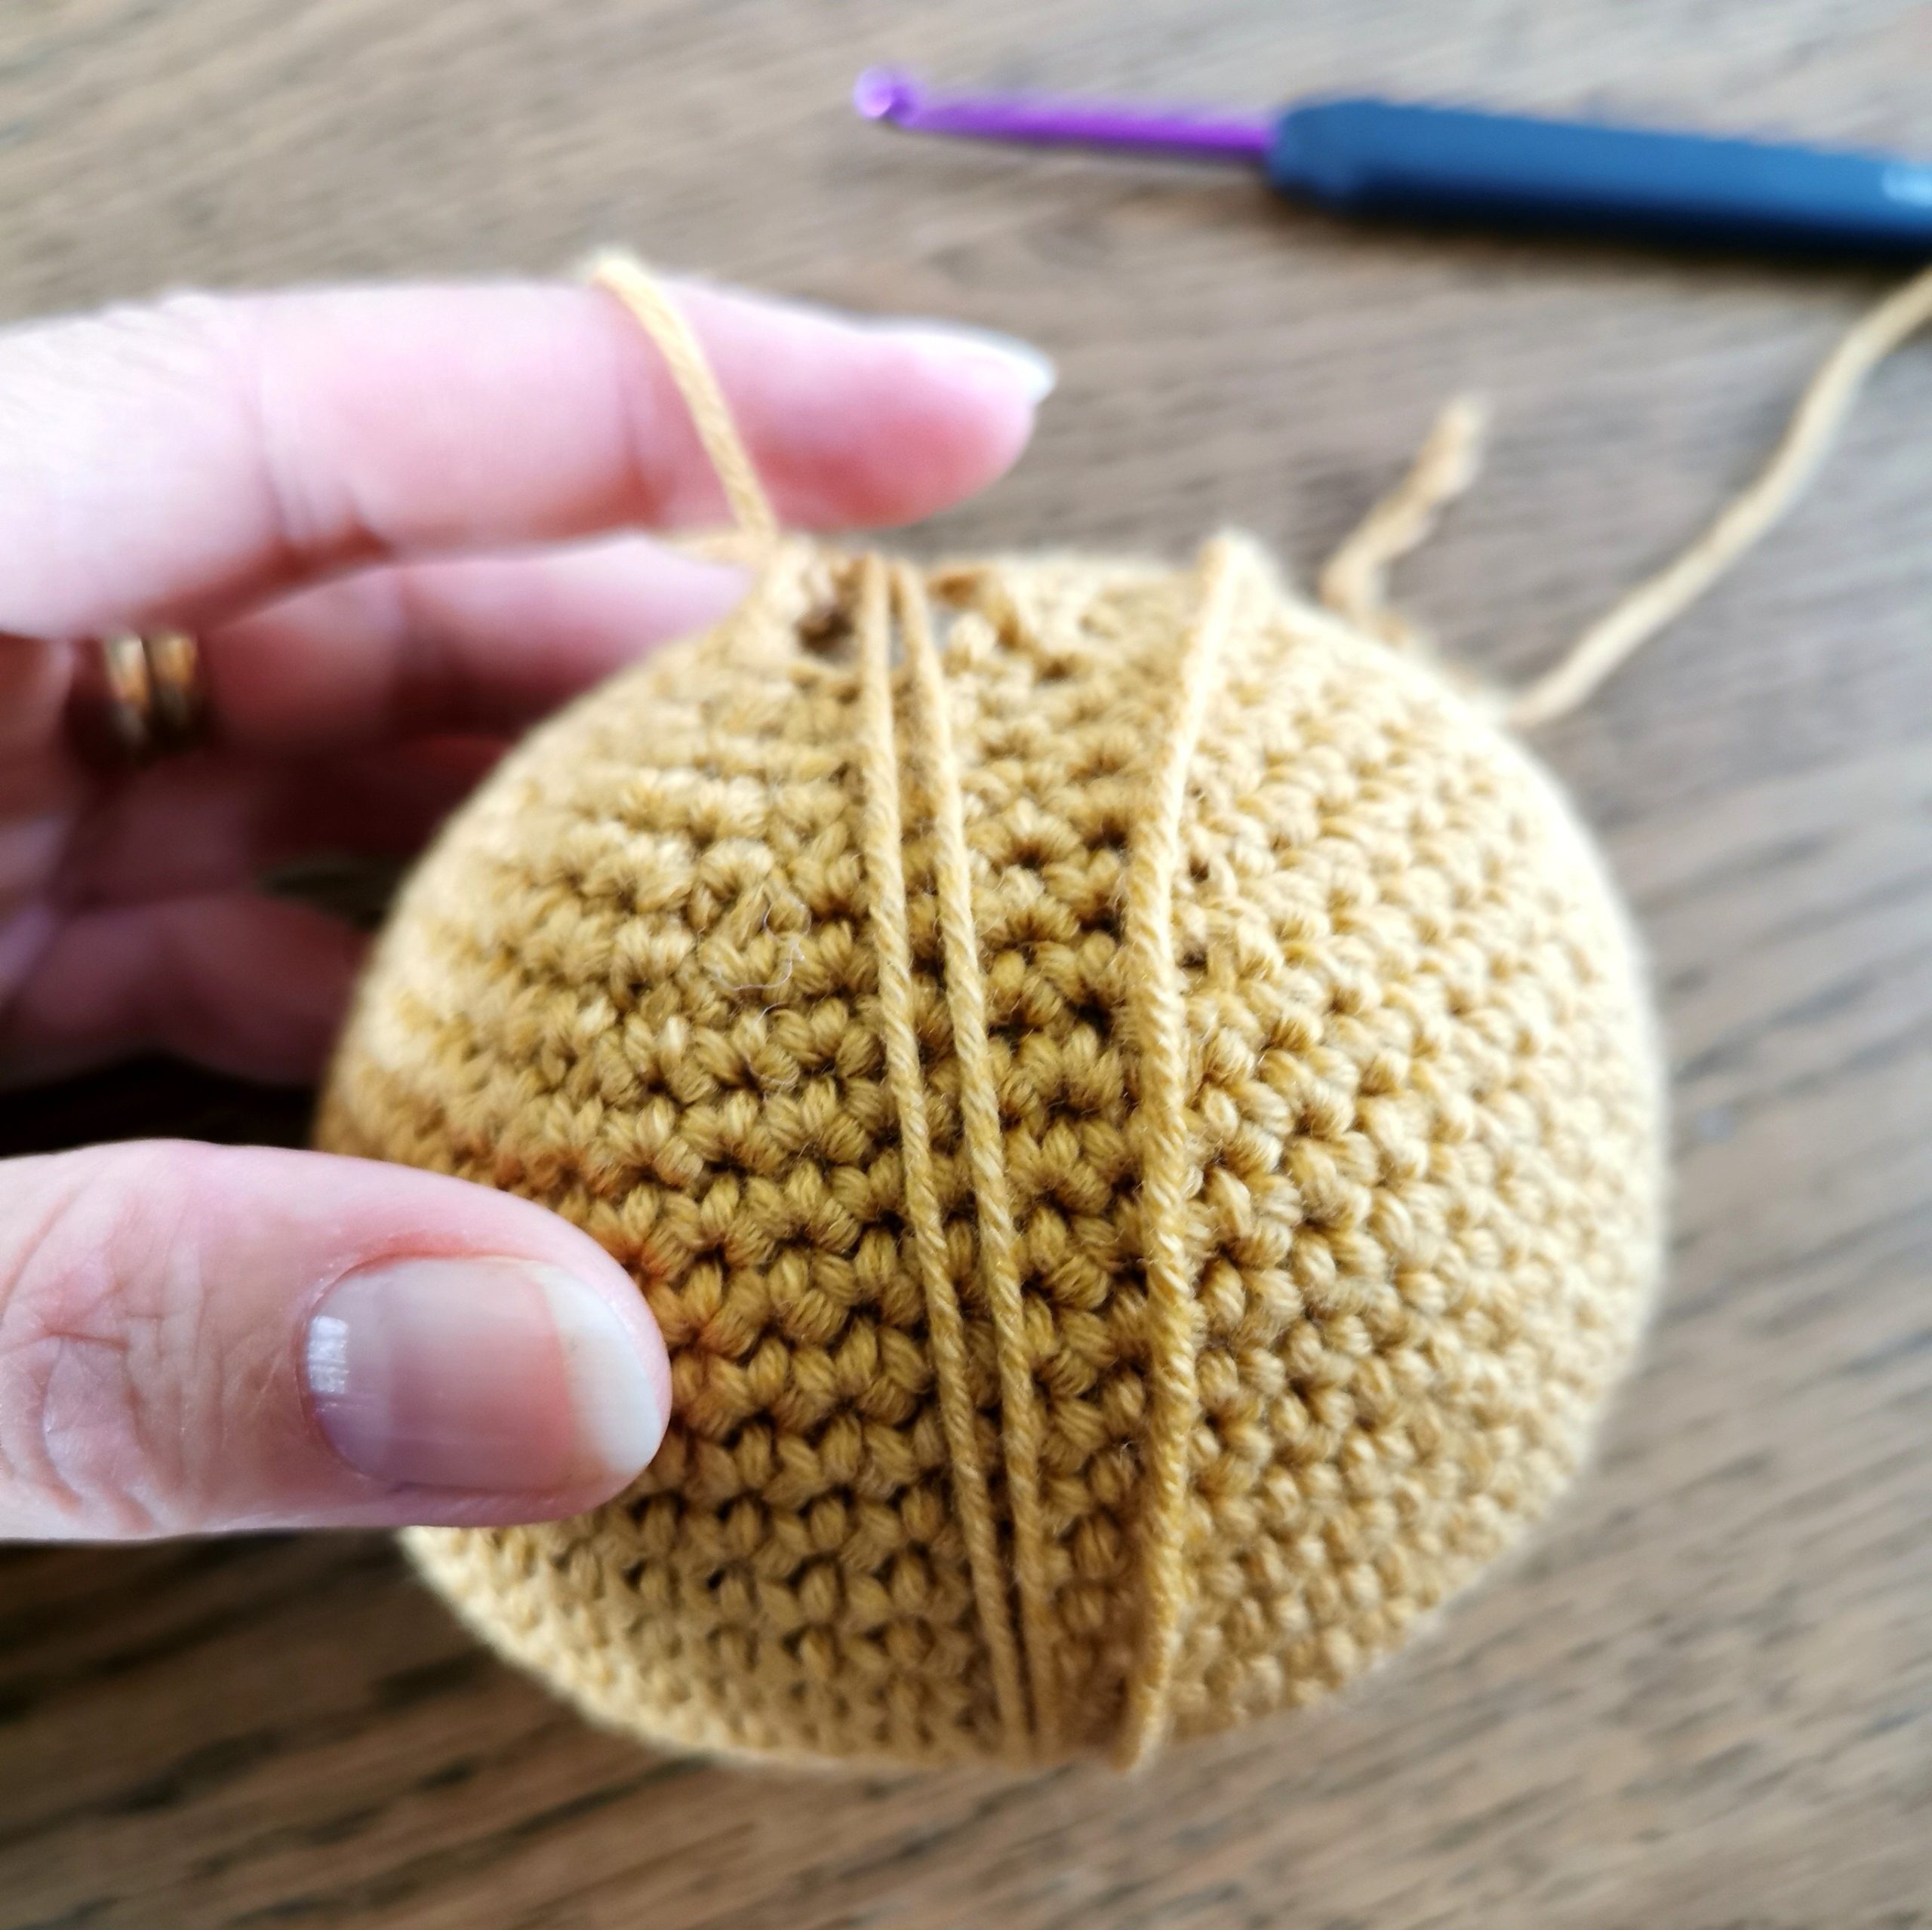
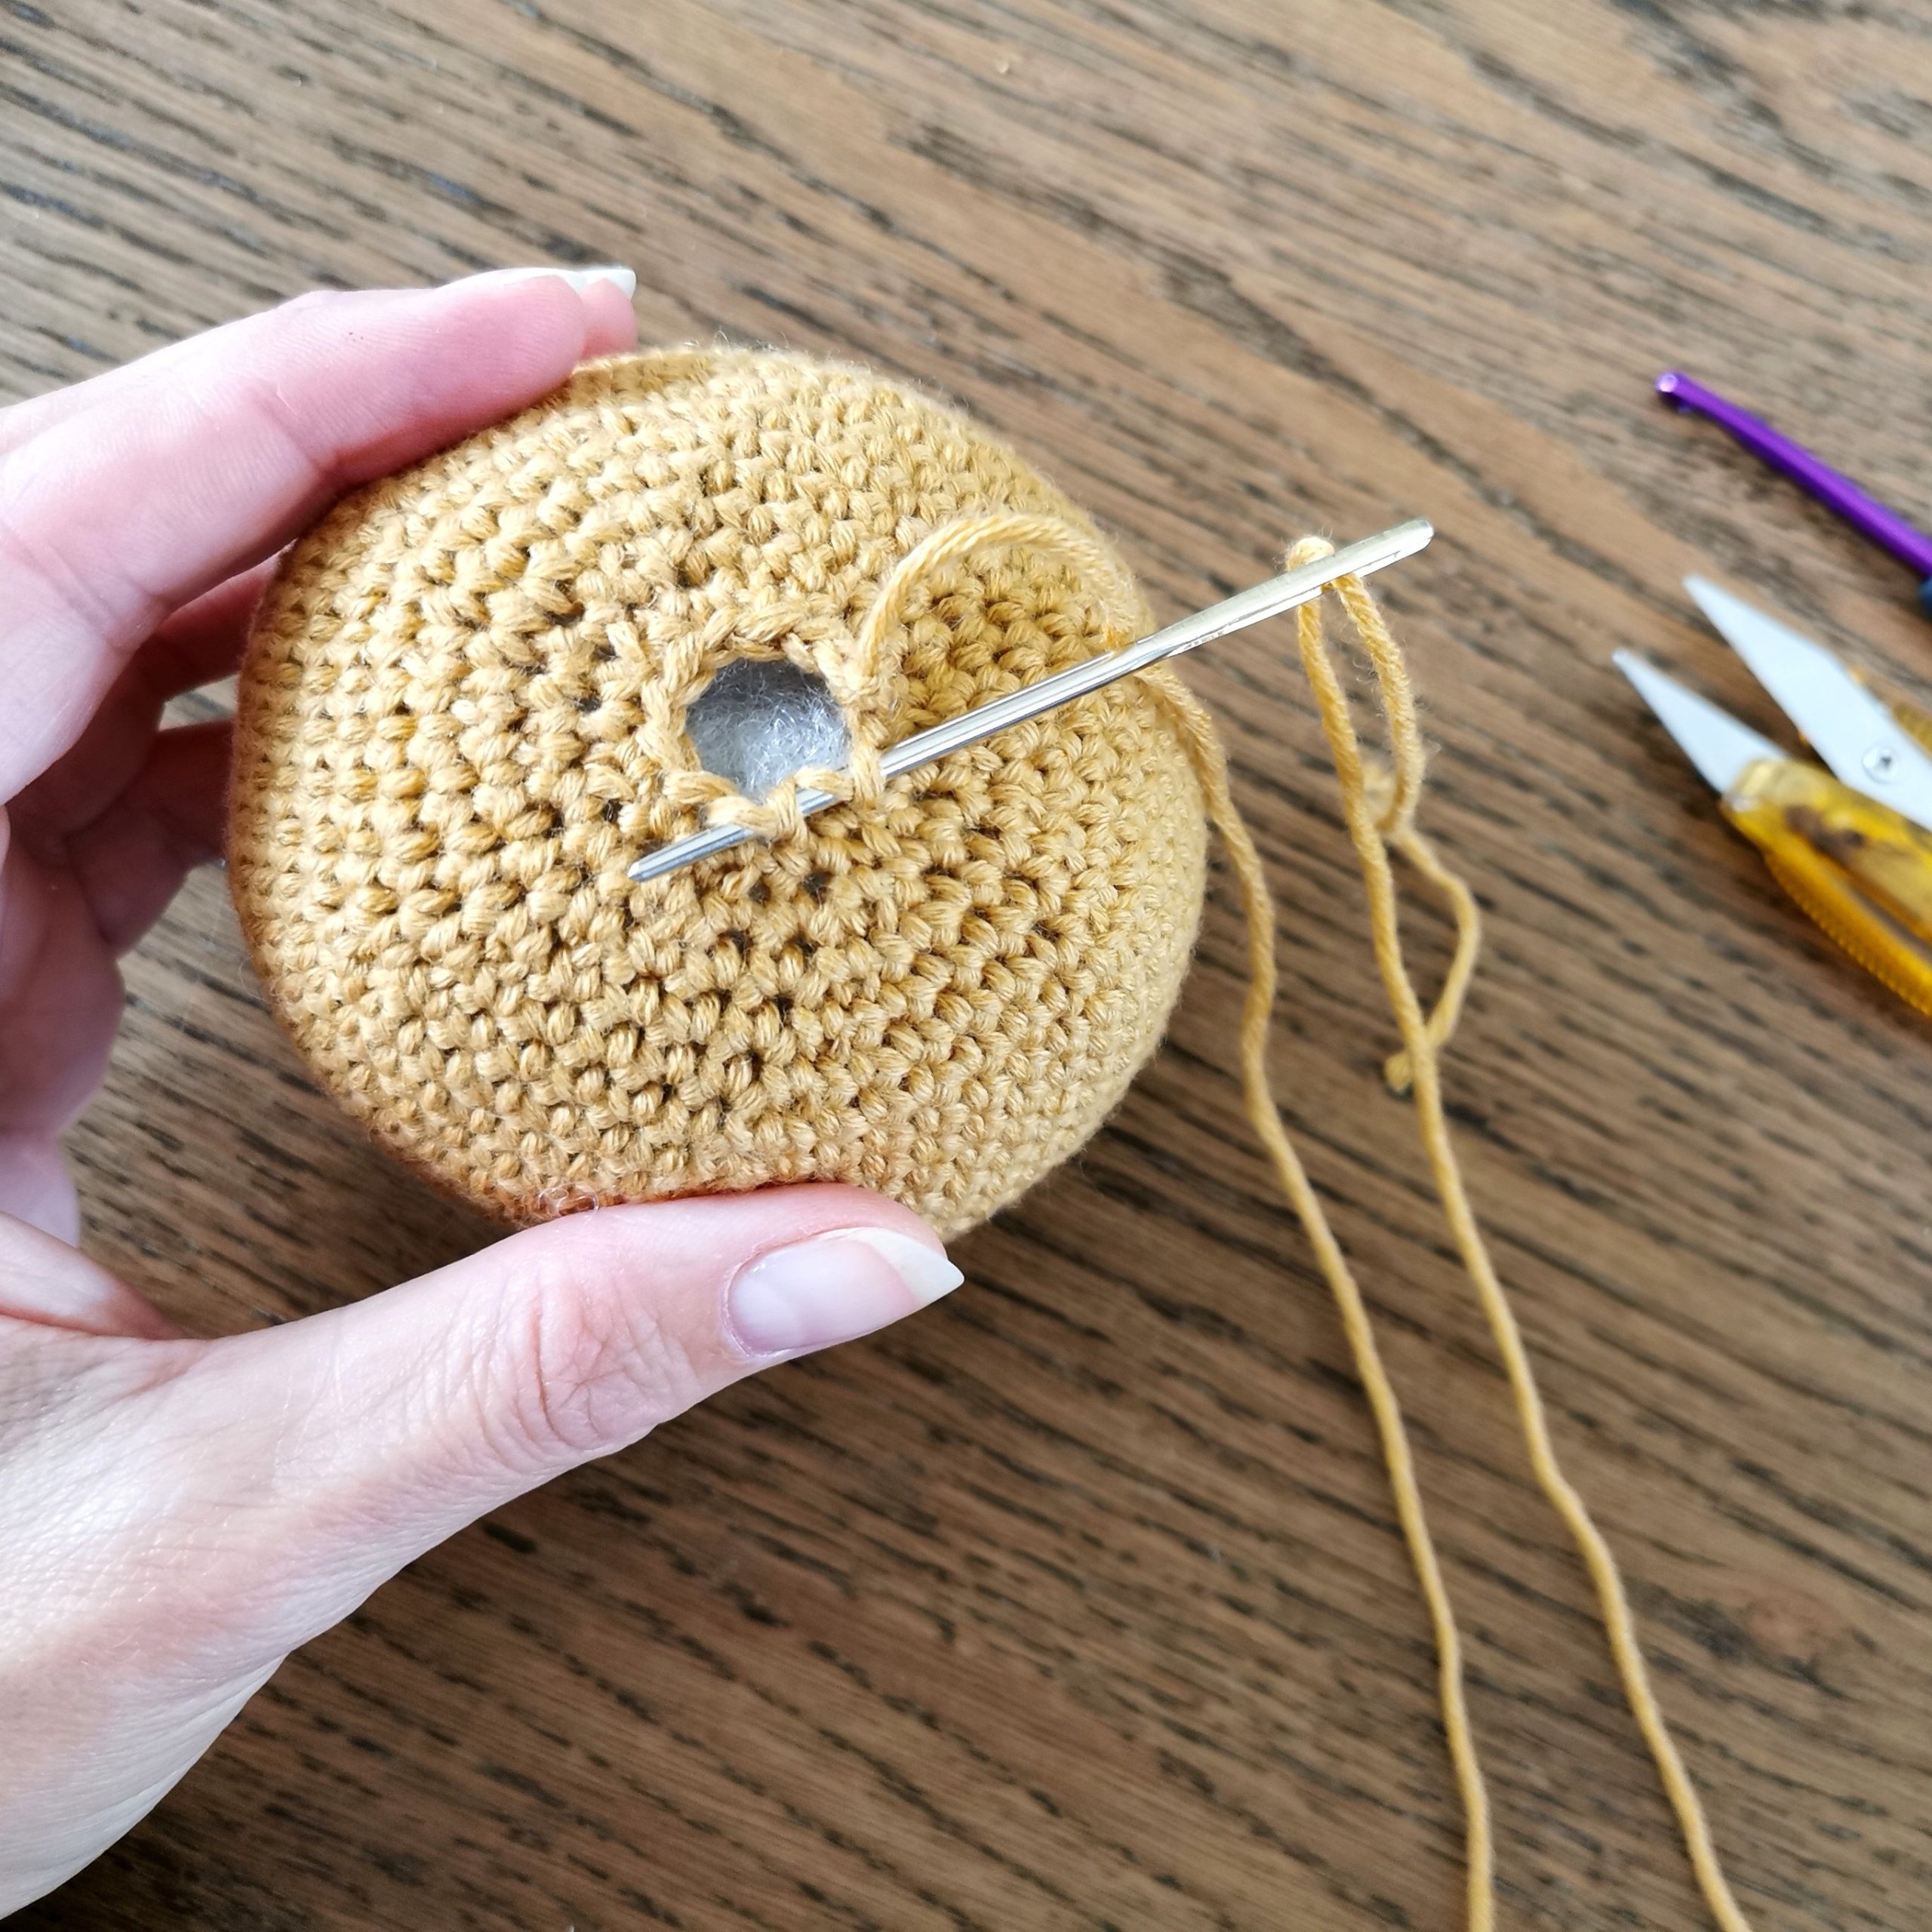
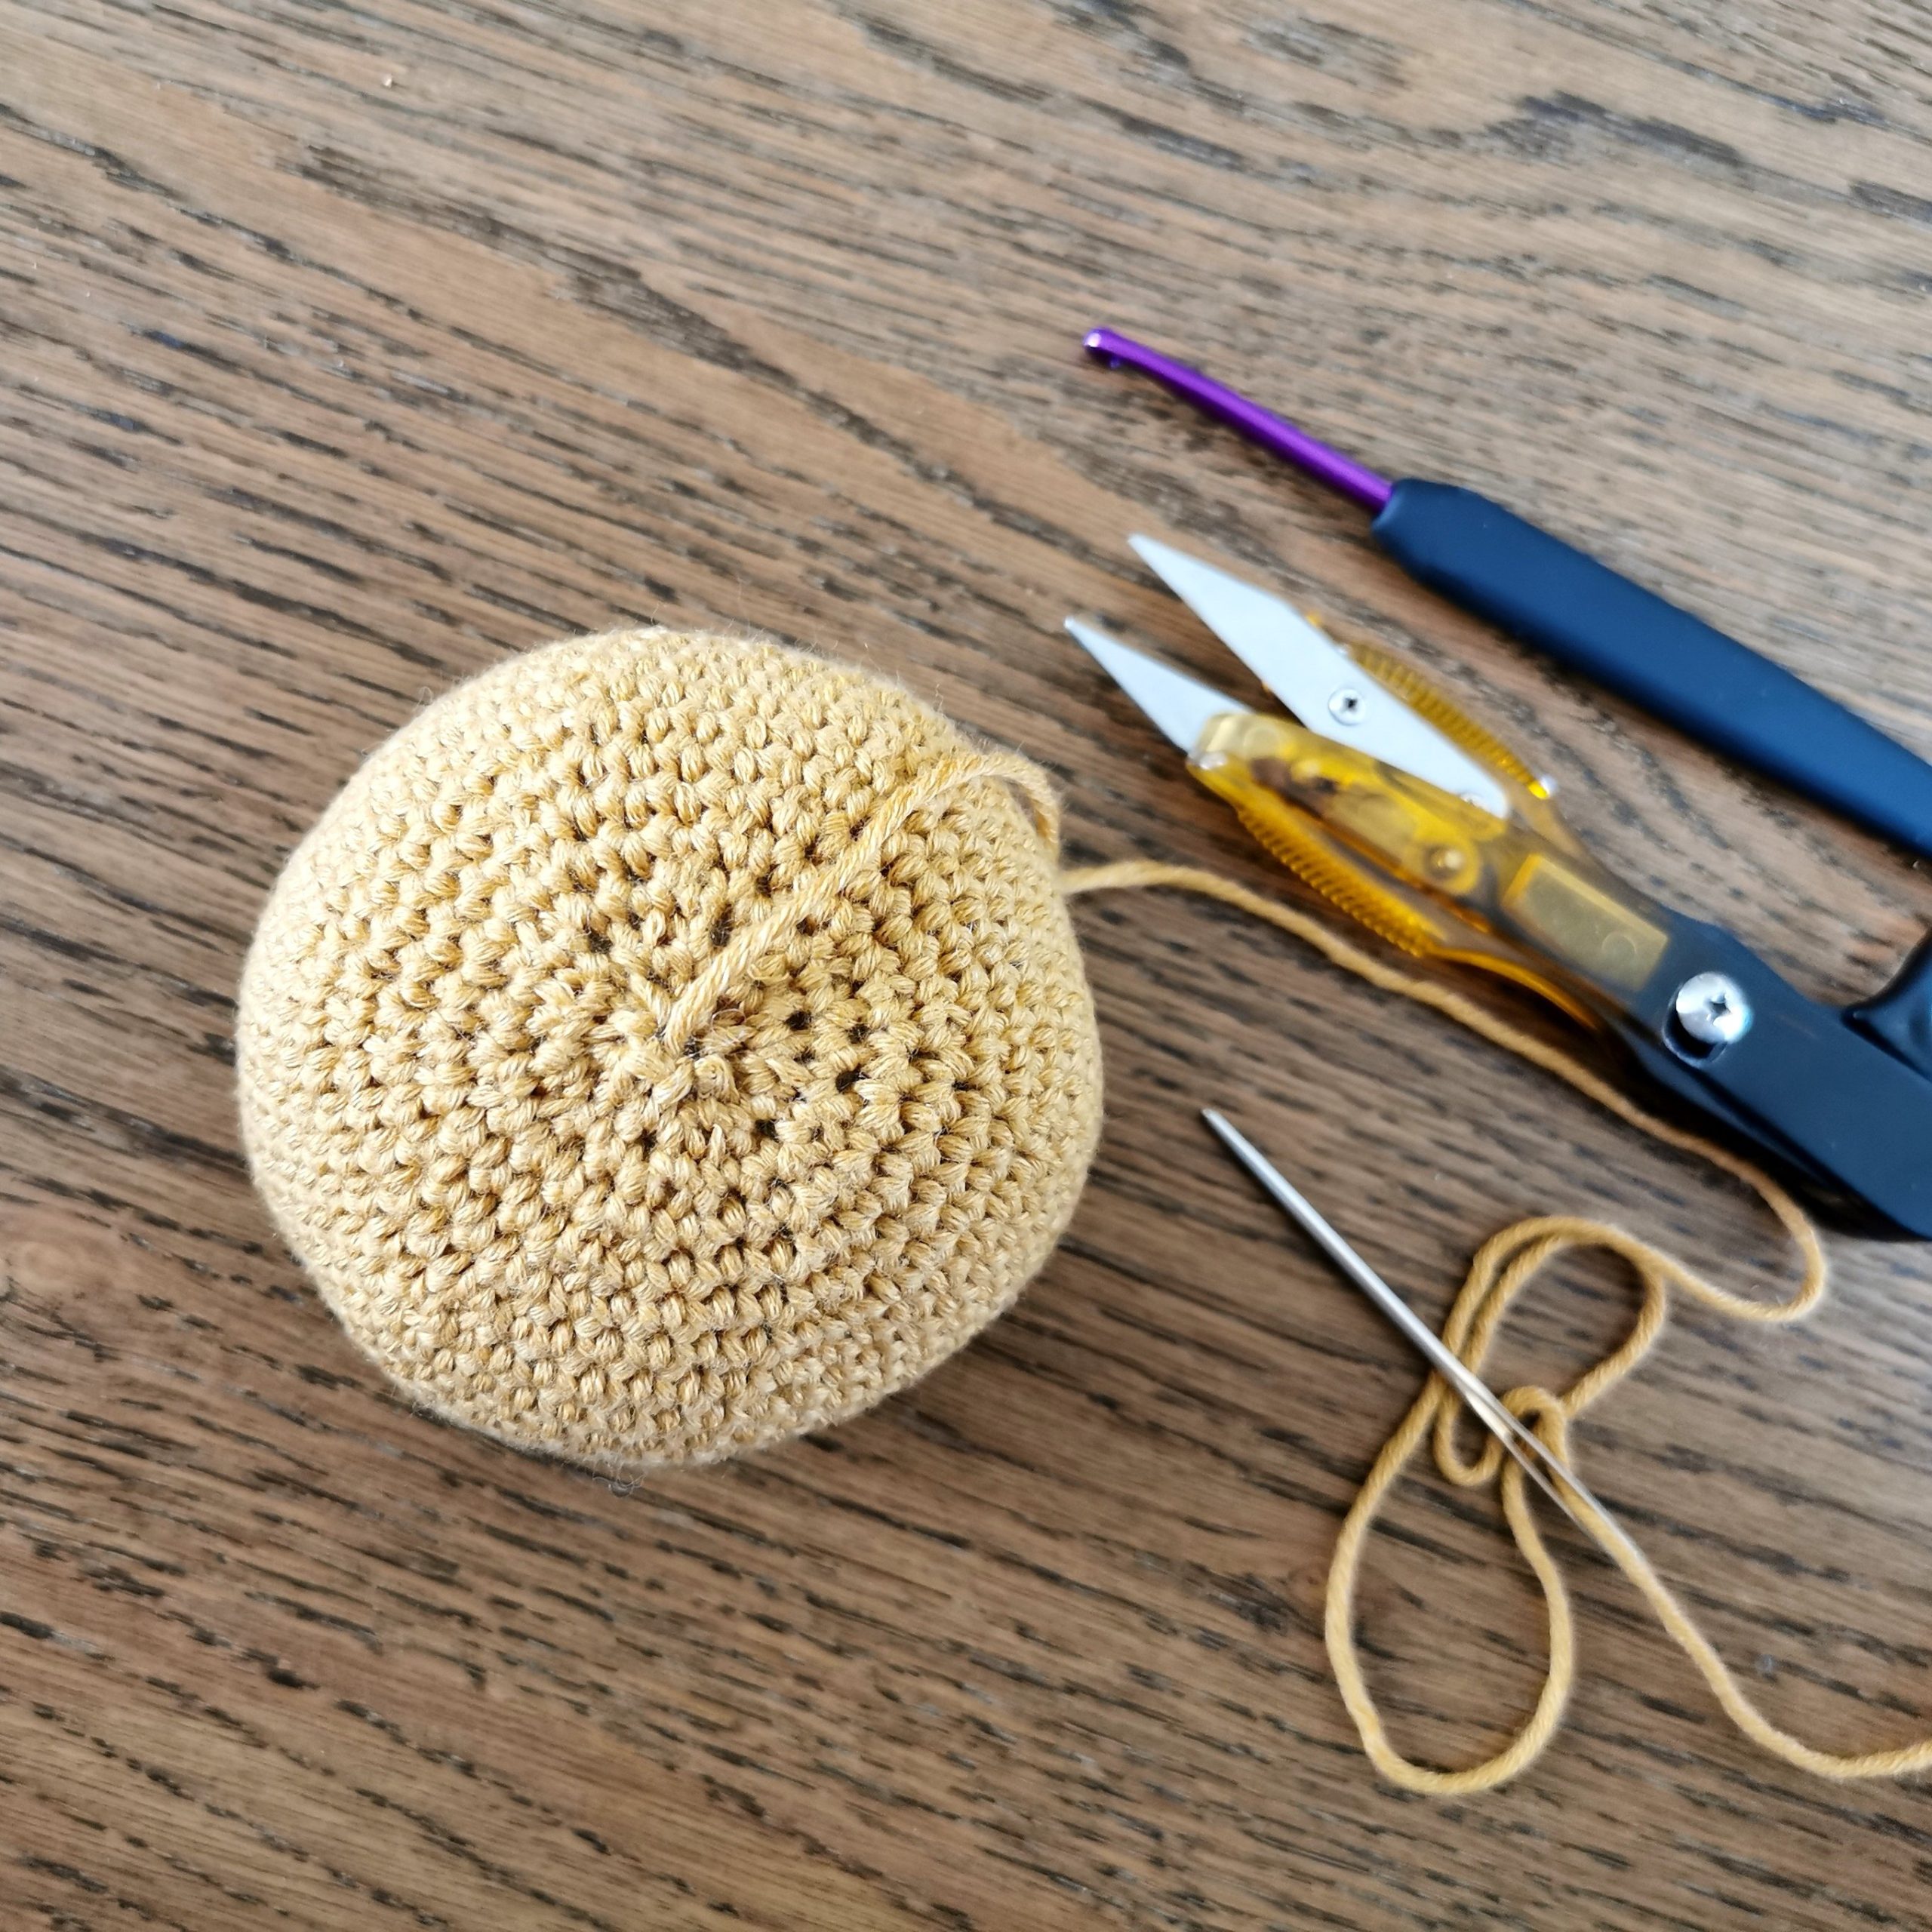
R5: Plukk opp igjen tråden fra R4 (bilde 3), 1 lm, 10 fm rundt åpningen, fest med kjm i første m (bilde 4 og 5). Klipp av tråden men la det være igjen litt lengde til å sy stilken fast til gresskaret med (bilde 6). 


Jeg håper du koste deg med oppskriften, og at du nå sitter med et eller flere gresskar som du kan pynte hjemmet ditt med.


Hvis du bruker oppskriftene mine så vær snill å linke tilbake til www.HELdesign.com.
Og jeg vil gjerne se gresskarene dine, så tagg dem gjerne med #heldesign_oppskrift og @heldesign_crochet 🙂


Send meg gjerne en melding eller en mail dersom det er noe du lurer på, eller hvis du finner noen feil i oppskriften.

Kos deg med heklingen!
Hilsen Hege 🙂


Vil du lære å hekle?

Gå inn på YouTube-kanalen min, der finner du videoer av grunnmaskene og etterhvert vil det også komme spesialmasker, små prosjekter og eventuelle ønsker folk kommer med.


CROCHET PUMPKIN – Free crochet pattern (UK terms)

CROCHET PUMPKIN – Free crochet pattern (UK terms)


DESIGN AND PATTERN:  Hege Espeland Lygrewww.HELdesign.com
Please read the Terms of use for my crochet patterns.


CROCHET PUMPKIN- big, medium and small

When autumn arrives I like to decorate my home with pumpkins, and last year I made a simple crochet pattern for a crochet pumpkin in three different sizes. There are numerous patterns like this on the internet, but I thought I’d share my pattern with you anyways. The pumpkins can be made in any type of yarn, so play around with different colours, sizes and also thickness of the yarn. And instead of making a stem you can also use a tiny branch (as shown in photos further down on the page).


MATERIALS

  • Yarn – The pumpkin can be made in any type of yarn, so choose the yarn that suits you best
  • Crochet Hook – The size that goes with the yarn you’re using, and one in a smaller size
  • Filling / Wadding to stuff the pumpkins
  • Needle
  • Scissors

STITCHES / ABBREVIATIONS (UK terms)

  • R (row/round)
  • ch (chain/slip knot) – Watch video
  • sl st (slip stitch) – Watch video
  • dc (double crochet) – Watch video (video title shows US terms – sc (single crochet)
  • MR (magic ring) – Watch video
  • st (stitch)
  • tog (together)

GAUGE

No gauge is necessary for this pattern, as it’s not a piece of clothing or something that requires exact measurments.

INFORMATION

  • Read through the whole pattern before you start.
  • Increase (example): When it says «2 sc, 2 sc in next st», it means that you make 1 sc in each of the two next stitches, and then 2 sc in the next stitch (you have then worked into 3 stitches in this example, ending up with 4 stitches).
  • Decrease (example): When it says «2 sc, 2sc tog», it means that you make 1 sc in each of the next two stitches, and then you decrease the next two stitches by crocheting them together (you have then worked into 4 stitches in this example, ending up with 3 stitches).
  • When you crochet in rounds it’s hard to see where the round ends and starts, so use a stitch marker or a piece of yarn to put a mark after each round.
  • ** – Repeat everything written between * to * as many times as the pattern says, or to the end of the round.

CROCHET PATTERN

Crochet hook: Use the size that fits the yarn you’ve chosen.

CROCHET PUMPKIN – big size

R1: 6 dc in MR (6 dc).
Tip: hold off tightening the ring until you’re done with R2.
R2: 2 dc in each st (12 dc)
R3: *1 dc, 2 dc in next st* Repeat from * to * til the end of the round (18 dc)
R4
: *2 dc, 2 dc in next st* (24 dc)
R5:
*3 dc, 2 dc in next st* (30 dc)
R6:
*4 dc, 2 dc in next st* (36 dc)
R7: *5 dc, 2 dc in next st* (42 dc)
R8: *6 dc, 2 dc in next st* (48 dc)
R9: *7 dc, 2 dc in next st* (54 dc)
R10-R18: 1 dc in each st (54 dc) 
R19: *7 dc, 2 dc tog* (48 dc)
R20:
 *6 dc, 2 dc tog* (42 dc)
R21: *5 dc, 2 dc tog* (36 dc)
R22: *4 dc, 2 dc tog* (30 dc)
R23: *3 dc, 2 dc tog* (24 dc)
R24: *2 dc, 2 dc tog* (18 dc). Stuff the pumpkin.
R25: *1 dc, 2 dc tog* (12 dc). Leave a long enough tail to shape the pumpkin (long enough to go around the ball about three times), cut the yarn and sew it through the remaining 12 dc, tighten together and fasten.

Shape the pumpkin as shown in the photos and video below.


CROCHET PUMPKIN – medium size

R1: 6 dc in MR (6 dc).
Tip: hold off tightening the ring until you’re done with R2.
R2: 2 dc in each st (12 dc)
R3: *1 dc, 2 dc in next st* Repeat from * to * til the end of the round (18 dc)
R4
: *2 dc, 2 dc in next st* (24 dc)
R5:
*3 dc, 2 dc in next st* (30 dc)
R6:
*4 dc, 2 dc in next st* (36 dc)
R7: *5 dc, 2 dc in next st* (42 dc)
R8: *6 dc, 2 dc in next st* (48 dc)
R9-R16: 1 dc in each st (48 dc) 
R17:  *6 dc, 2 dc tog* (42 dc)
R18: *5 dc, 2 dc tog* (36 dc)
R19: *4 dc, 2 dc tog* (30 dc)
R20: *3 dc, 2 dc tog* (24 dc)
R21: *2 dc, 2 dc tog* (18 dc). Stuff the pumpkin.
R22: *1 dc, 2 dc tog* (12 dc). Leave a long enough tail to shape the pumpkin (long enough to go around the ball about three times), cut the yarn and sew it through the remaining 12 dc, tighten together and fasten.

Shape the pumpkin as showed under the big size.


CROCHET PUMPKIN – small size

R1: 6 dc in MR (6 dc).
Tip: hold off tightening the ring until you’re done with R2.
R2: 2 dc in each st (12 dc)
R3: *1 dc, 2 dc in next st* Repeat from * to * til the end of the round (18 dc)
R4
: *2 dc, 2 dc in next st* (24 dc)
R5:
*3 dc, 2 dc in next st* (30 dc)
R6:
*4 dc, 2 dc in next st* (36 dc)
R7: *5 dc, 2 dc in next st* (42 dc)
R8-R14: 1 dc in each st (42 dc) 
R15:  *5 dc, 2 dc tog* (36 dc)
R16: *4 dc, 2 dc tog* (30 dc)
R17: *3 dc, 2 dc tog* (24 dc)
R18: *2 dc, 2 dc tog* (18 dc). Stuff the pumpkin.
R19: *1 dc, 2 dc tog* (12 dc). Leave a long enough tail to shape the pumpkin (long enough to go around the ball about three times), cut the yarn and sew it through the remaining 12 dc, tighten together and fasten.

Shape the pumpkin as showed under the big size.


STEM – make one for each size

Crochet hook: Use one size smaller than the one you used for the pumpkins.

Chain 5
R1: 1 dc in second chain from hook, 3 dc, turn (4 dc)
R2-R4: 1 ch, 4 dc, turn (4 dc)

Don’t fasten the yarn, you’ll come back to it after you’re finished sewing the stem (photo 1). With the tail, sew 4 stitches down the side through the first and last row at the same time (photo 2). Weave in the end.

R5: Continue with the yarn from R4 (photo 3), 1 ch, 10 dc around the opening, fasten with sl st in first st (photo 4 and 5). Cut off the yarn, but leave a tail in order to sew the stem to the pumpkin (photo 6).


I hope you enjoyed my pattern, and that you now have one or more pumpkins to decorate your home with.


If you use my patterns please link back to www.HELdesign.com.
And I would love to see your finished pumpkins, so please tag me if you post on Instagram, with #heldesign_pattern and @heldesign_crochet 🙂


Please
contact me if you have any questions.

Enjoy your crocheting! 🙂

Dette bildet mangler alt-tekst; dets filnavn er cropped-heldesign_mint3-1-300x227.png

Would you like to learn how to crochet? 

Visit my YouTube channel, there you will find videos of the basic stitches and in time there will also come special stitches, various projects and requests.

CROCHET PUMPKIN – Free crochet pattern (US terms)

CROCHET PUMPKIN – Free crochet pattern (US terms)


DESIGN AND PATTERN:  Hege Espeland Lygrewww.HELdesign.com
Please read the Terms of use for my crochet patterns.


CROCHET PUMPKIN- big, medium and small

When autumn arrives I like to decorate my home with pumpkins, and last year I made a simple crochet pattern for a crochet pumpkin in three different sizes. There are numerous patterns like this on the internet, but I thought I’d share my pattern with you anyways. The pumpkins can be made in any type of yarn, so play around with different colours, sizes and also thickness of the yarn. And instead of making a stem you can also use a tiny branch (as shown in photos further down on the page).


MATERIALS

  • Yarn – The pumpkin can be made in any type of yarn, so choose the yarn that suits you best.
  • Crochet Hook – The size that goes with the yarn you’re using, and one in a smaller size.
  • Filling / Wadding to stuff the pumpkins
  • Needle
  • Scissors

STITCHES / ABBREVIATIONS (US terms)

GAUGE

No gauge is necessary for this pattern, as it’s not a piece of clothing or something that requires exact measurments.

INFORMATION

  • Read through the whole pattern before you start.
  • Increase (example): When it says «2 sc, 2 sc in next st», it means that you make 1 sc in each of the two next stitches, and then 2 sc in the next stitch (you have then worked into 3 stitches in this example, ending up with 4 stitches).
  • Decrease (example): When it says «2 sc, 2sc tog», it means that you make 1 sc in each of the next two stitches, and then you decrease the next two stitches by crocheting them together (you have then worked into 4 stitches in this example, ending up with 3 stitches).
  • When you crochet in rounds it’s hard to see where the round ends and starts, so use a stitch marker or a piece of yarn to put a mark after each round.
  • ** – Repeat everything written between * to * as many times as the pattern says, or to the end of the round.

CROCHET PATTERN

Crochet hook: Use the size that fits the yarn you’ve chosen.

CROCHET PUMPKIN – big size

R1: 6 sc in MR (6 sc).
Tip: hold off tightening the ring until you’re done with R2.
R2: 2 sc in each st (12 sc)
R3: *1 sc, 2 sc in next st* Repeat from * to * til the end of the round (18 sc)
R4
: *2 sc, 2 sc in next st* (24 sc)
R5:
*3 sc, 2 sc in next st* (30 sc)
R6:
*4 sc, 2 sc in next st* (36 sc)
R7: *5 sc, 2 sc in next st* (42 sc)
R8: *6 sc, 2 sc in next st* (48 sc)
R9: *7 sc, 2 sc in next st* (54 sc)
R10-R18: 1 sc in each st (54 sc) 
R19: *7 sc, 2 sc tog* (48 sc)
R20:
 *6 sc, 2 sc tog* (42 sc)
R21: *5 sc, 2 sc tog* (36 sc)
R22: *4 sc, 2 sc tog* (30 sc)
R23: *3 sc, 2 sc tog* (24 sc)
R24: *2 sc, 2 sc tog* (18 sc). Stuff the pumpkin.
R25: *1 sc, 2 sc tog* (12 sc). Leave a long enough tail to shape the pumpkin (long enough to go around the ball about three times), cut the yarn and sew it through the remaining 12 sc, tighten together and fasten.

Shape the pumpkin as shown in the photos and video below.


CROCHET PUMPKIN – medium size

R1: 6 sc in MR (6 sc).
Tip: hold off tightening the ring until you’re done with R2.
R2: 2 sc in each st (12 sc)
R3: *1 sc, 2 sc in next st* Repeat from * to * til the end of the round (18 sc)
R4
: *2 sc, 2 sc in next st* (24 sc)
R5:
*3 sc, 2 sc in next st* (30 sc)
R6:
*4 sc, 2 sc in next st* (36 sc)
R7: *5 sc, 2 sc in next st* (42 sc)
R8: *6 sc, 2 sc in next st* (48 sc)
R9-R16: 1 sc in each st (48 sc) 
R17:  *6 sc, 2 sc tog* (42 sc)
R18: *5 sc, 2 sc tog* (36 sc)
R19: *4 sc, 2 sc tog* (30 sc)
R20: *3 sc, 2 sc tog* (24 sc)
R21: *2 sc, 2 sc tog* (18 sc). Stuff the pumpkin.
R22: *1 sc, 2 sc tog* (12 sc). Leave a long enough tail to shape the pumpkin (long enough to go around the ball about three times), cut the yarn and sew it through the remaining 12 sc, tighten together and fasten.

Shape the pumpkin as showed under the big size.


CROCHET PUMPKIN – small size

R1: 6 sc in MR (6 sc).
Tip: hold off tightening the ring until you’re done with R2.
R2: 2 sc in each st (12 sc)
R3: *1 sc, 2 sc in next st* Repeat from * to * til the end of the round (18 sc)
R4
: *2 sc, 2 sc in next st* (24 sc)
R5:
*3 sc, 2 sc in next st* (30 sc)
R6:
*4 sc, 2 sc in next st* (36 sc)
R7: *5 sc, 2 sc in next st* (42 sc)
R8-R14: 1 sc in each st (42 sc) 
R15:  *5 sc, 2 sc tog* (36 sc)
R16: *4 sc, 2 sc tog* (30 sc)
R17: *3 sc, 2 sc tog* (24 sc)
R18: *2 sc, 2 sc tog* (18 sc). Stuff the pumpkin.
R19: *1 sc, 2 sc tog* (12 sc). Leave a long enough tail to shape the pumpkin (long enough to go around the ball about three times), cut the yarn and sew it through the remaining 12 sc, tighten together and fasten.

Shape the pumpkin as showed under the big size.


STEM – make one for each size

Crochet hook: Use one size smaller than the one you used for the pumpkins.

Chain 5
R1: 1 sc in second chain from hook, 3 sc, turn (4 sc)
R2-R4: 1 ch, 4 sc, turn (4 sc)

Don’t fasten the yarn, you’ll come back to it after you’re finished sewing the stem (photo 1). With the tail, sew 4 stitches down the side through the first and last row at the same time (photo 2). Weave in the end.

R5: Continue with the yarn from R4 (photo 3), 1 ch, 10 sc around the opening, fasten with sl st in first st (photo 4 and 5). Cut off the yarn, but leave a tail in order to sew the stem to the pumpkin (photo 6).


I hope you enjoyed my pattern, and that you now have one or more pumpkins to decorate your home with.


If you use my patterns please link back to www.HELdesign.com.
And I would love to see your finished pumpkins, so please tag me if you post on Instagram, with #heldesign_pattern and @heldesign_crochet 🙂


Please
contact me if you have any questions, or if you find any mistakes in the pattern.

Enjoy your crocheting!
Best regards, Hege 🙂

Dette bildet mangler alt-tekst; dets filnavn er cropped-heldesign_mint3-1-300x227.png

Would you like to learn how to crochet? 

Visit my YouTube channel, there you will find videos of the basic stitches and in time there will also come special stitches, various projects and requests.