DESIGN AND PATTERN: Hege Espeland Lygre – www.HELdesign.com
Please read the Terms of use for my crochet patterns.
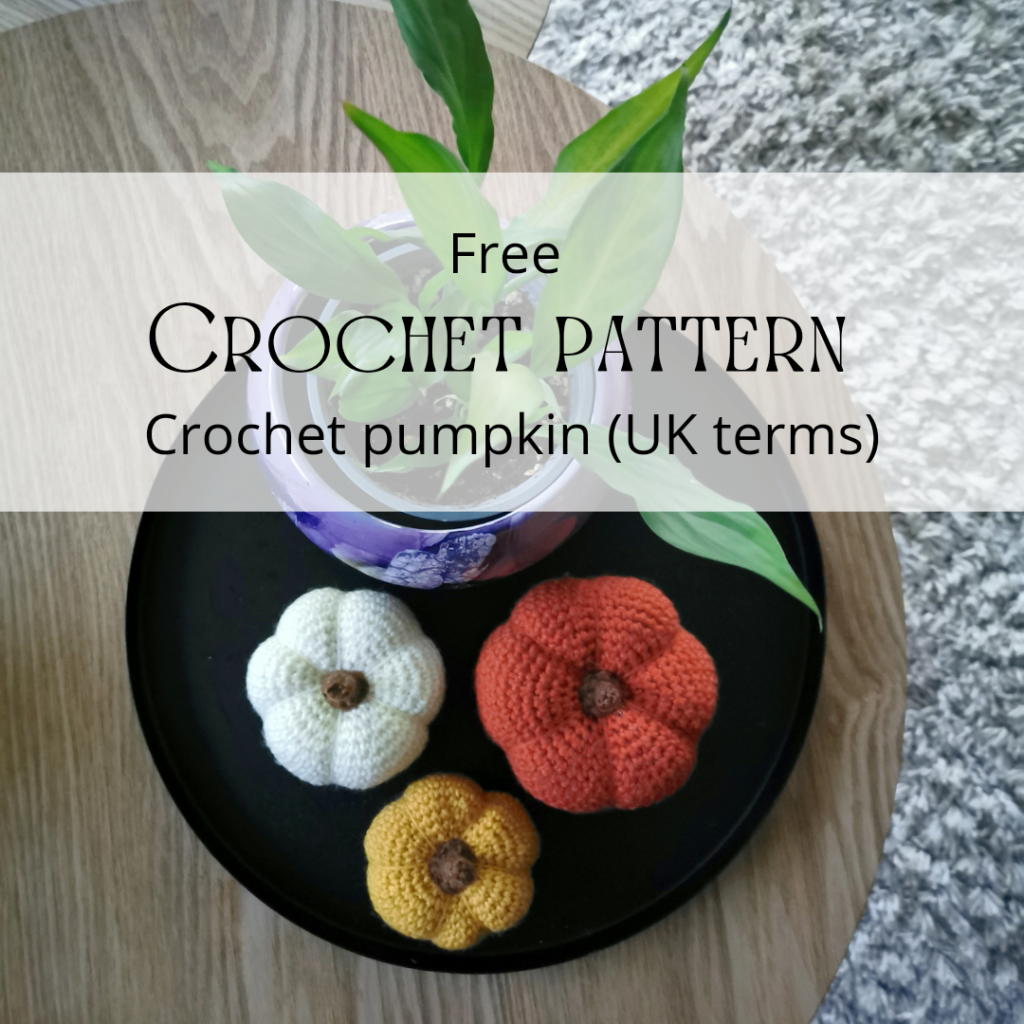
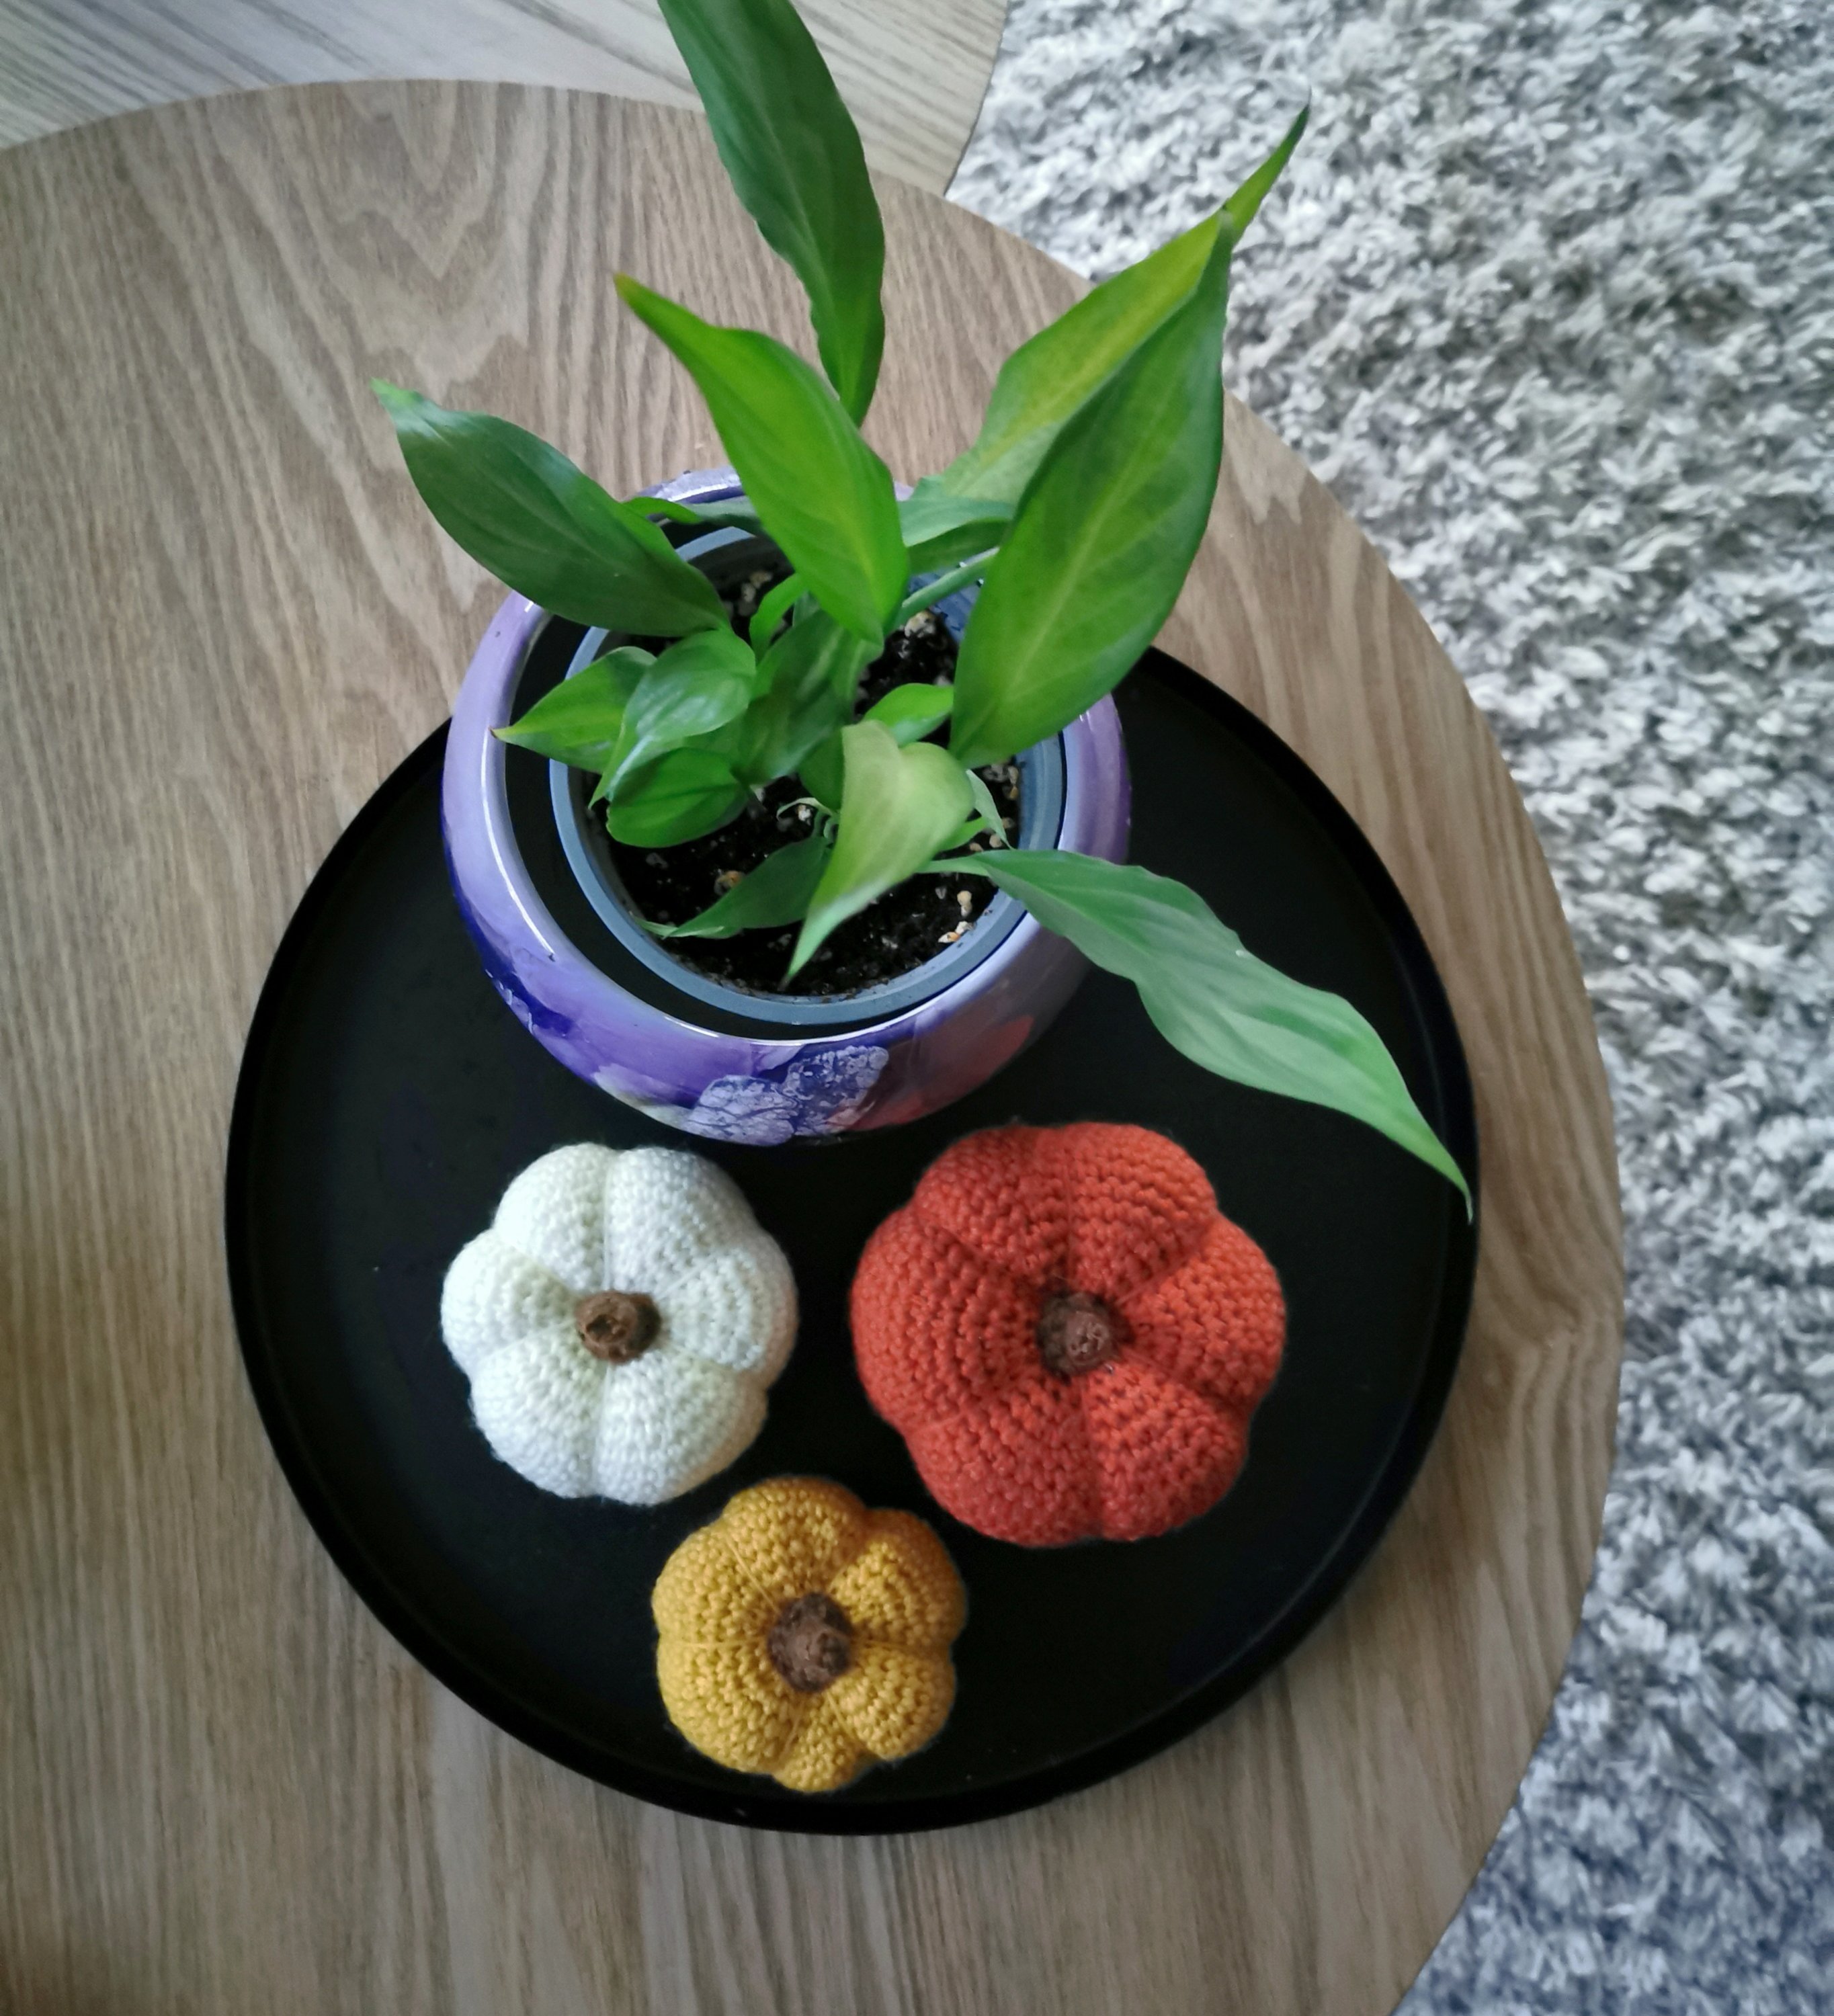
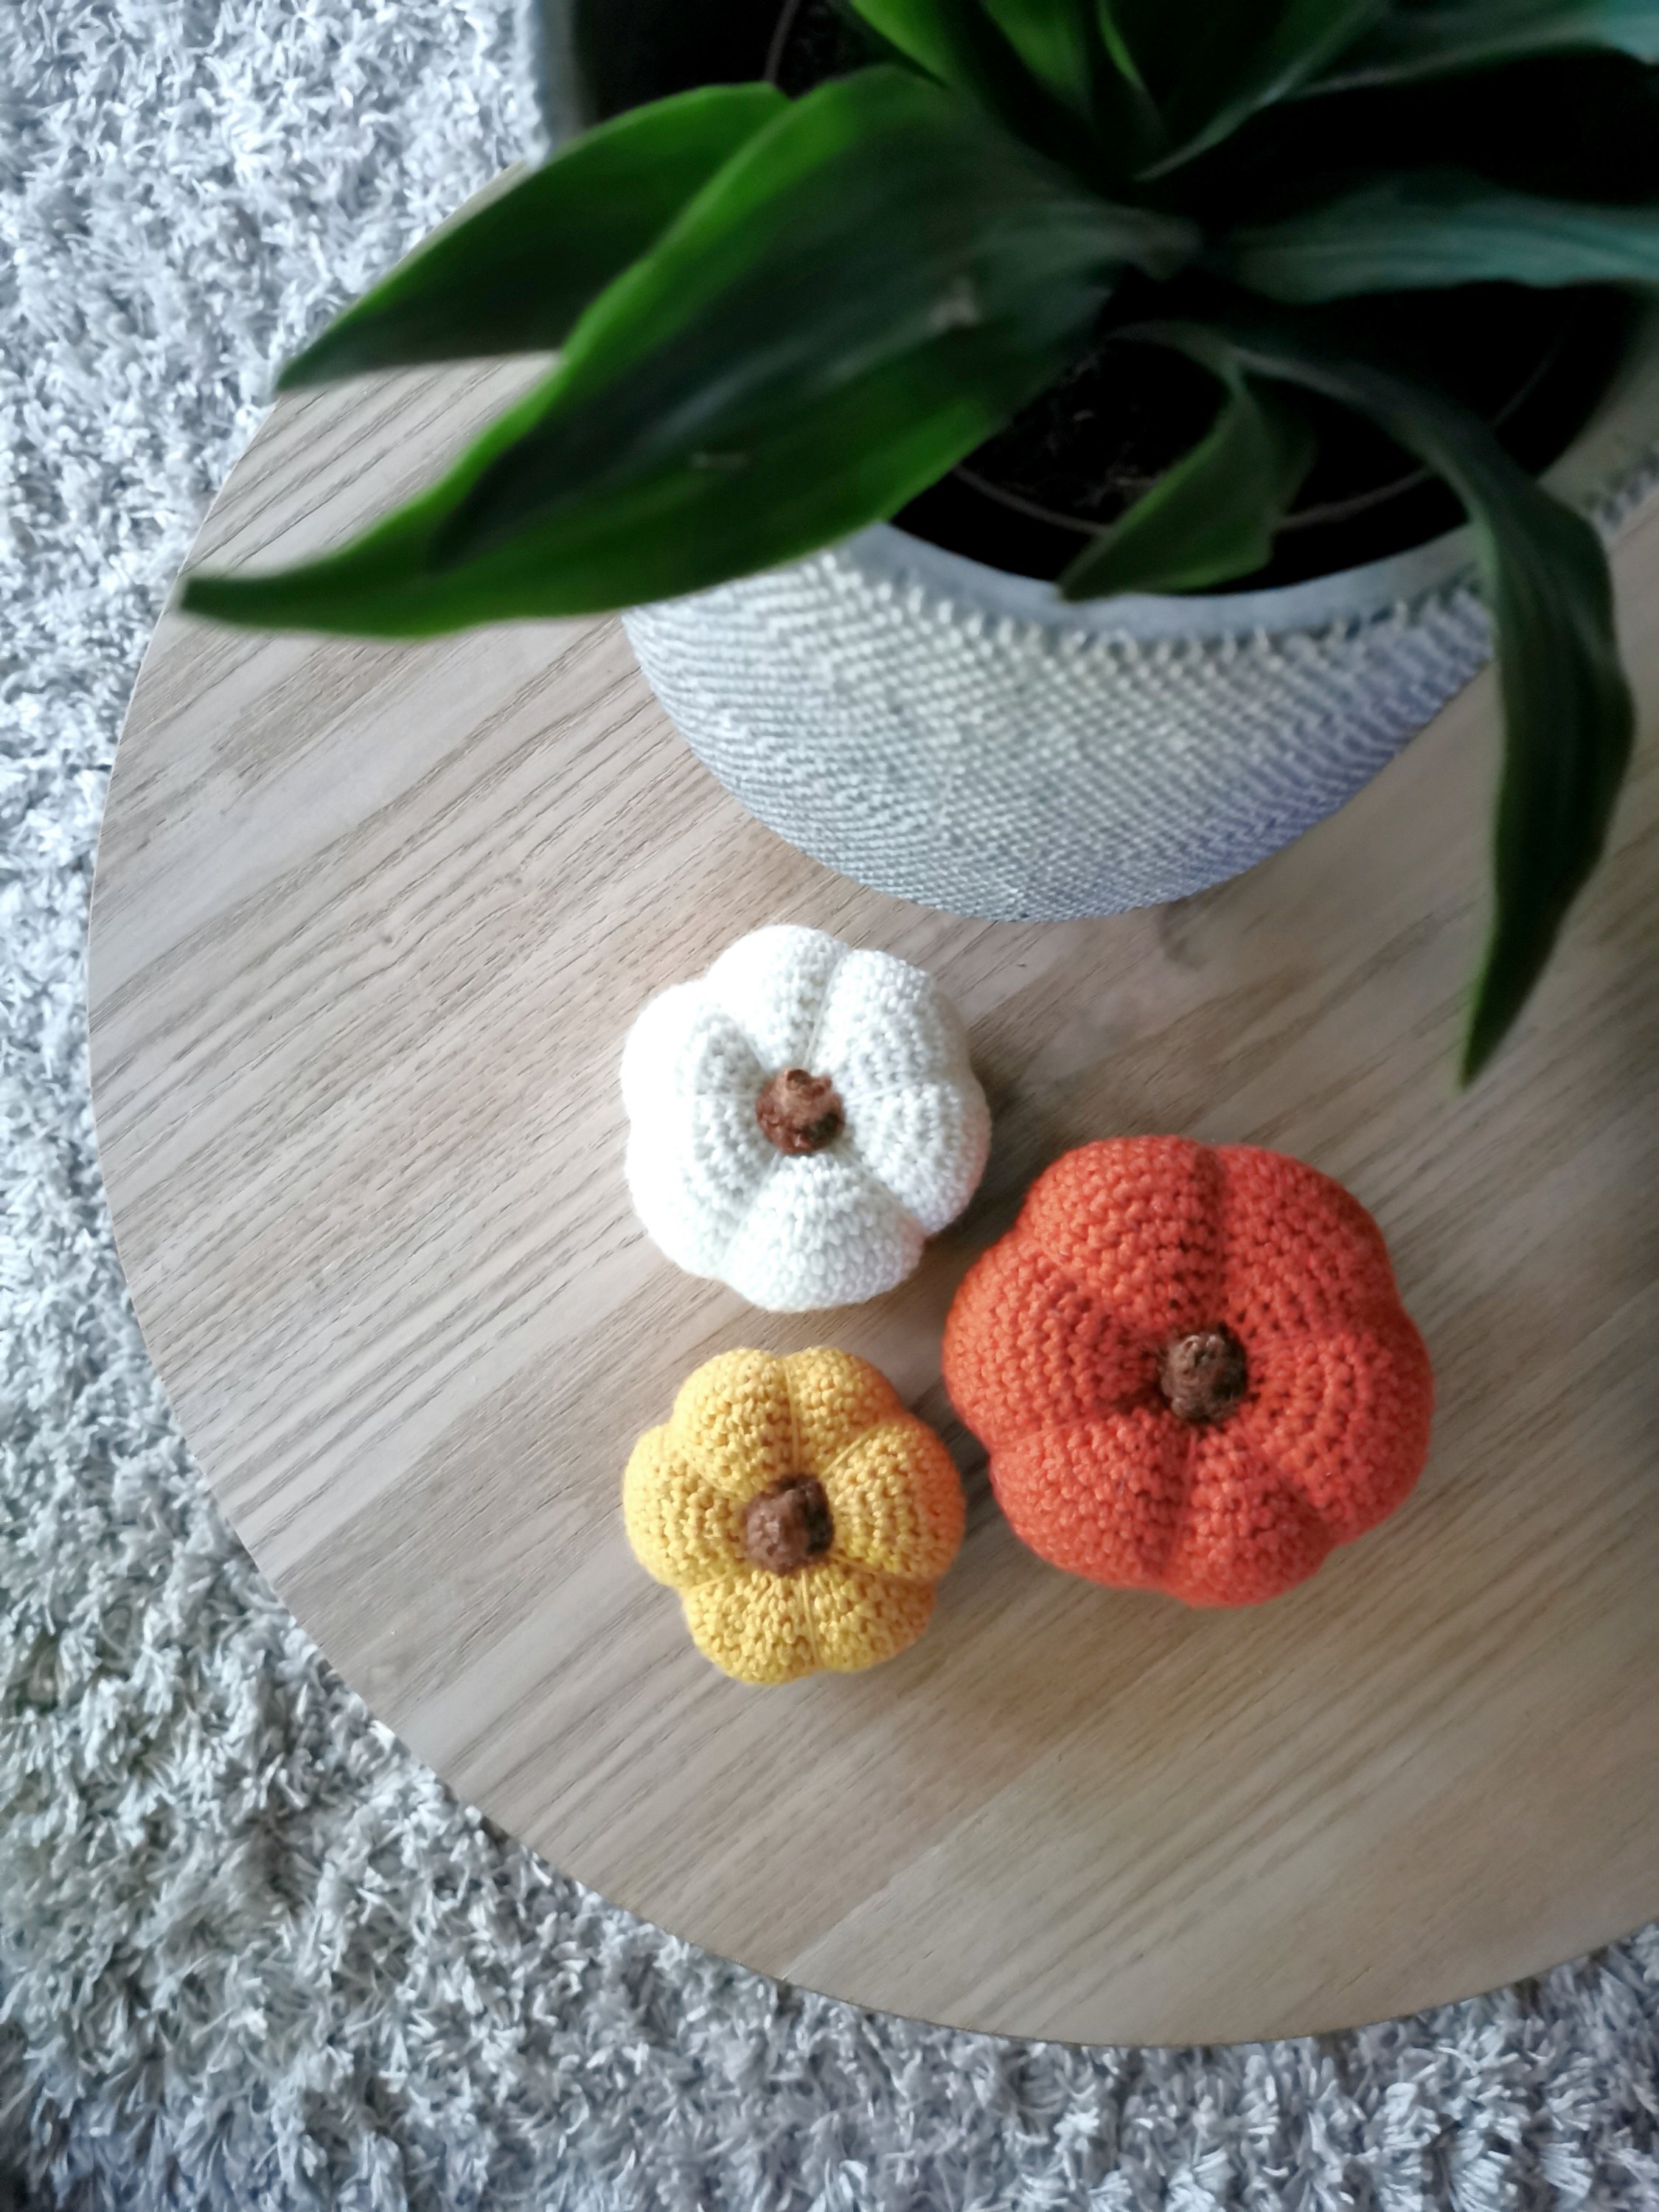
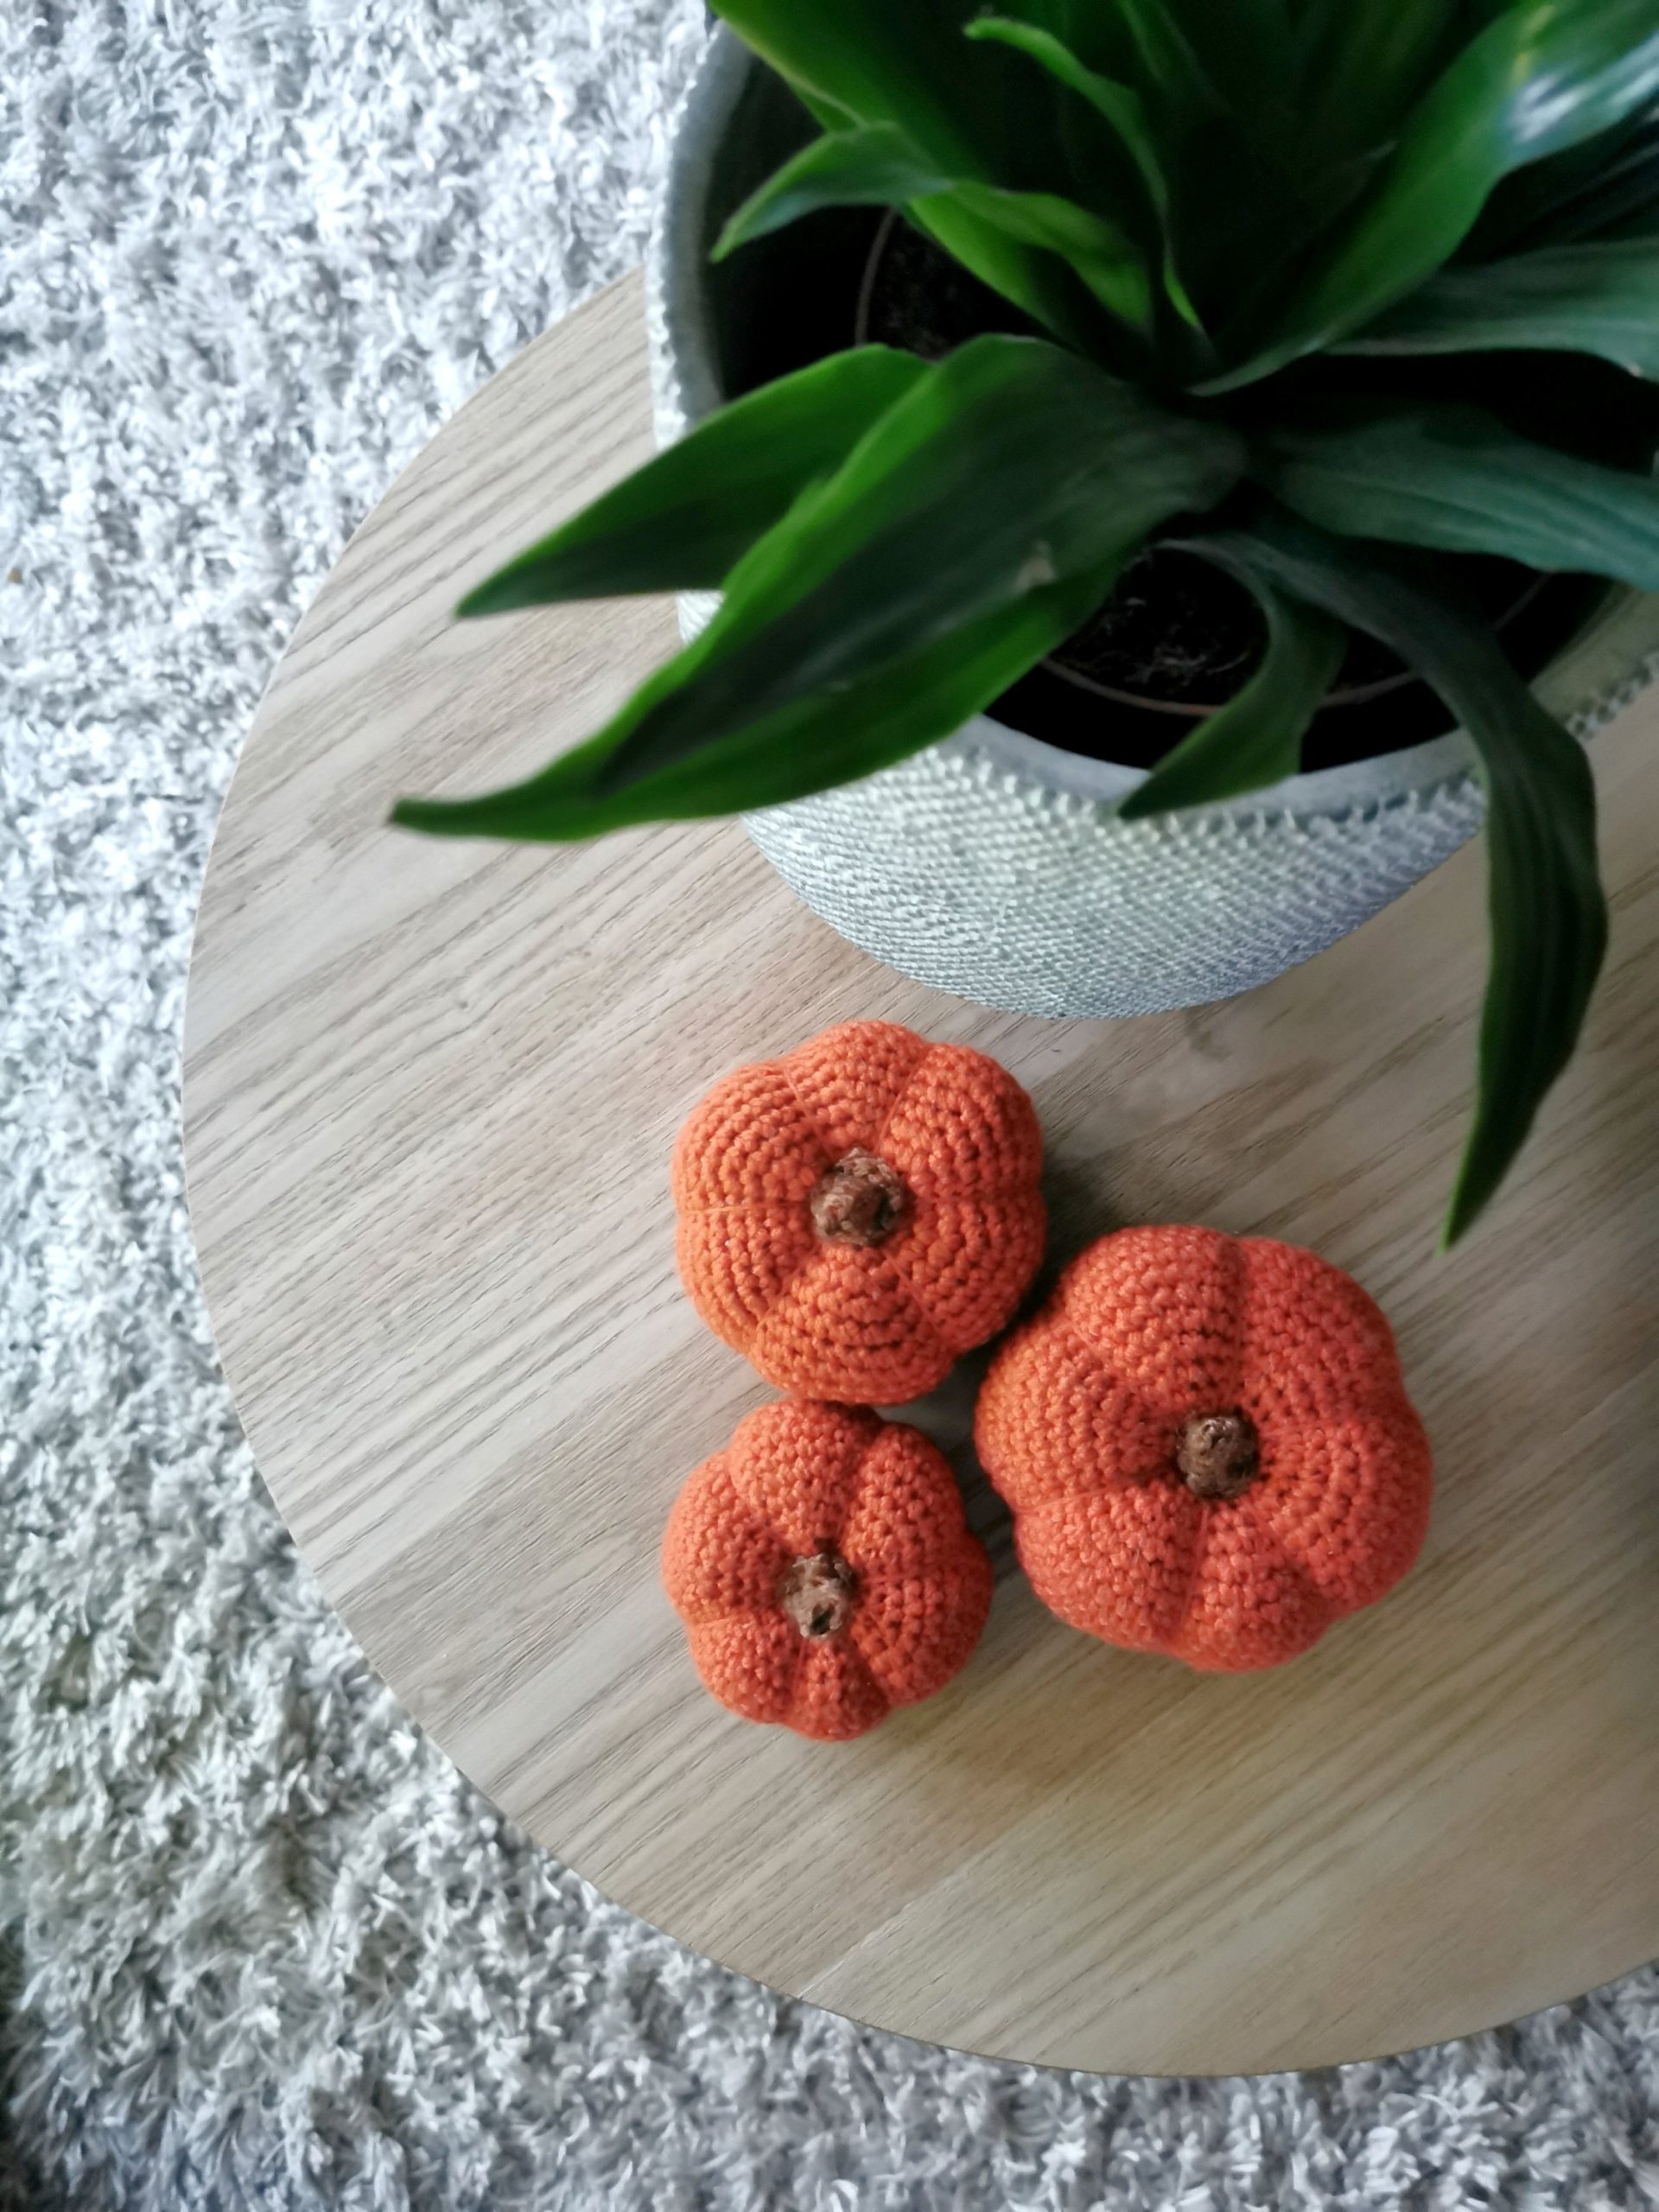
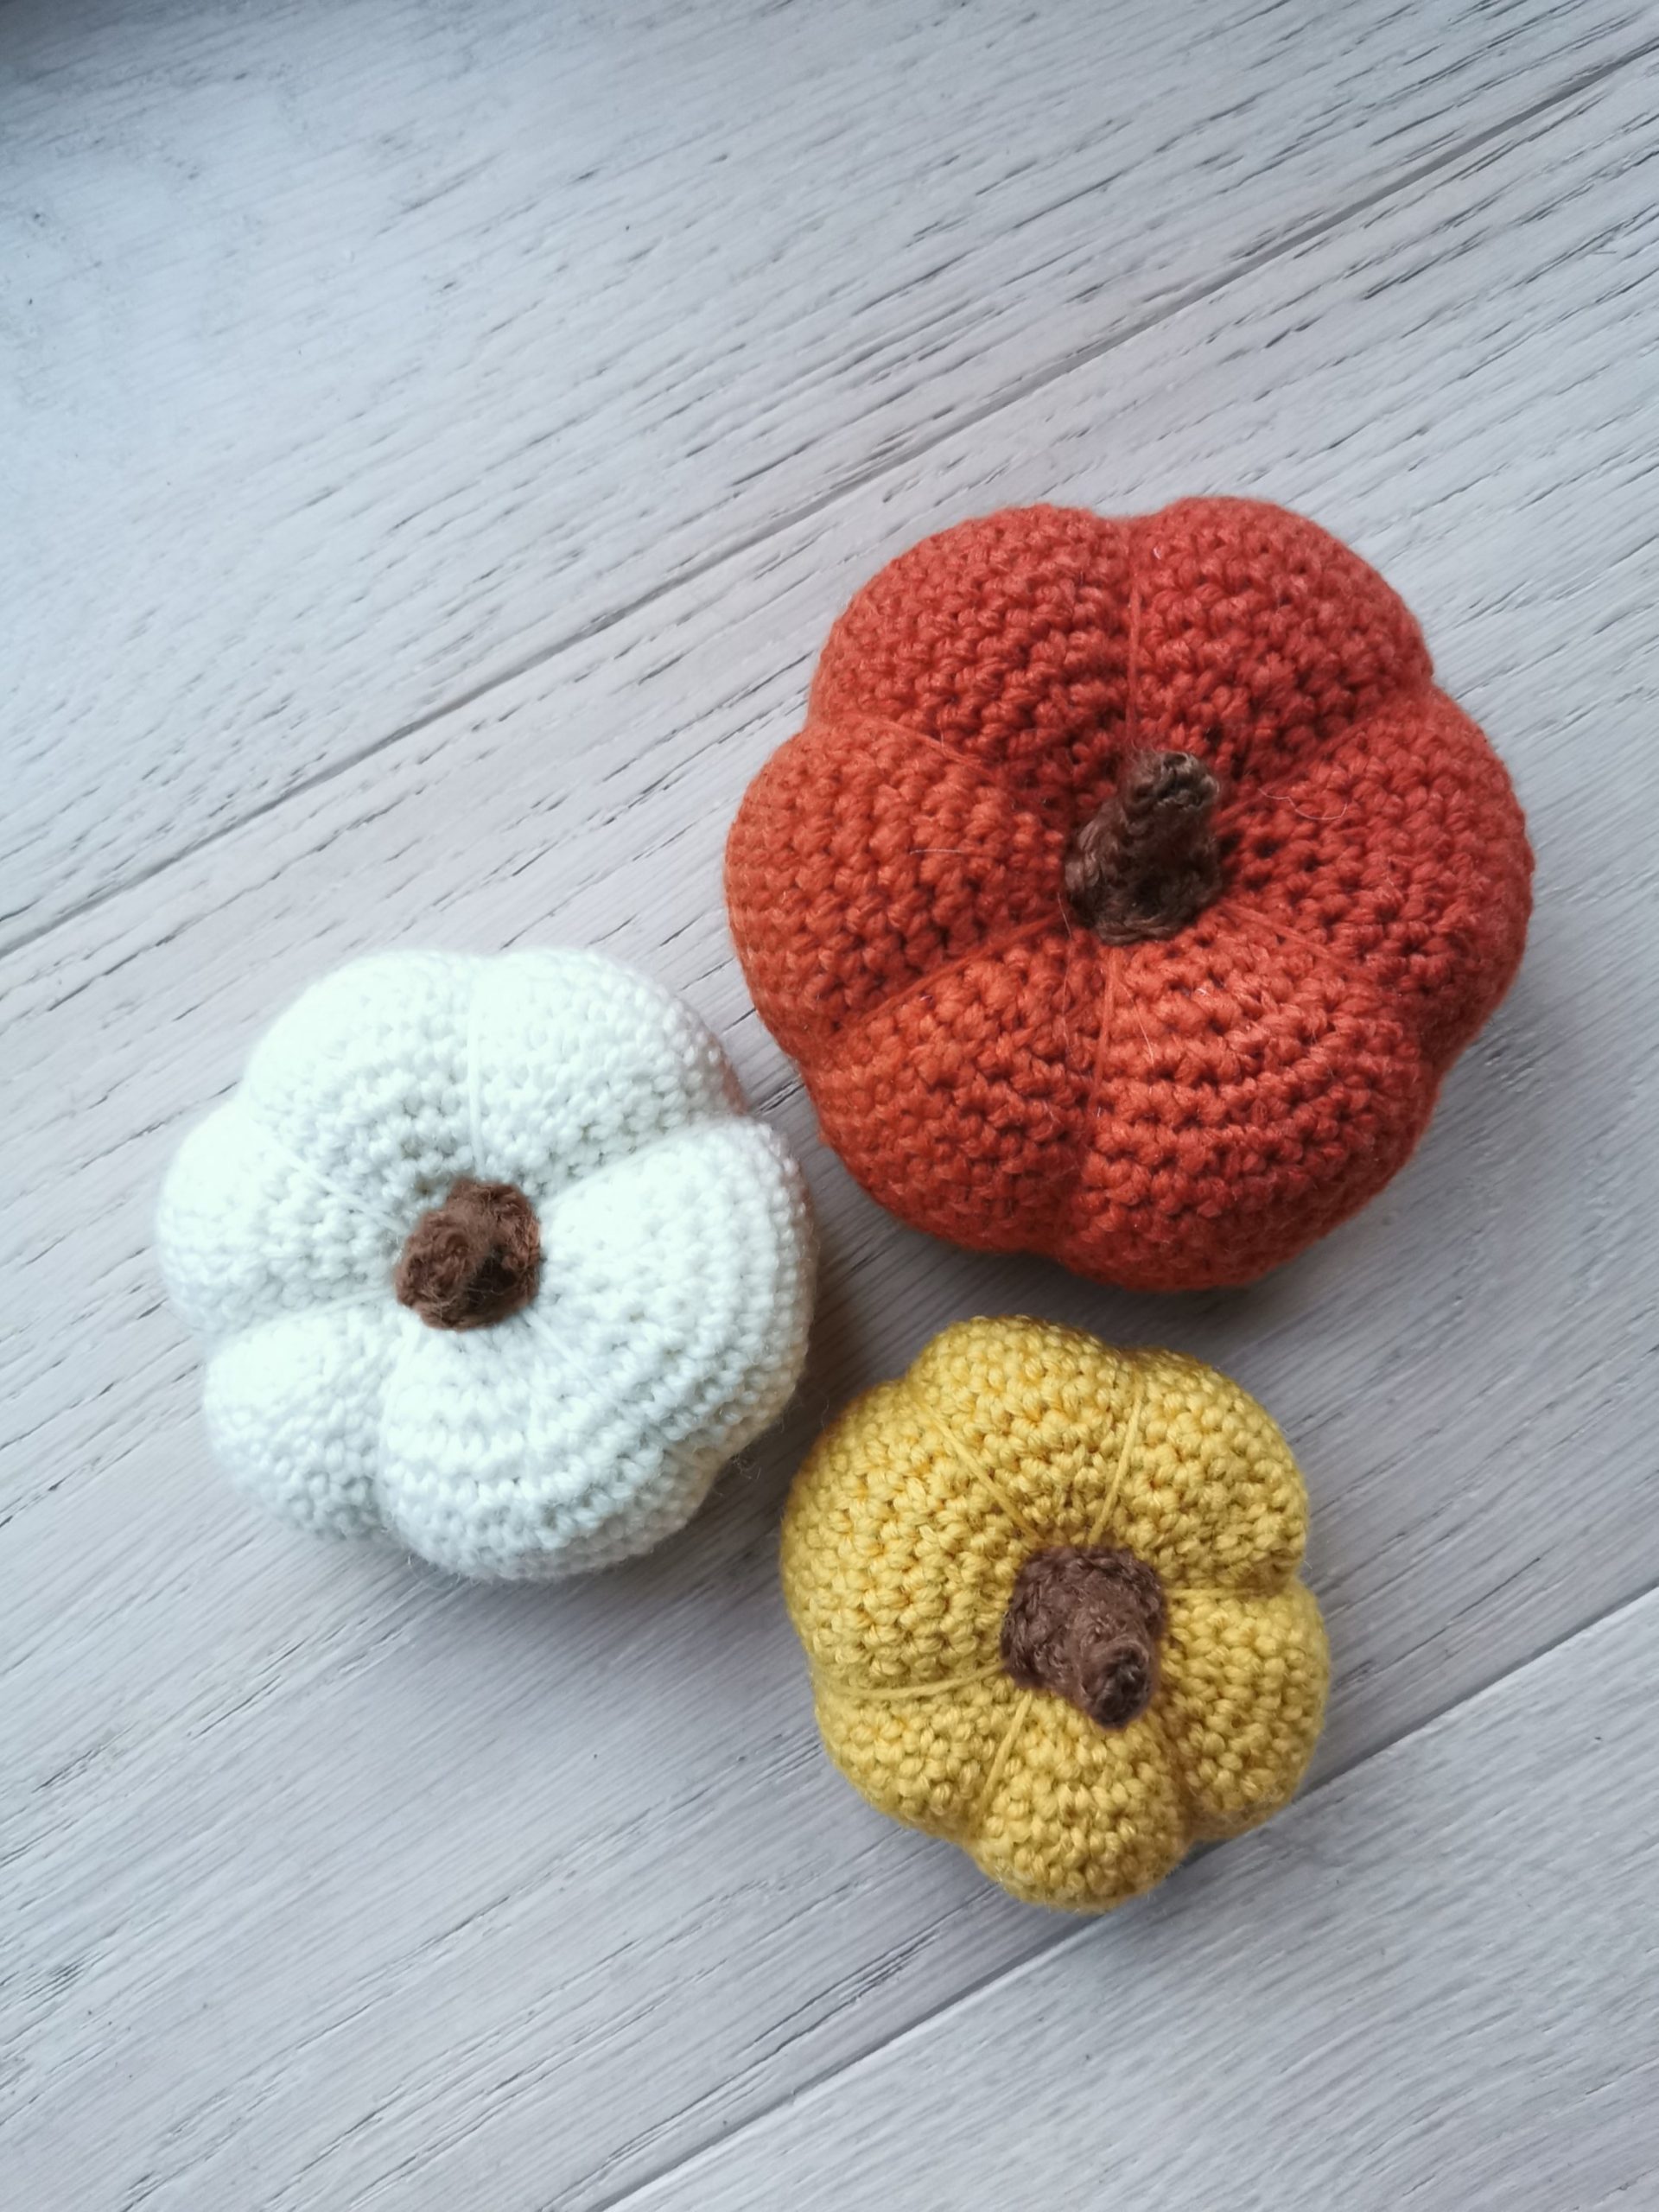
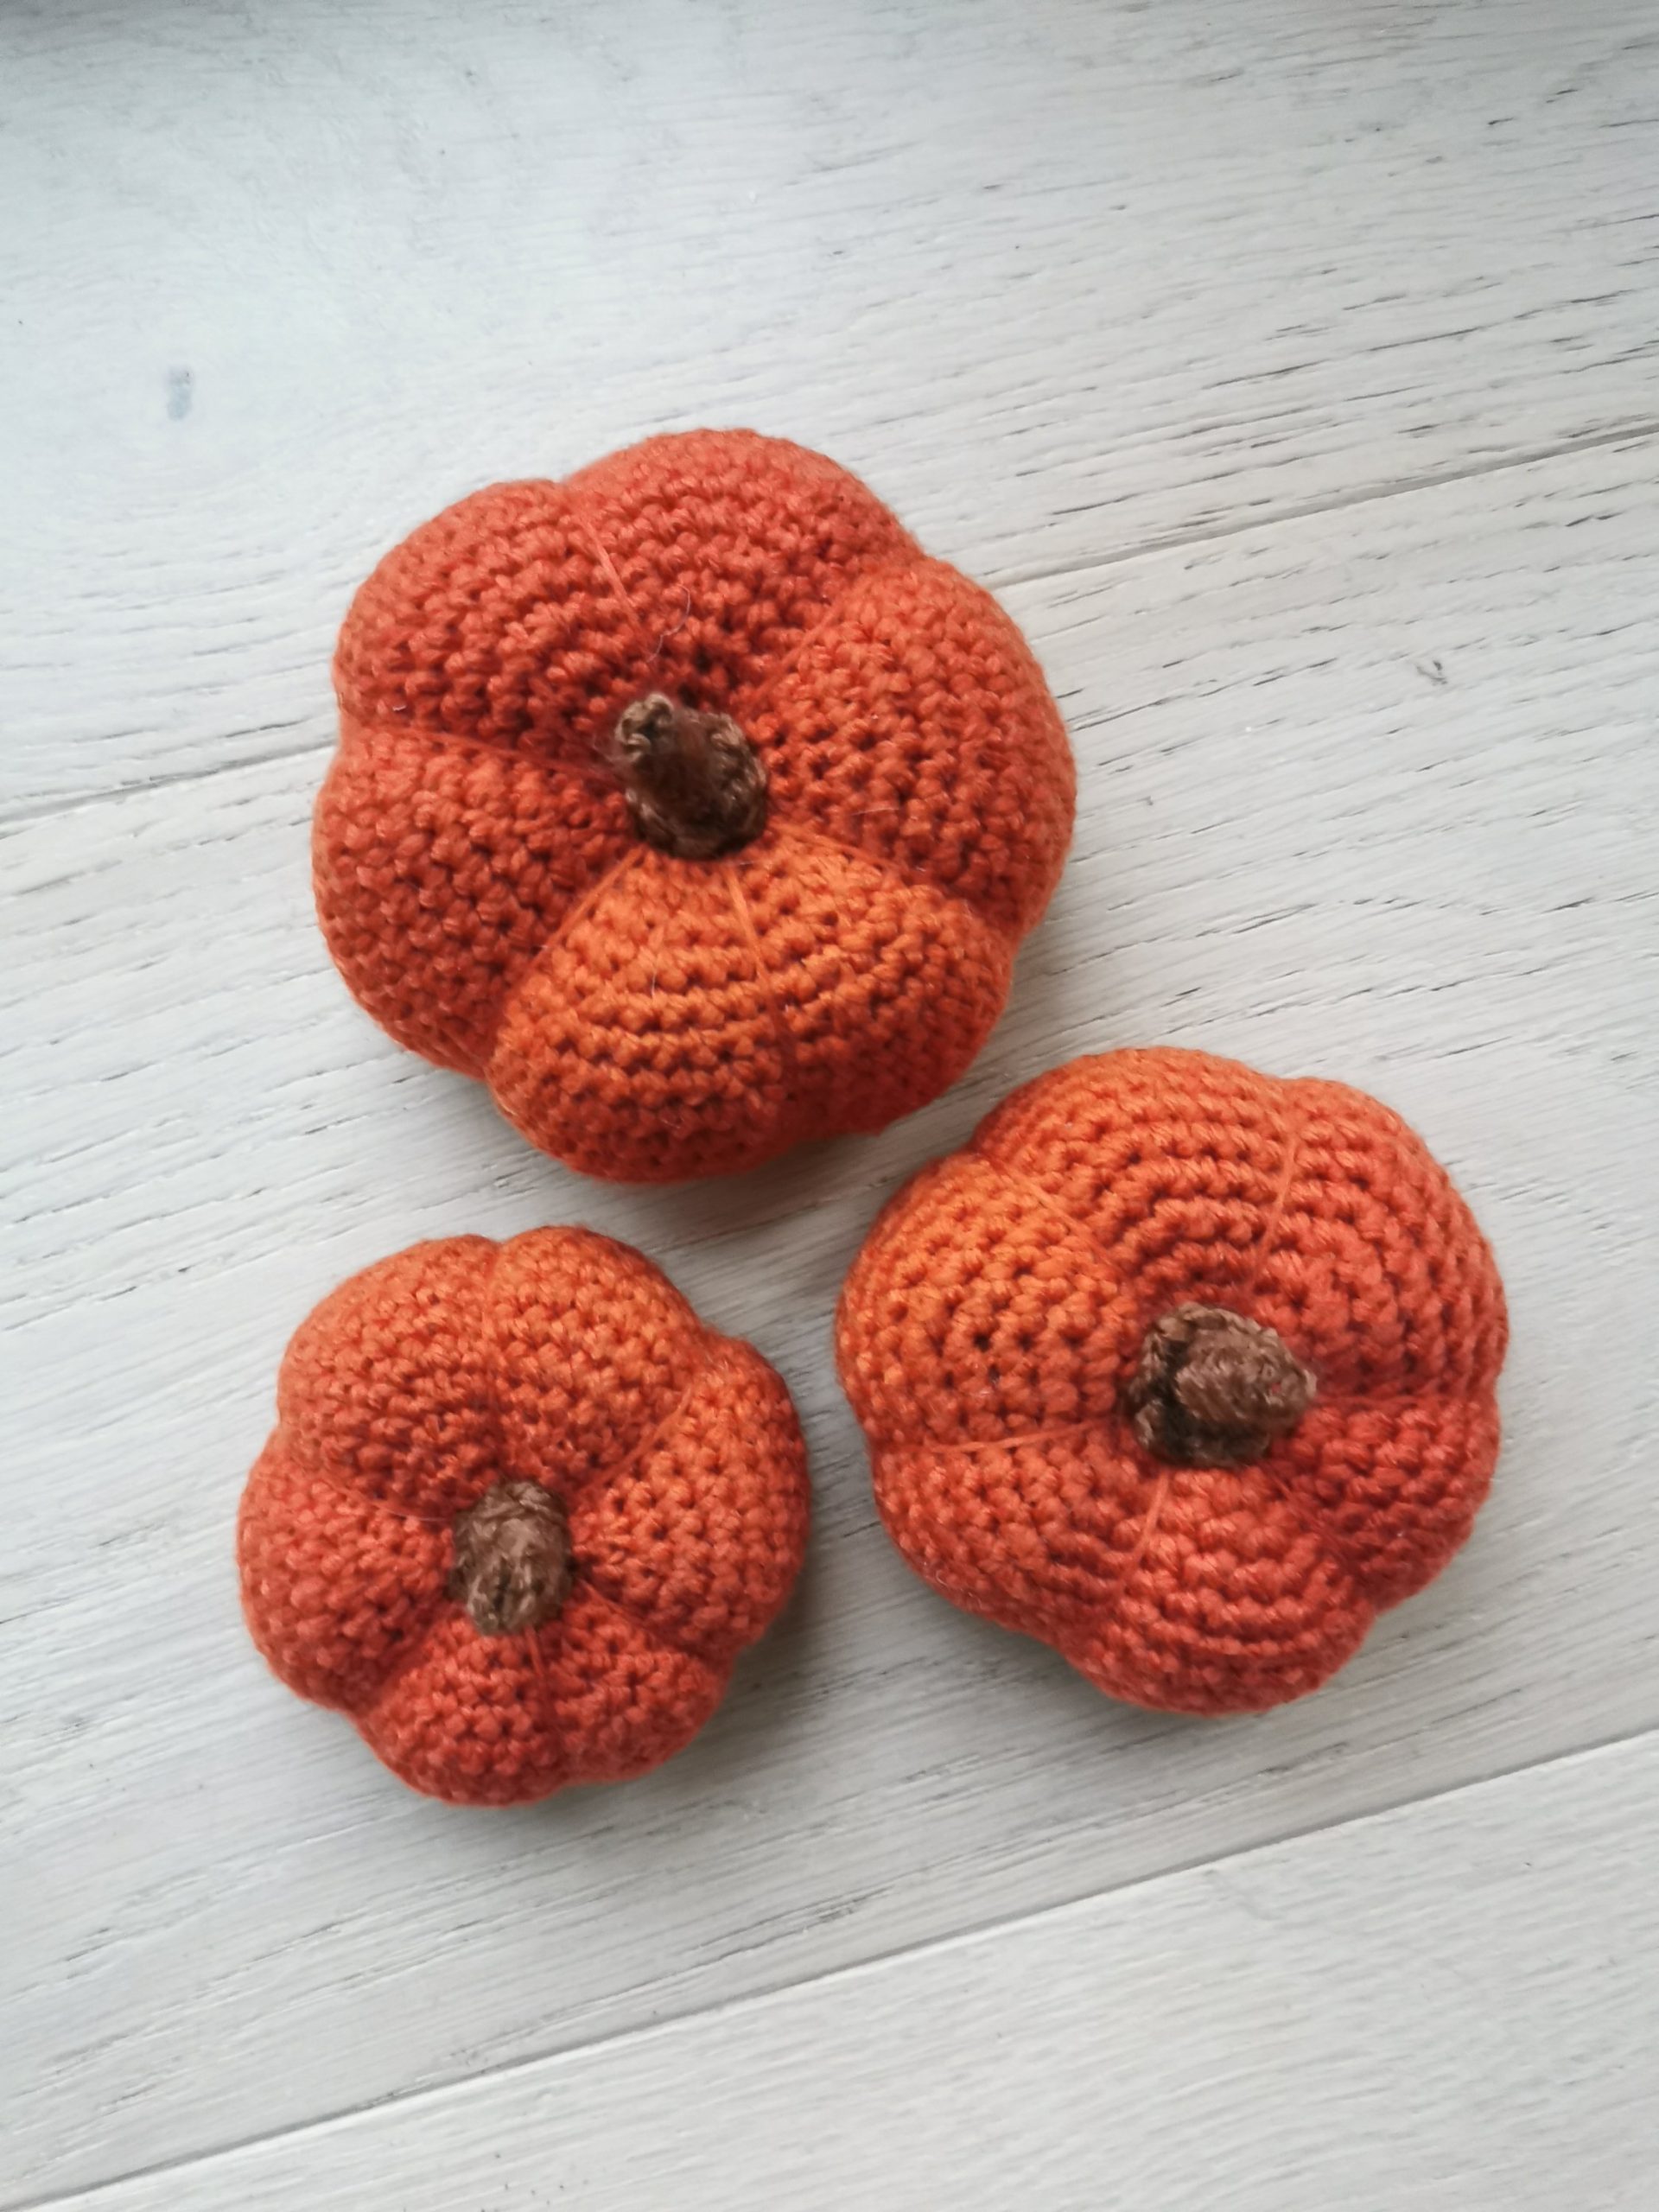
CROCHET PUMPKIN- big, medium and small
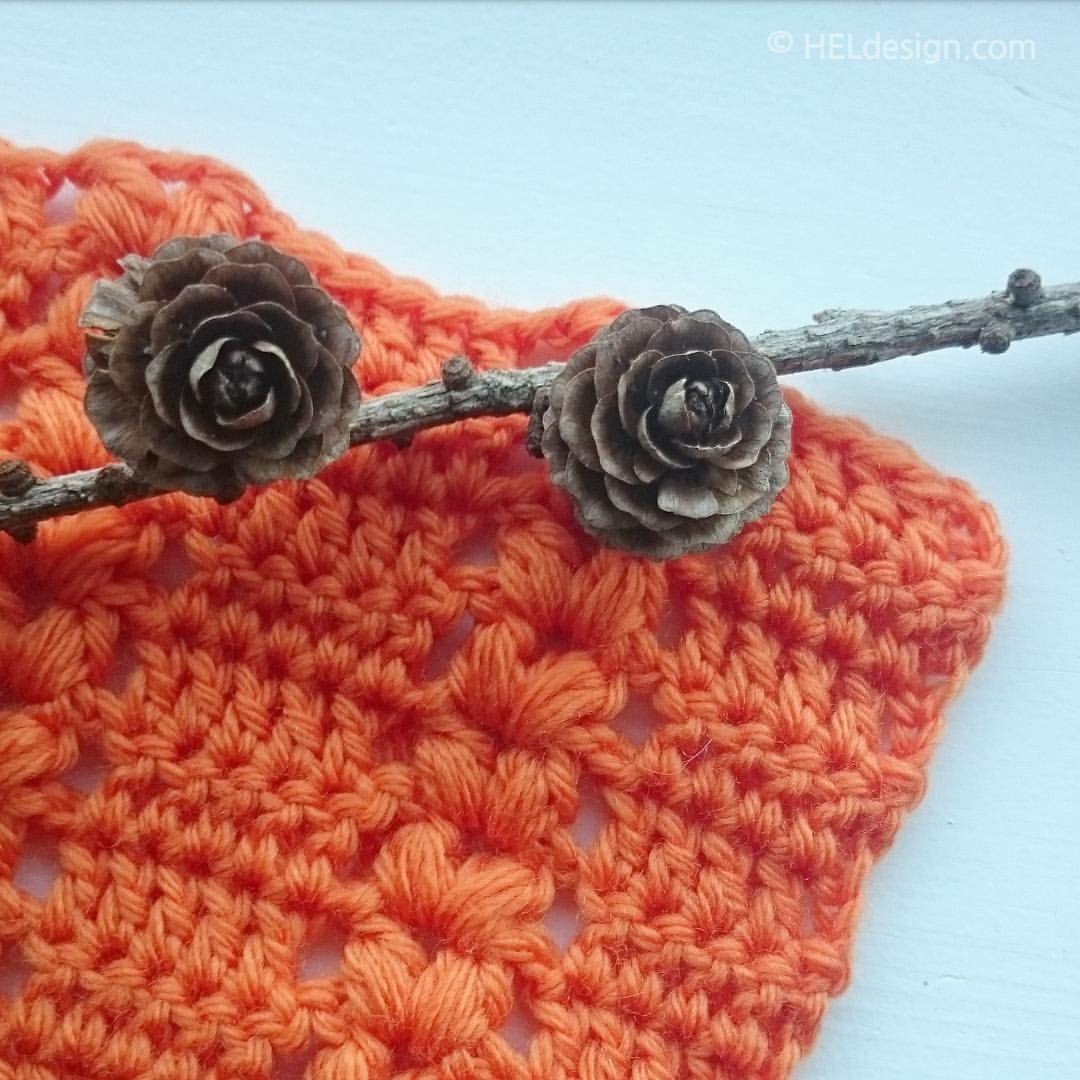
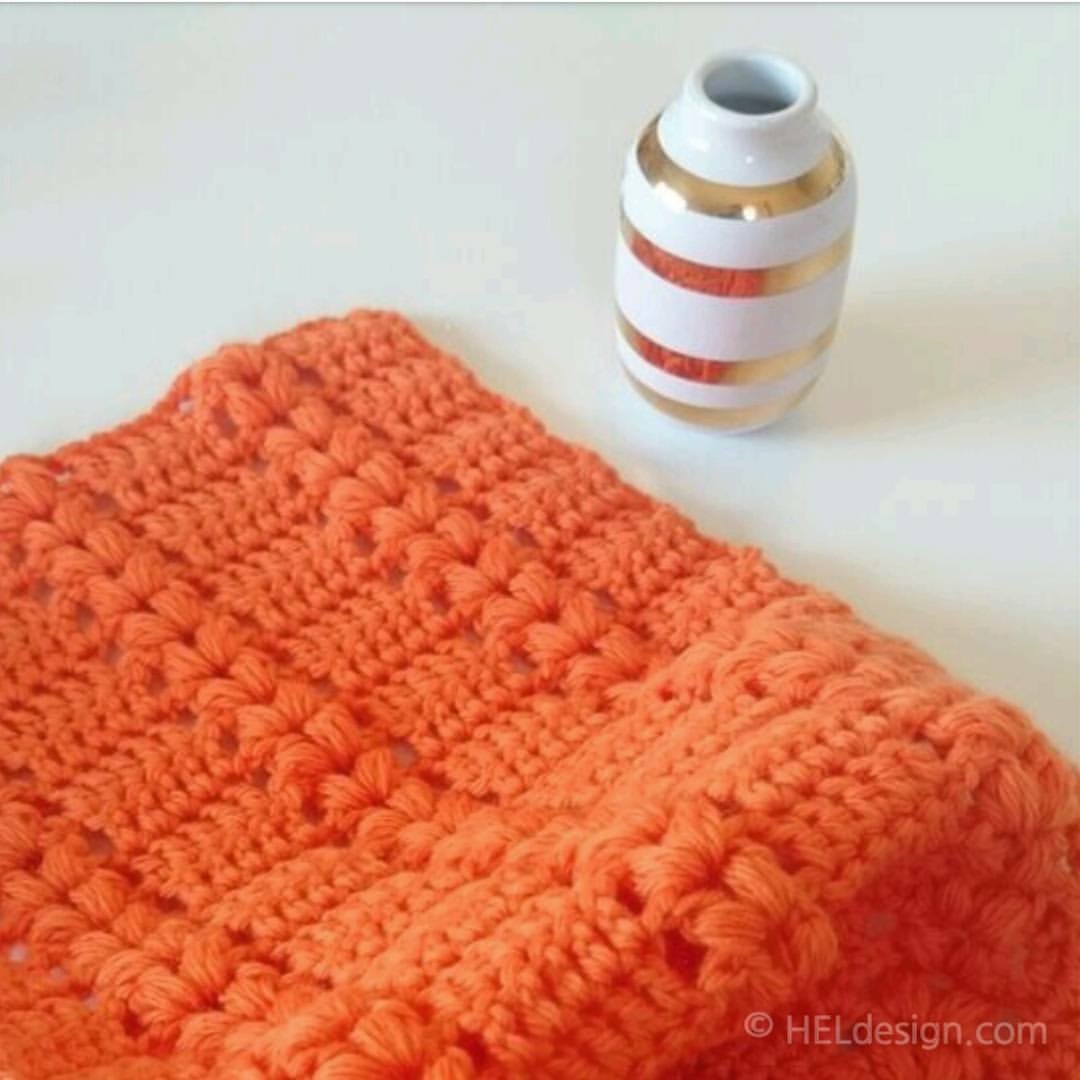
When autumn arrives I like to decorate my home with pumpkins, and last year I made a simple crochet pattern for a crochet pumpkin in three different sizes. There are numerous patterns like this on the internet, but I thought I’d share my pattern with you anyways. The pumpkins can be made in any type of yarn, so play around with different colours, sizes and also thickness of the yarn. And instead of making a stem you can also use a tiny branch (as shown in photos further down on the page).

MATERIALS
- Yarn – The pumpkin can be made in any type of yarn, so choose the yarn that suits you best
- Crochet Hook – The size that goes with the yarn you’re using, and one in a smaller size
- Filling / Wadding to stuff the pumpkins
- Needle
- Scissors
STITCHES / ABBREVIATIONS (UK terms)
- R (row/round)
- ch (chain/slip knot) – Watch video
- sl st (slip stitch) – Watch video
- dc (double crochet) – Watch video (video title shows US terms – sc (single crochet)
- MR (magic ring) – Watch video
- st (stitch)
- tog (together)
GAUGE
No gauge is necessary for this pattern, as it’s not a piece of clothing or something that requires exact measurments.
INFORMATION
- Read through the whole pattern before you start.
- Increase (example): When it says «2 sc, 2 sc in next st», it means that you make 1 sc in each of the two next stitches, and then 2 sc in the next stitch (you have then worked into 3 stitches in this example, ending up with 4 stitches).
- Decrease (example): When it says «2 sc, 2sc tog», it means that you make 1 sc in each of the next two stitches, and then you decrease the next two stitches by crocheting them together (you have then worked into 4 stitches in this example, ending up with 3 stitches).
- When you crochet in rounds it’s hard to see where the round ends and starts, so use a stitch marker or a piece of yarn to put a mark after each round.
- ** – Repeat everything written between * to * as many times as the pattern says, or to the end of the round.
CROCHET PATTERN
Crochet hook: Use the size that fits the yarn you’ve chosen.
CROCHET PUMPKIN – big size
R1: 6 dc in MR (6 dc).
Tip: hold off tightening the ring until you’re done with R2.
R2: 2 dc in each st (12 dc)
R3: *1 dc, 2 dc in next st* Repeat from * to * til the end of the round (18 dc)
R4: *2 dc, 2 dc in next st* (24 dc)
R5: *3 dc, 2 dc in next st* (30 dc)
R6: *4 dc, 2 dc in next st* (36 dc)
R7: *5 dc, 2 dc in next st* (42 dc)
R8: *6 dc, 2 dc in next st* (48 dc)
R9: *7 dc, 2 dc in next st* (54 dc)
R10-R18: 1 dc in each st (54 dc)
R19: *7 dc, 2 dc tog* (48 dc)
R20: *6 dc, 2 dc tog* (42 dc)
R21: *5 dc, 2 dc tog* (36 dc)
R22: *4 dc, 2 dc tog* (30 dc)
R23: *3 dc, 2 dc tog* (24 dc)
R24: *2 dc, 2 dc tog* (18 dc). Stuff the pumpkin.
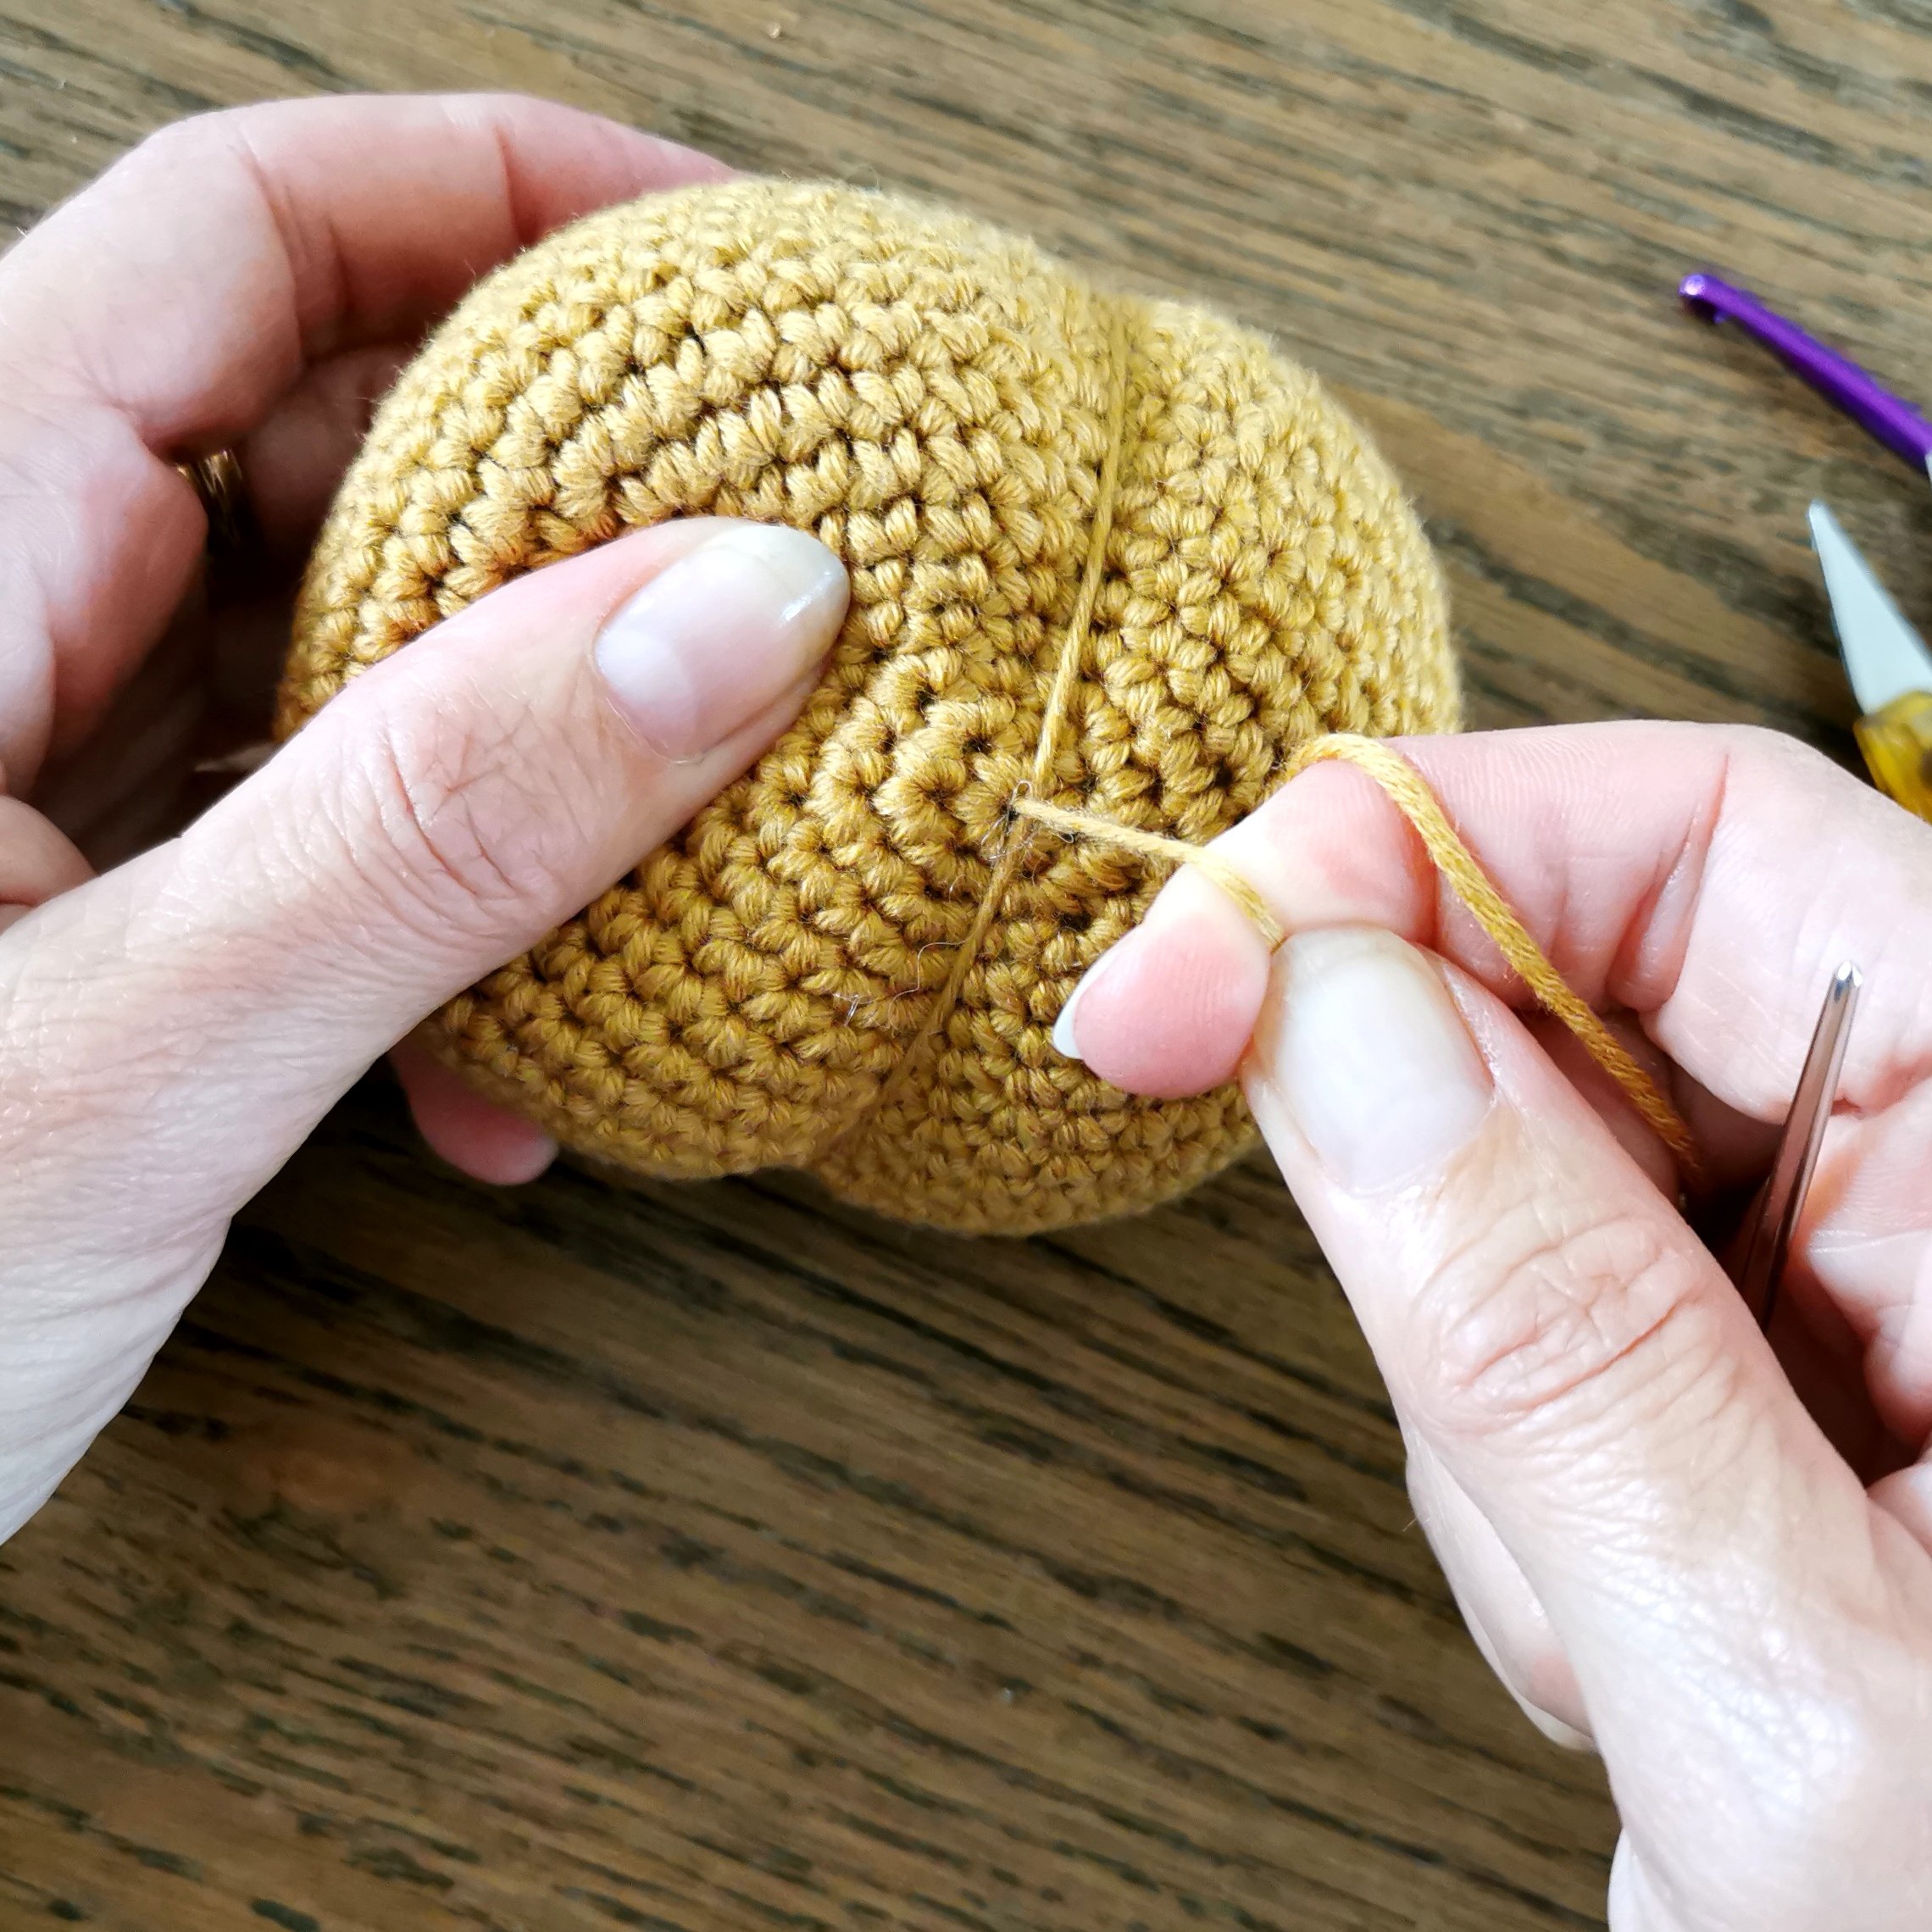
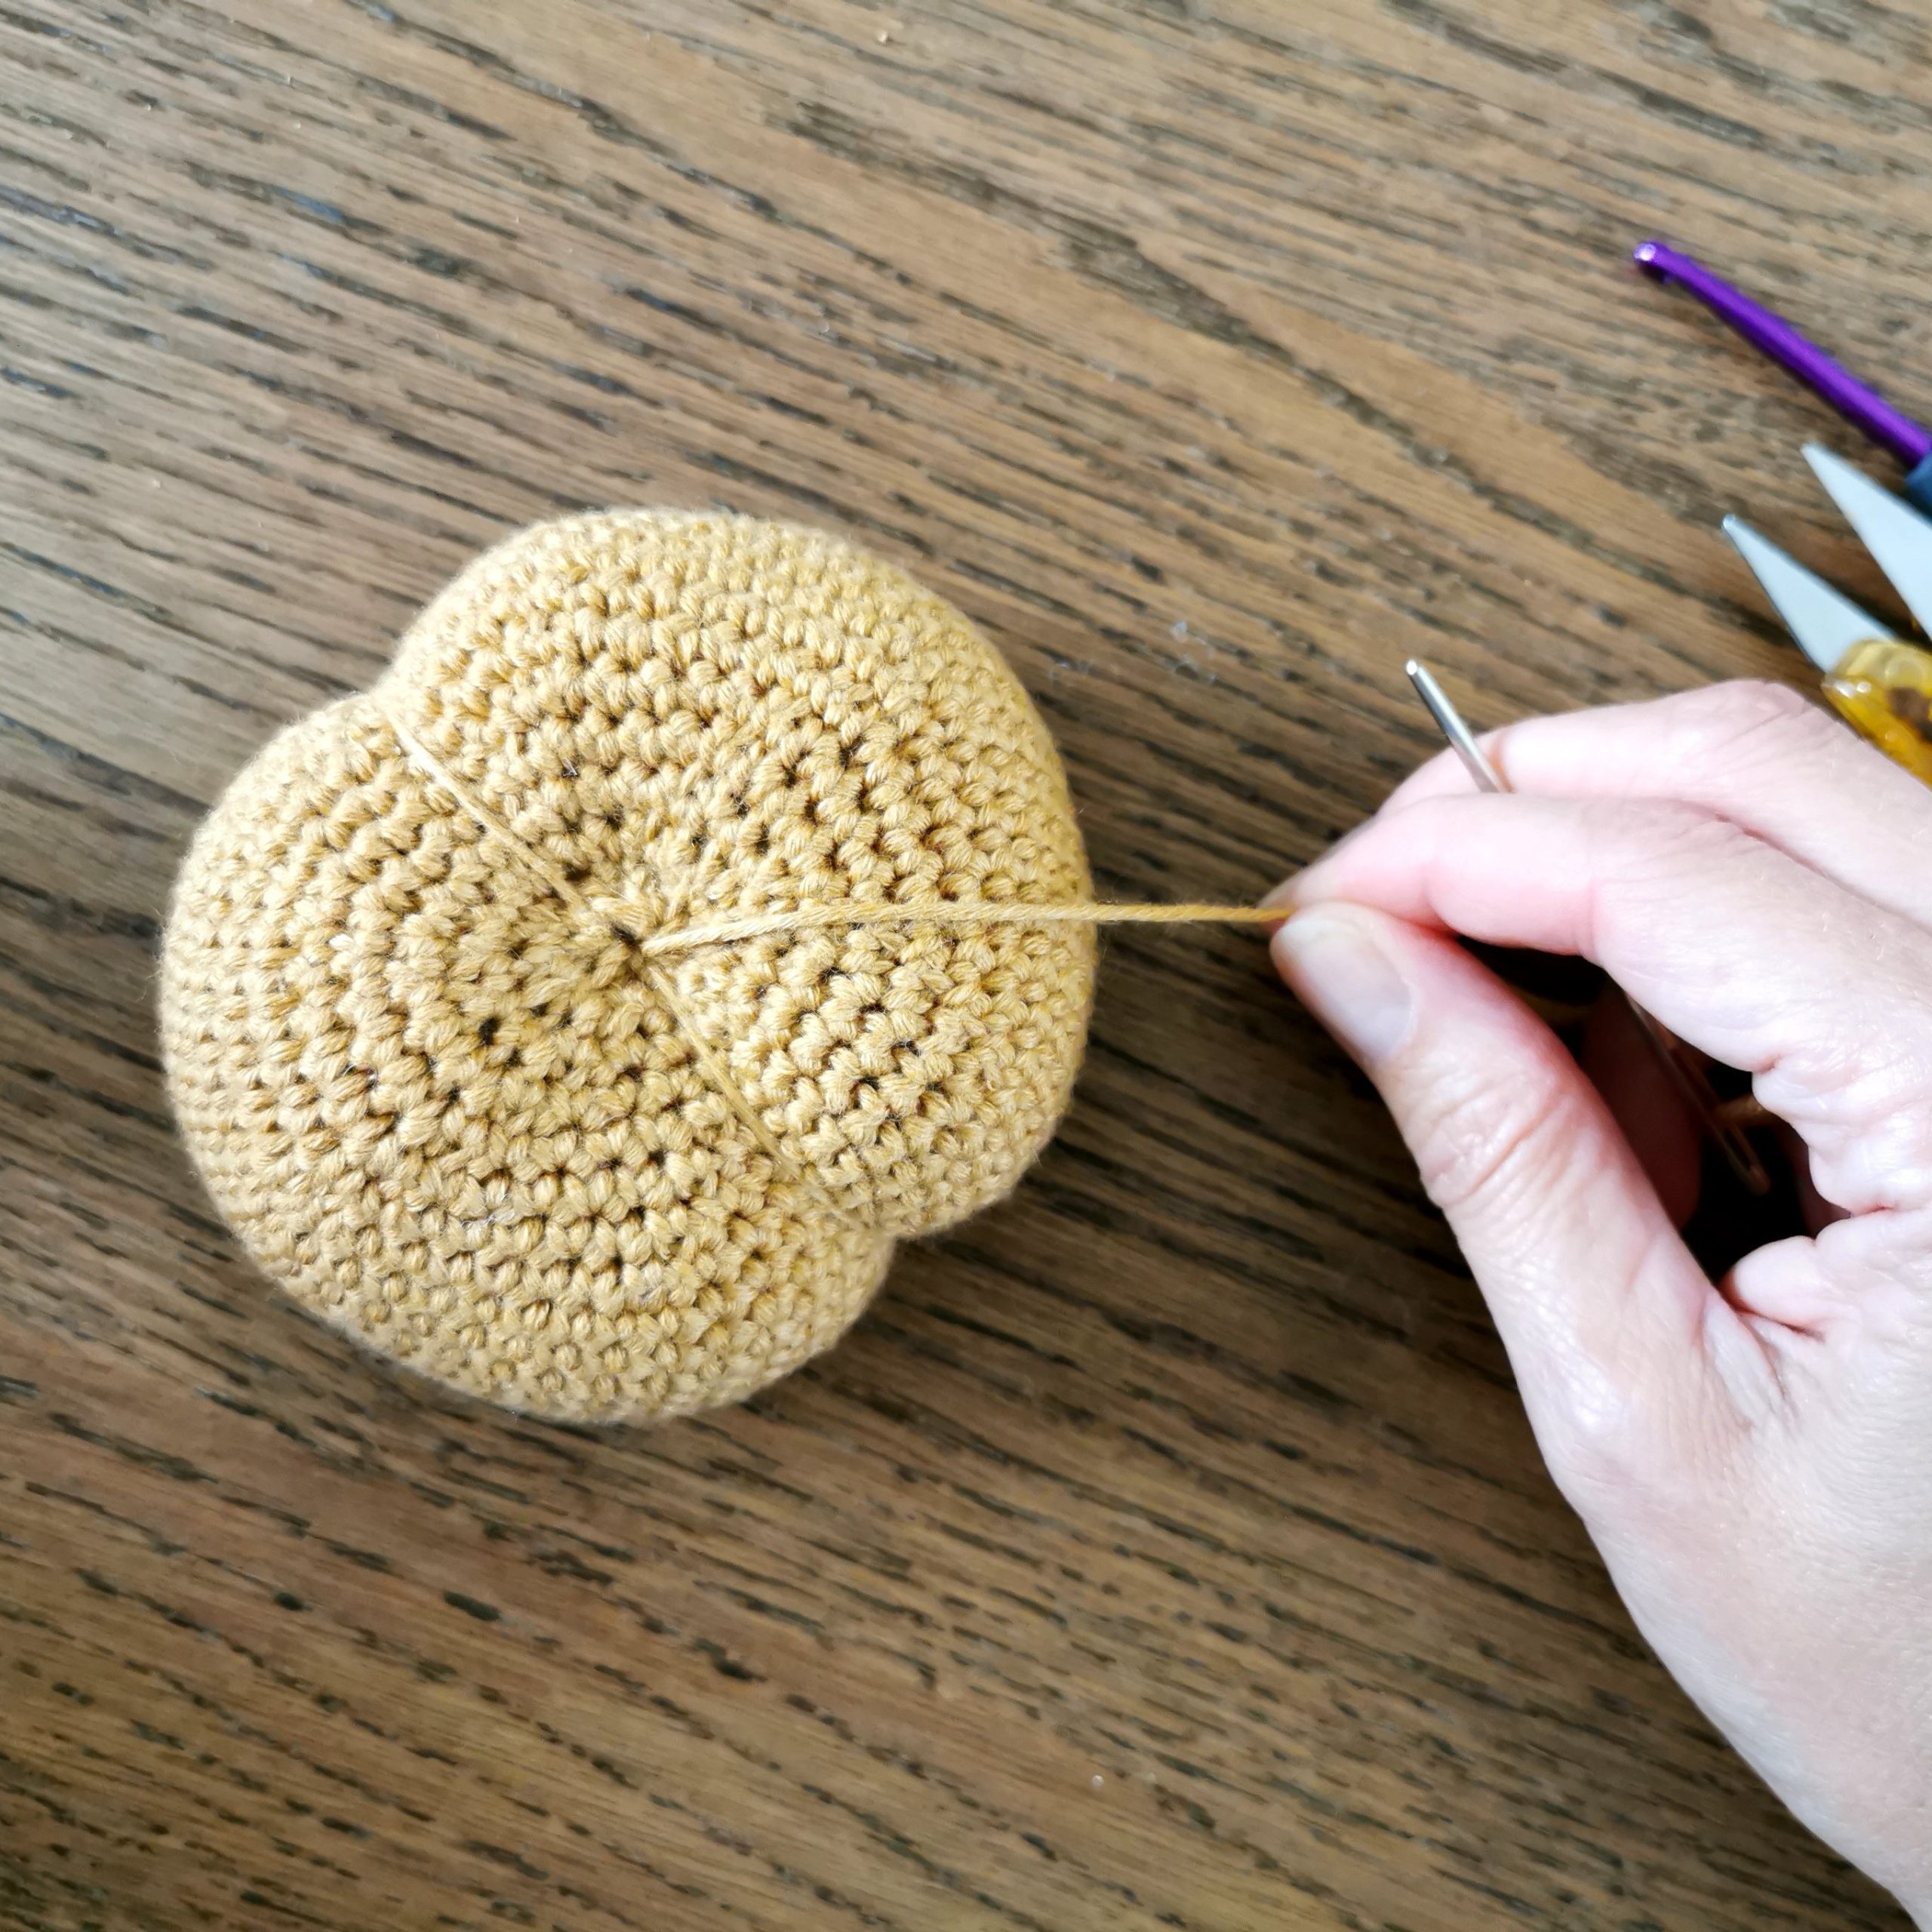
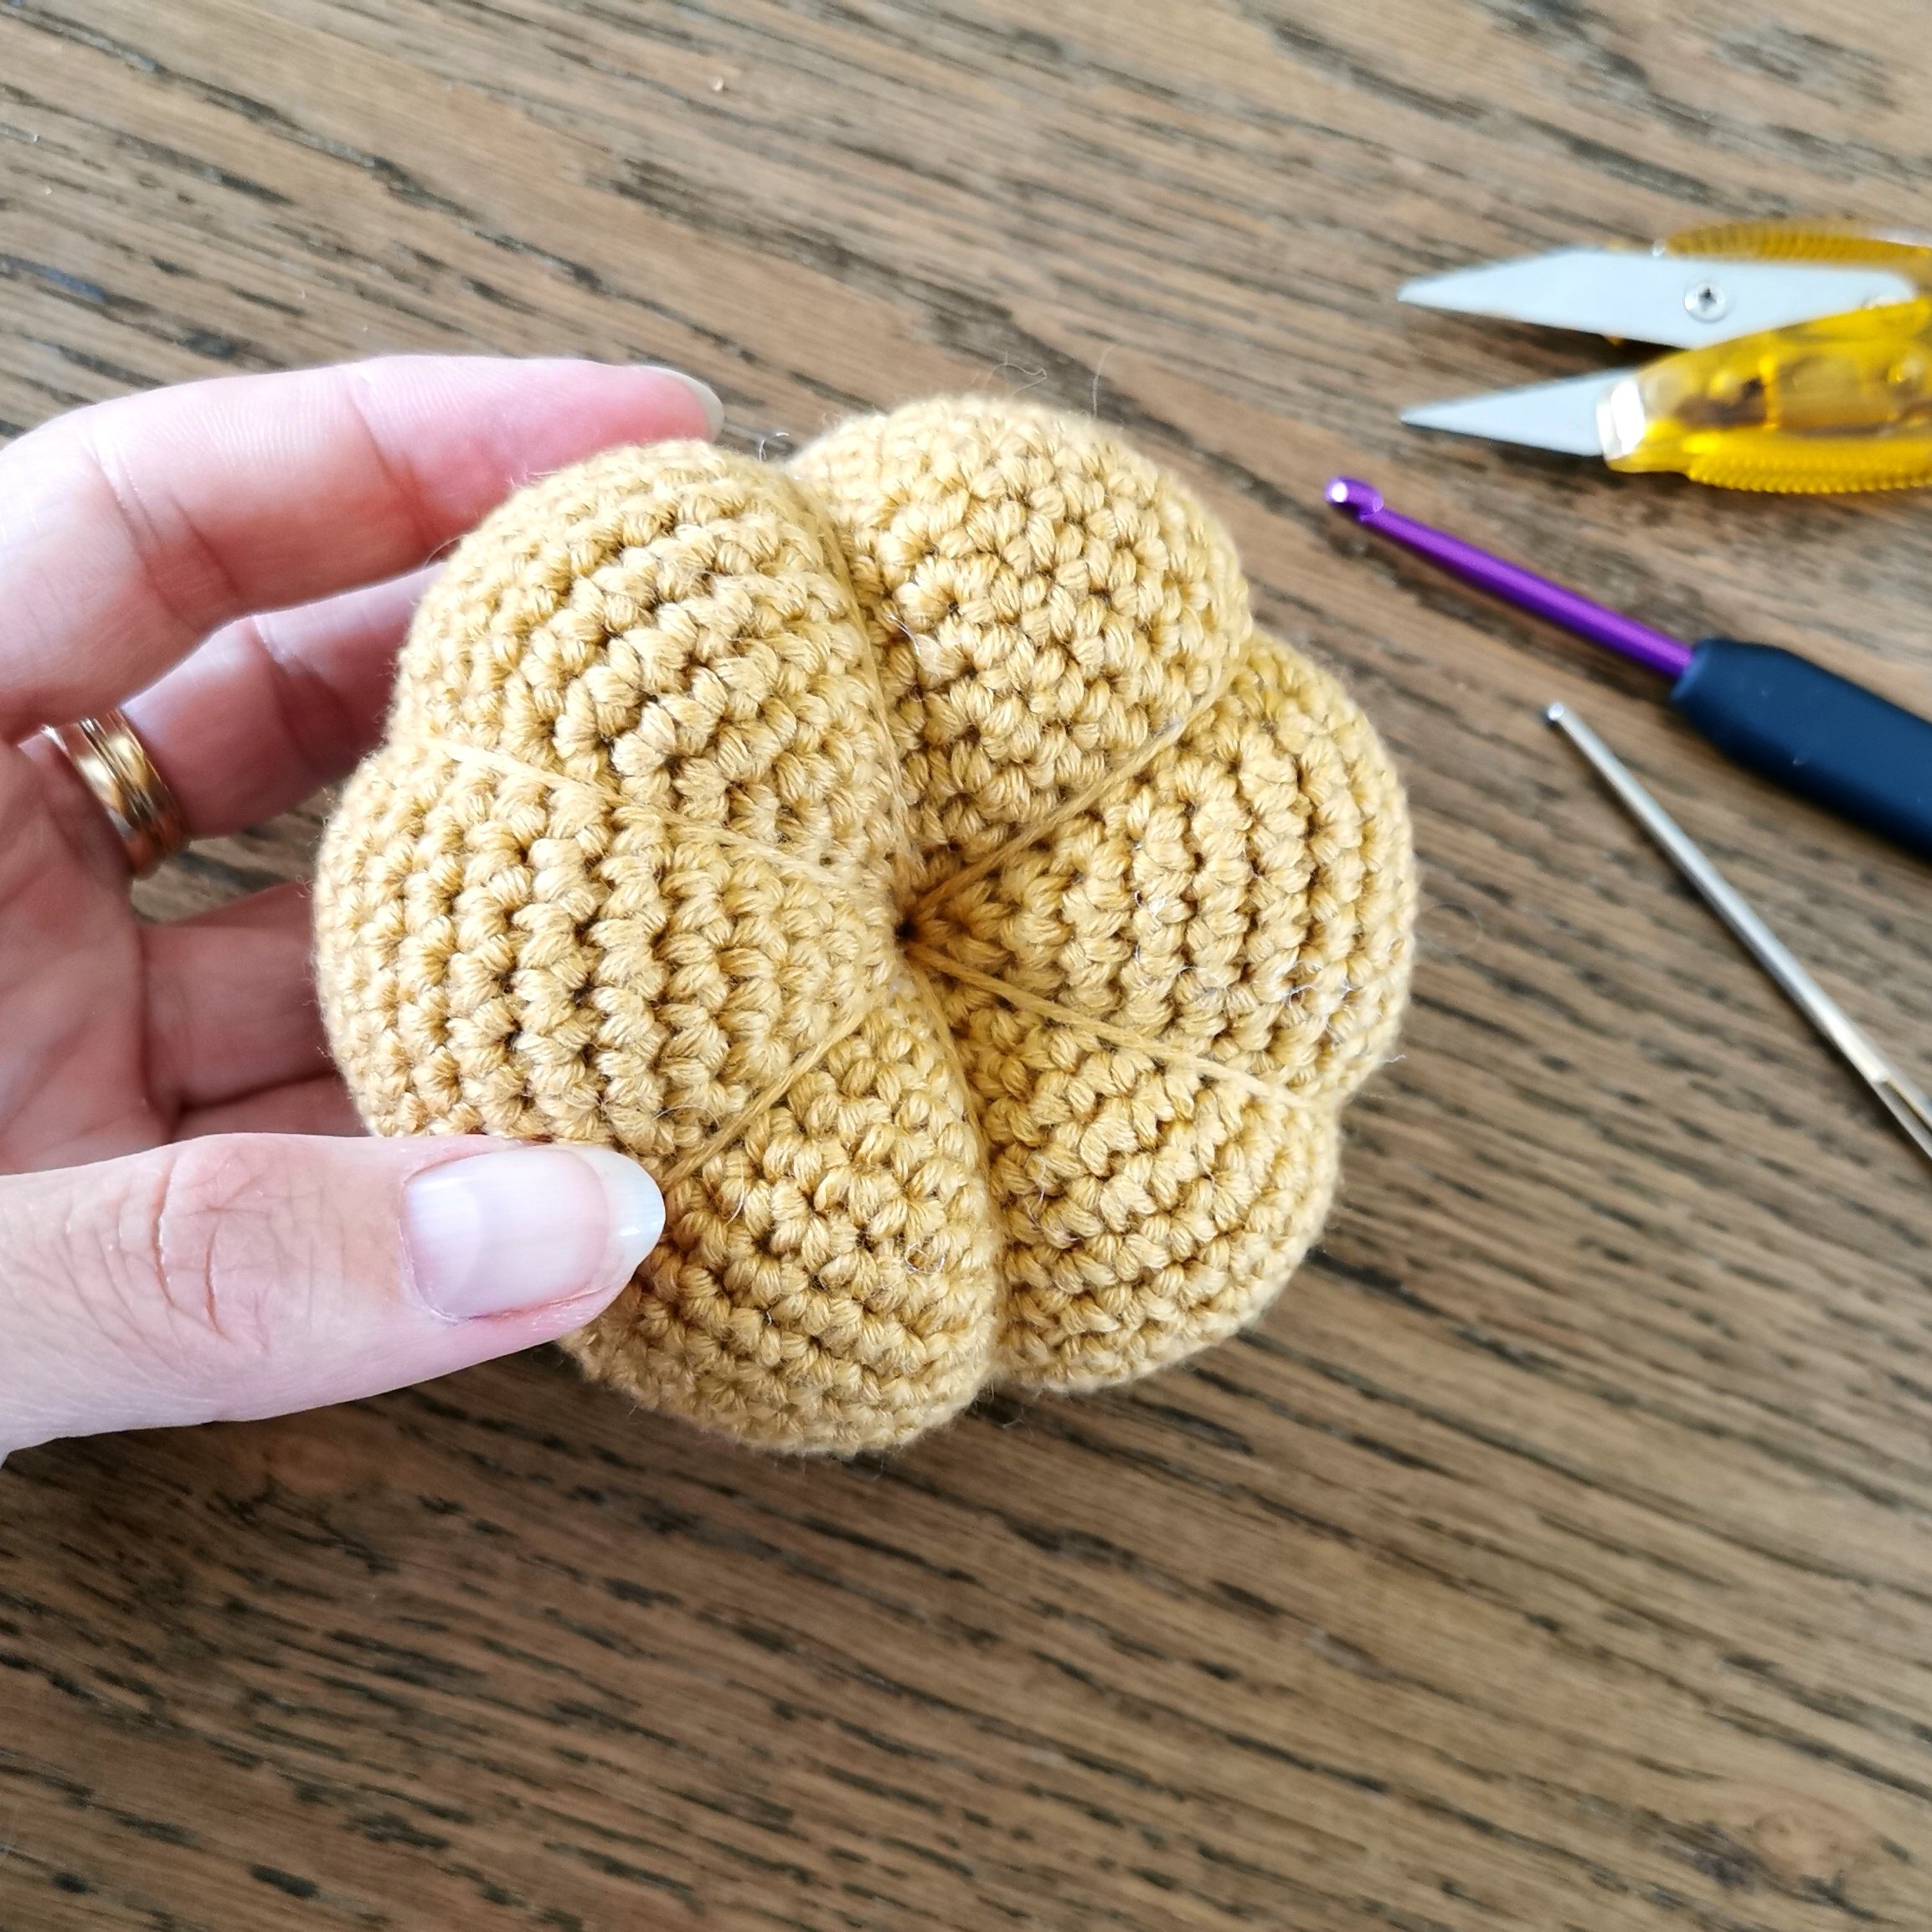
R25: *1 dc, 2 dc tog* (12 dc). Leave a long enough tail to shape the pumpkin (long enough to go around the ball about three times), cut the yarn and sew it through the remaining 12 dc, tighten together and fasten.
Shape the pumpkin as shown in the photos and video below.


CROCHET PUMPKIN – medium size
R1: 6 dc in MR (6 dc).
Tip: hold off tightening the ring until you’re done with R2.
R2: 2 dc in each st (12 dc)
R3: *1 dc, 2 dc in next st* Repeat from * to * til the end of the round (18 dc)
R4: *2 dc, 2 dc in next st* (24 dc)
R5: *3 dc, 2 dc in next st* (30 dc)
R6: *4 dc, 2 dc in next st* (36 dc)
R7: *5 dc, 2 dc in next st* (42 dc)
R8: *6 dc, 2 dc in next st* (48 dc)
R9-R16: 1 dc in each st (48 dc)
R17: *6 dc, 2 dc tog* (42 dc)
R18: *5 dc, 2 dc tog* (36 dc)
R19: *4 dc, 2 dc tog* (30 dc)
R20: *3 dc, 2 dc tog* (24 dc)
R21: *2 dc, 2 dc tog* (18 dc). Stuff the pumpkin.
R22: *1 dc, 2 dc tog* (12 dc). Leave a long enough tail to shape the pumpkin (long enough to go around the ball about three times), cut the yarn and sew it through the remaining 12 dc, tighten together and fasten.
Shape the pumpkin as showed under the big size.
CROCHET PUMPKIN – small size
R1: 6 dc in MR (6 dc).
Tip: hold off tightening the ring until you’re done with R2.
R2: 2 dc in each st (12 dc)
R3: *1 dc, 2 dc in next st* Repeat from * to * til the end of the round (18 dc)
R4: *2 dc, 2 dc in next st* (24 dc)
R5: *3 dc, 2 dc in next st* (30 dc)
R6: *4 dc, 2 dc in next st* (36 dc)
R7: *5 dc, 2 dc in next st* (42 dc)
R8-R14: 1 dc in each st (42 dc)
R15: *5 dc, 2 dc tog* (36 dc)
R16: *4 dc, 2 dc tog* (30 dc)
R17: *3 dc, 2 dc tog* (24 dc)
R18: *2 dc, 2 dc tog* (18 dc). Stuff the pumpkin.
R19: *1 dc, 2 dc tog* (12 dc). Leave a long enough tail to shape the pumpkin (long enough to go around the ball about three times), cut the yarn and sew it through the remaining 12 dc, tighten together and fasten.
Shape the pumpkin as showed under the big size.
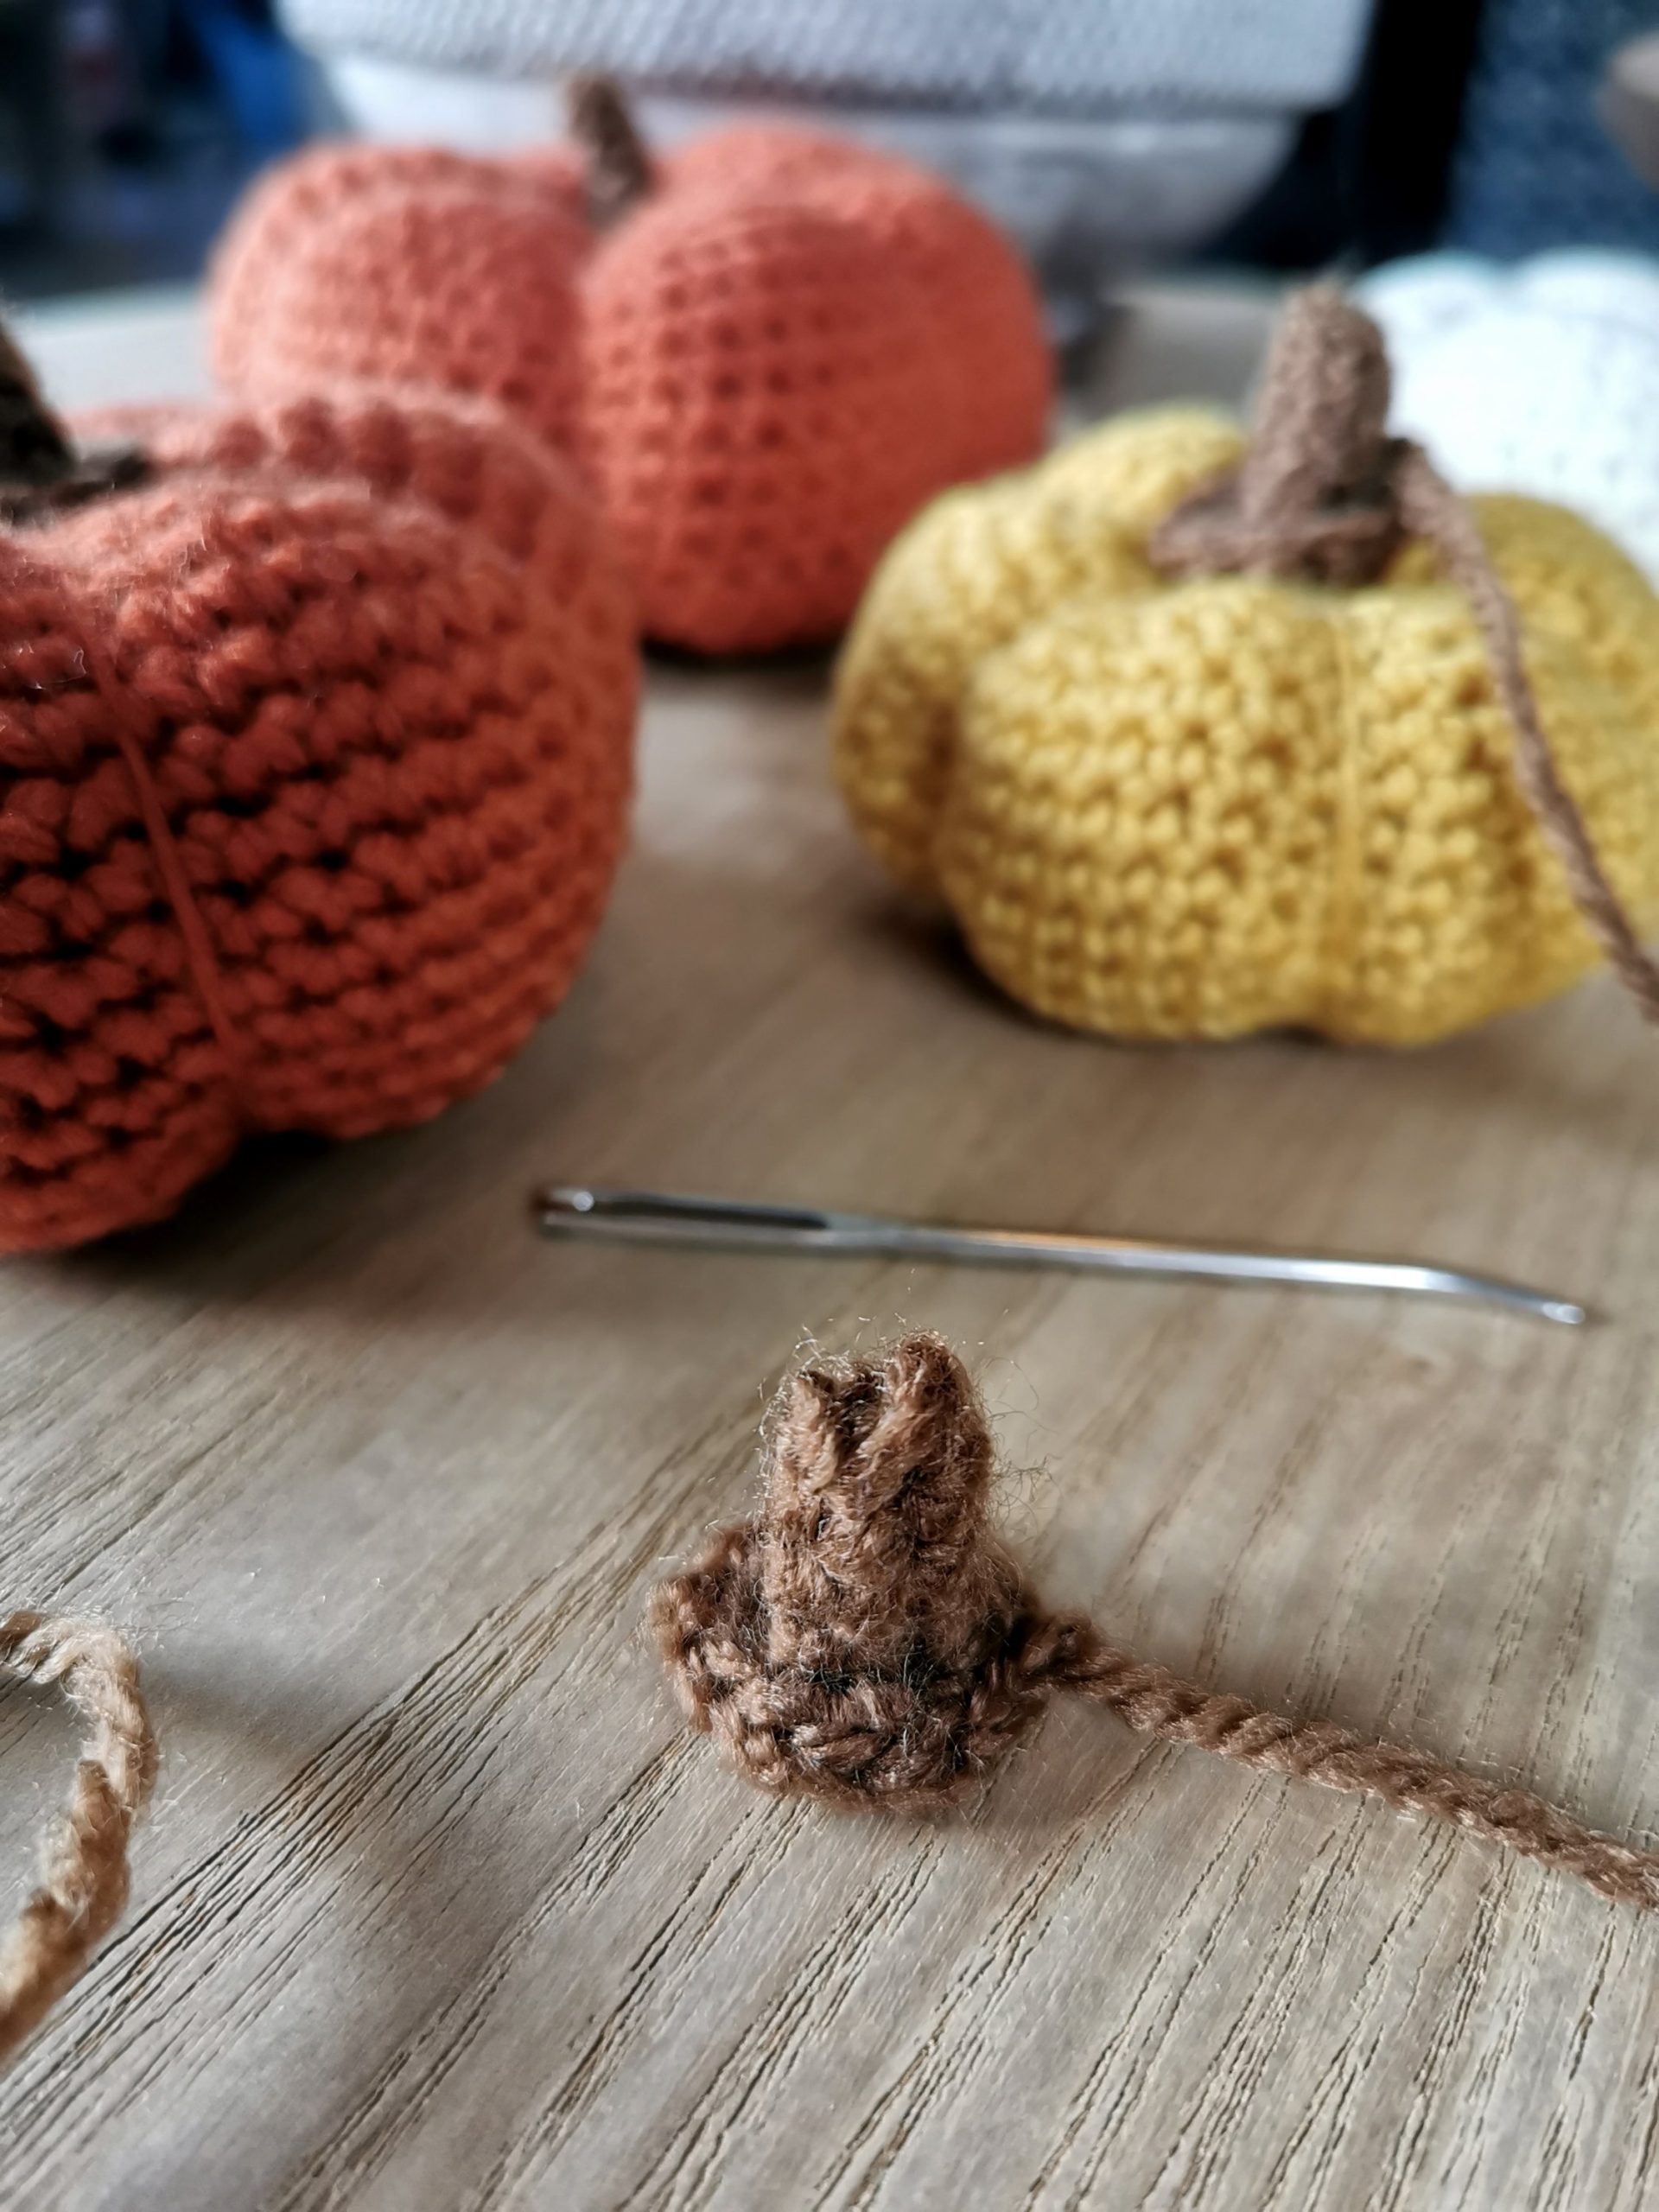
STEM – make one for each size
Crochet hook: Use one size smaller than the one you used for the pumpkins.
Chain 5
R1: 1 dc in second chain from hook, 3 dc, turn (4 dc)
R2-R4: 1 ch, 4 dc, turn (4 dc)
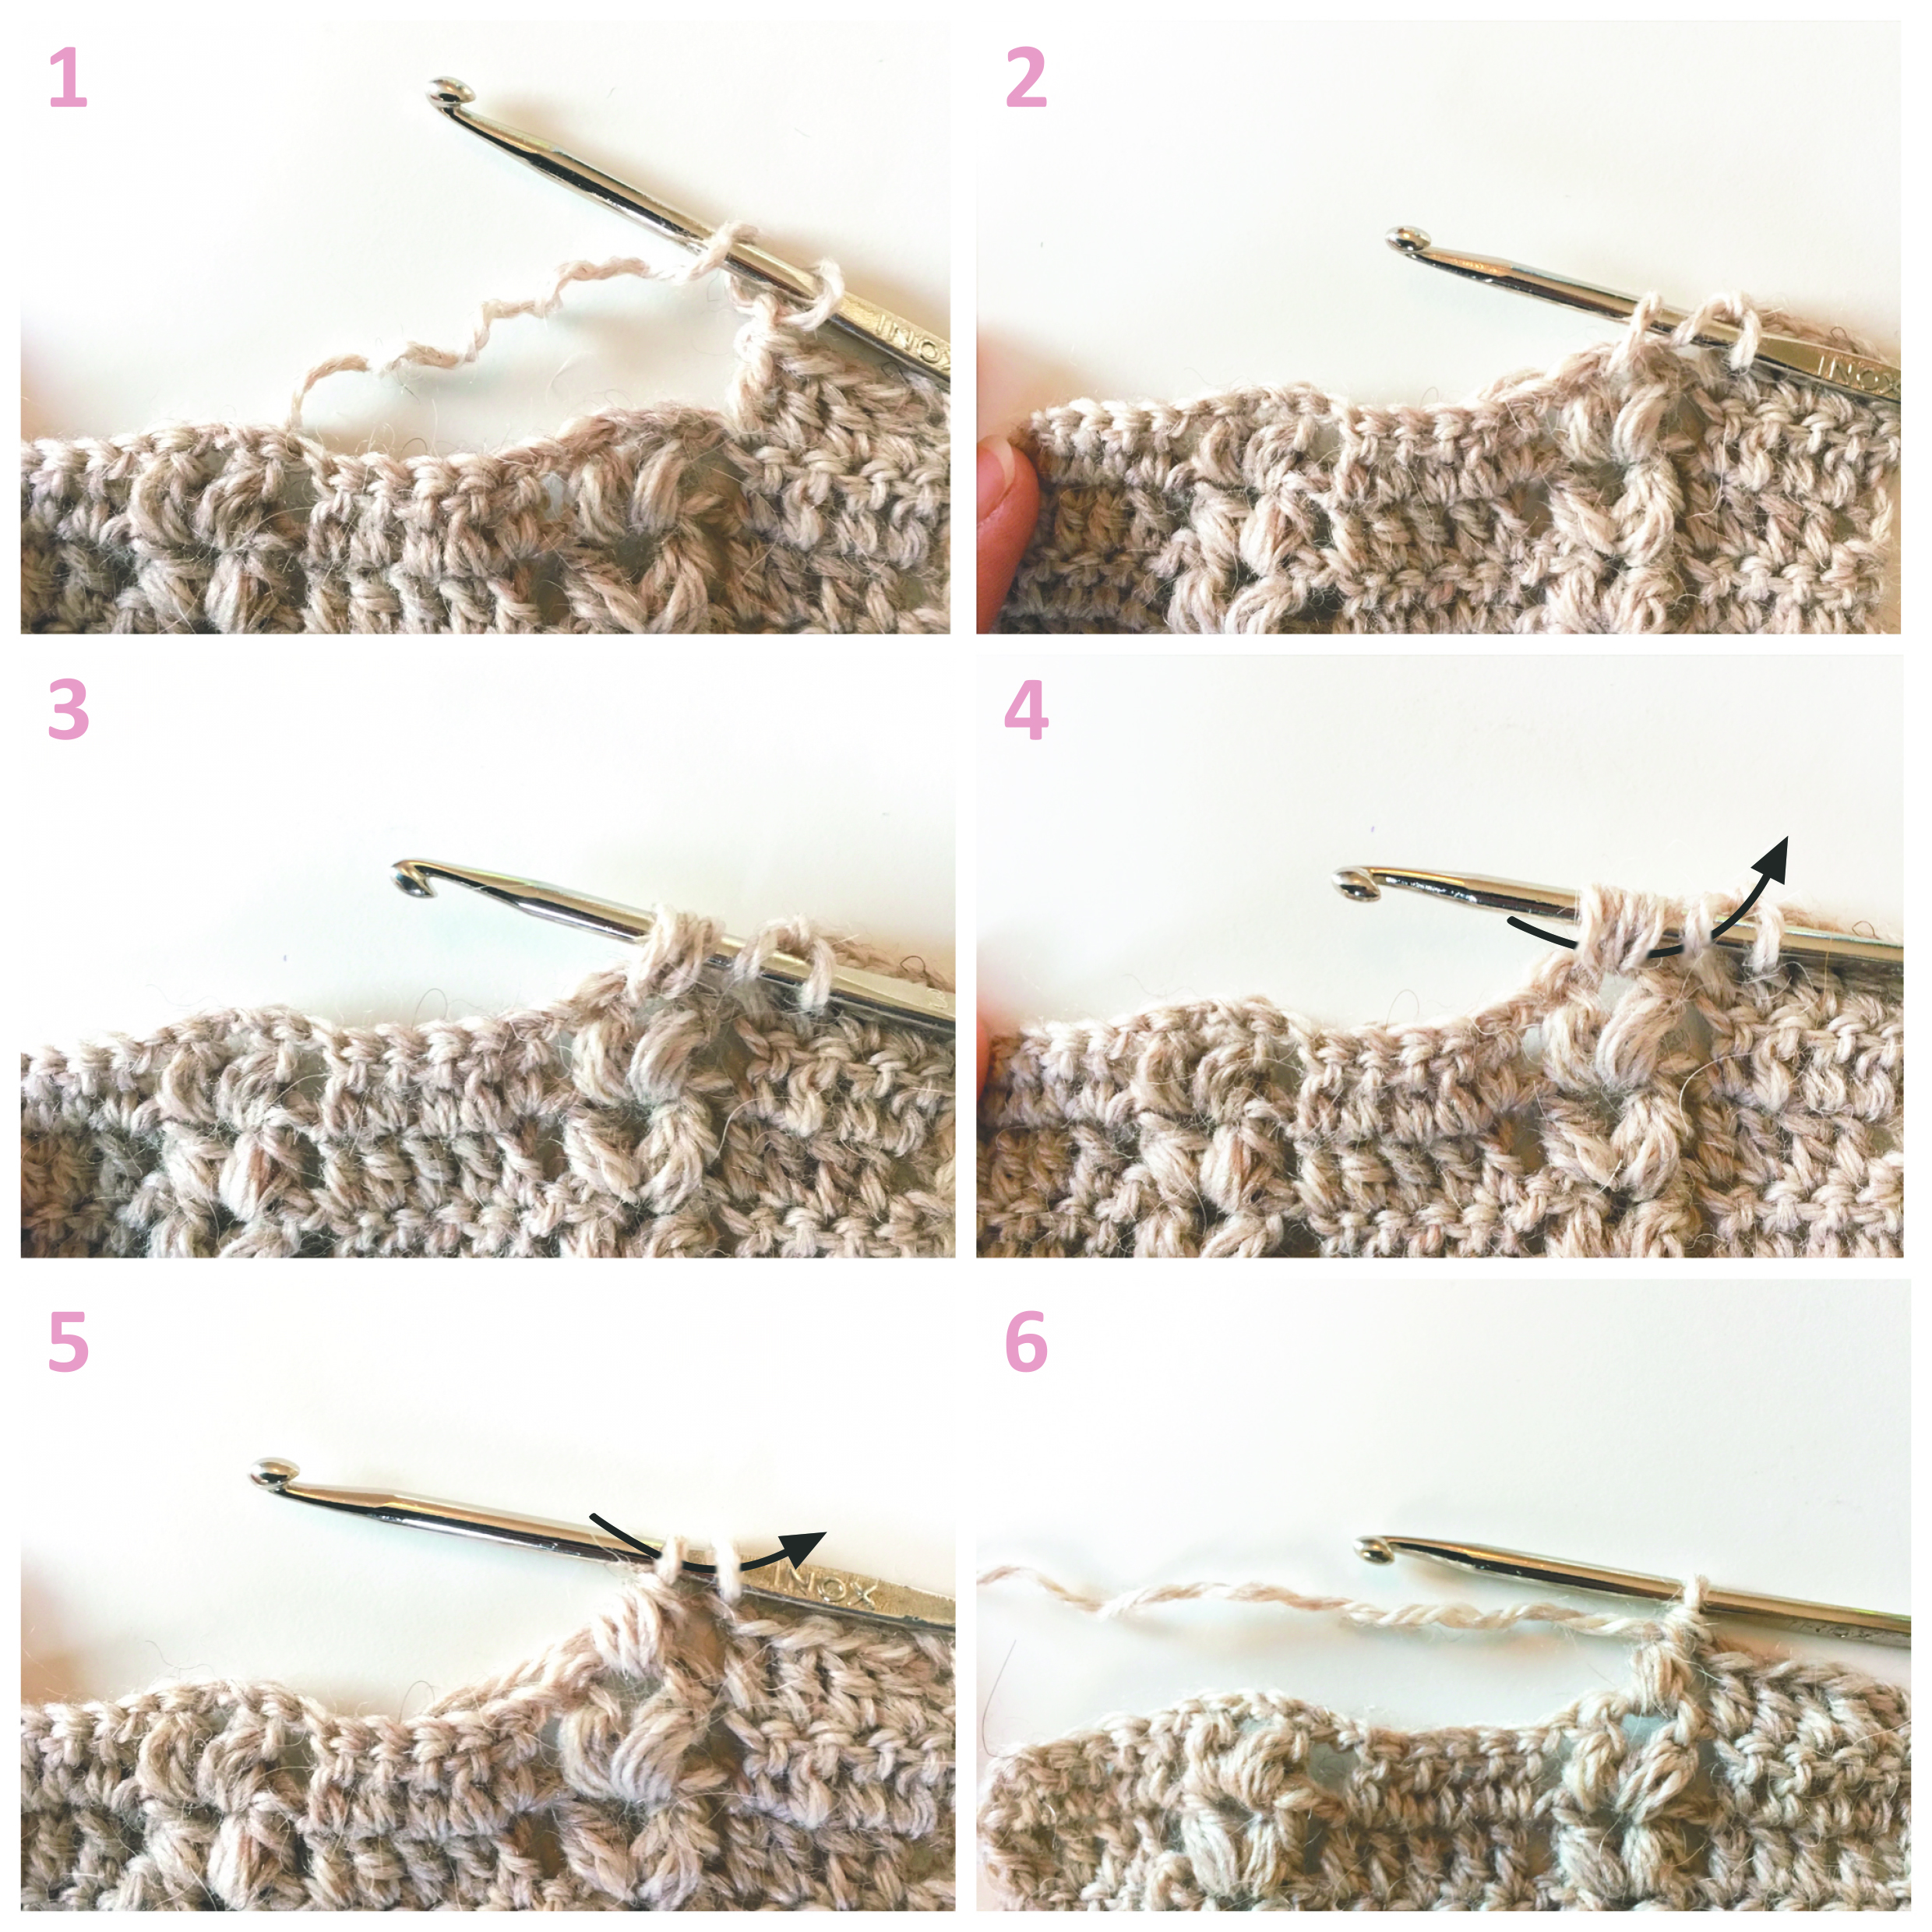
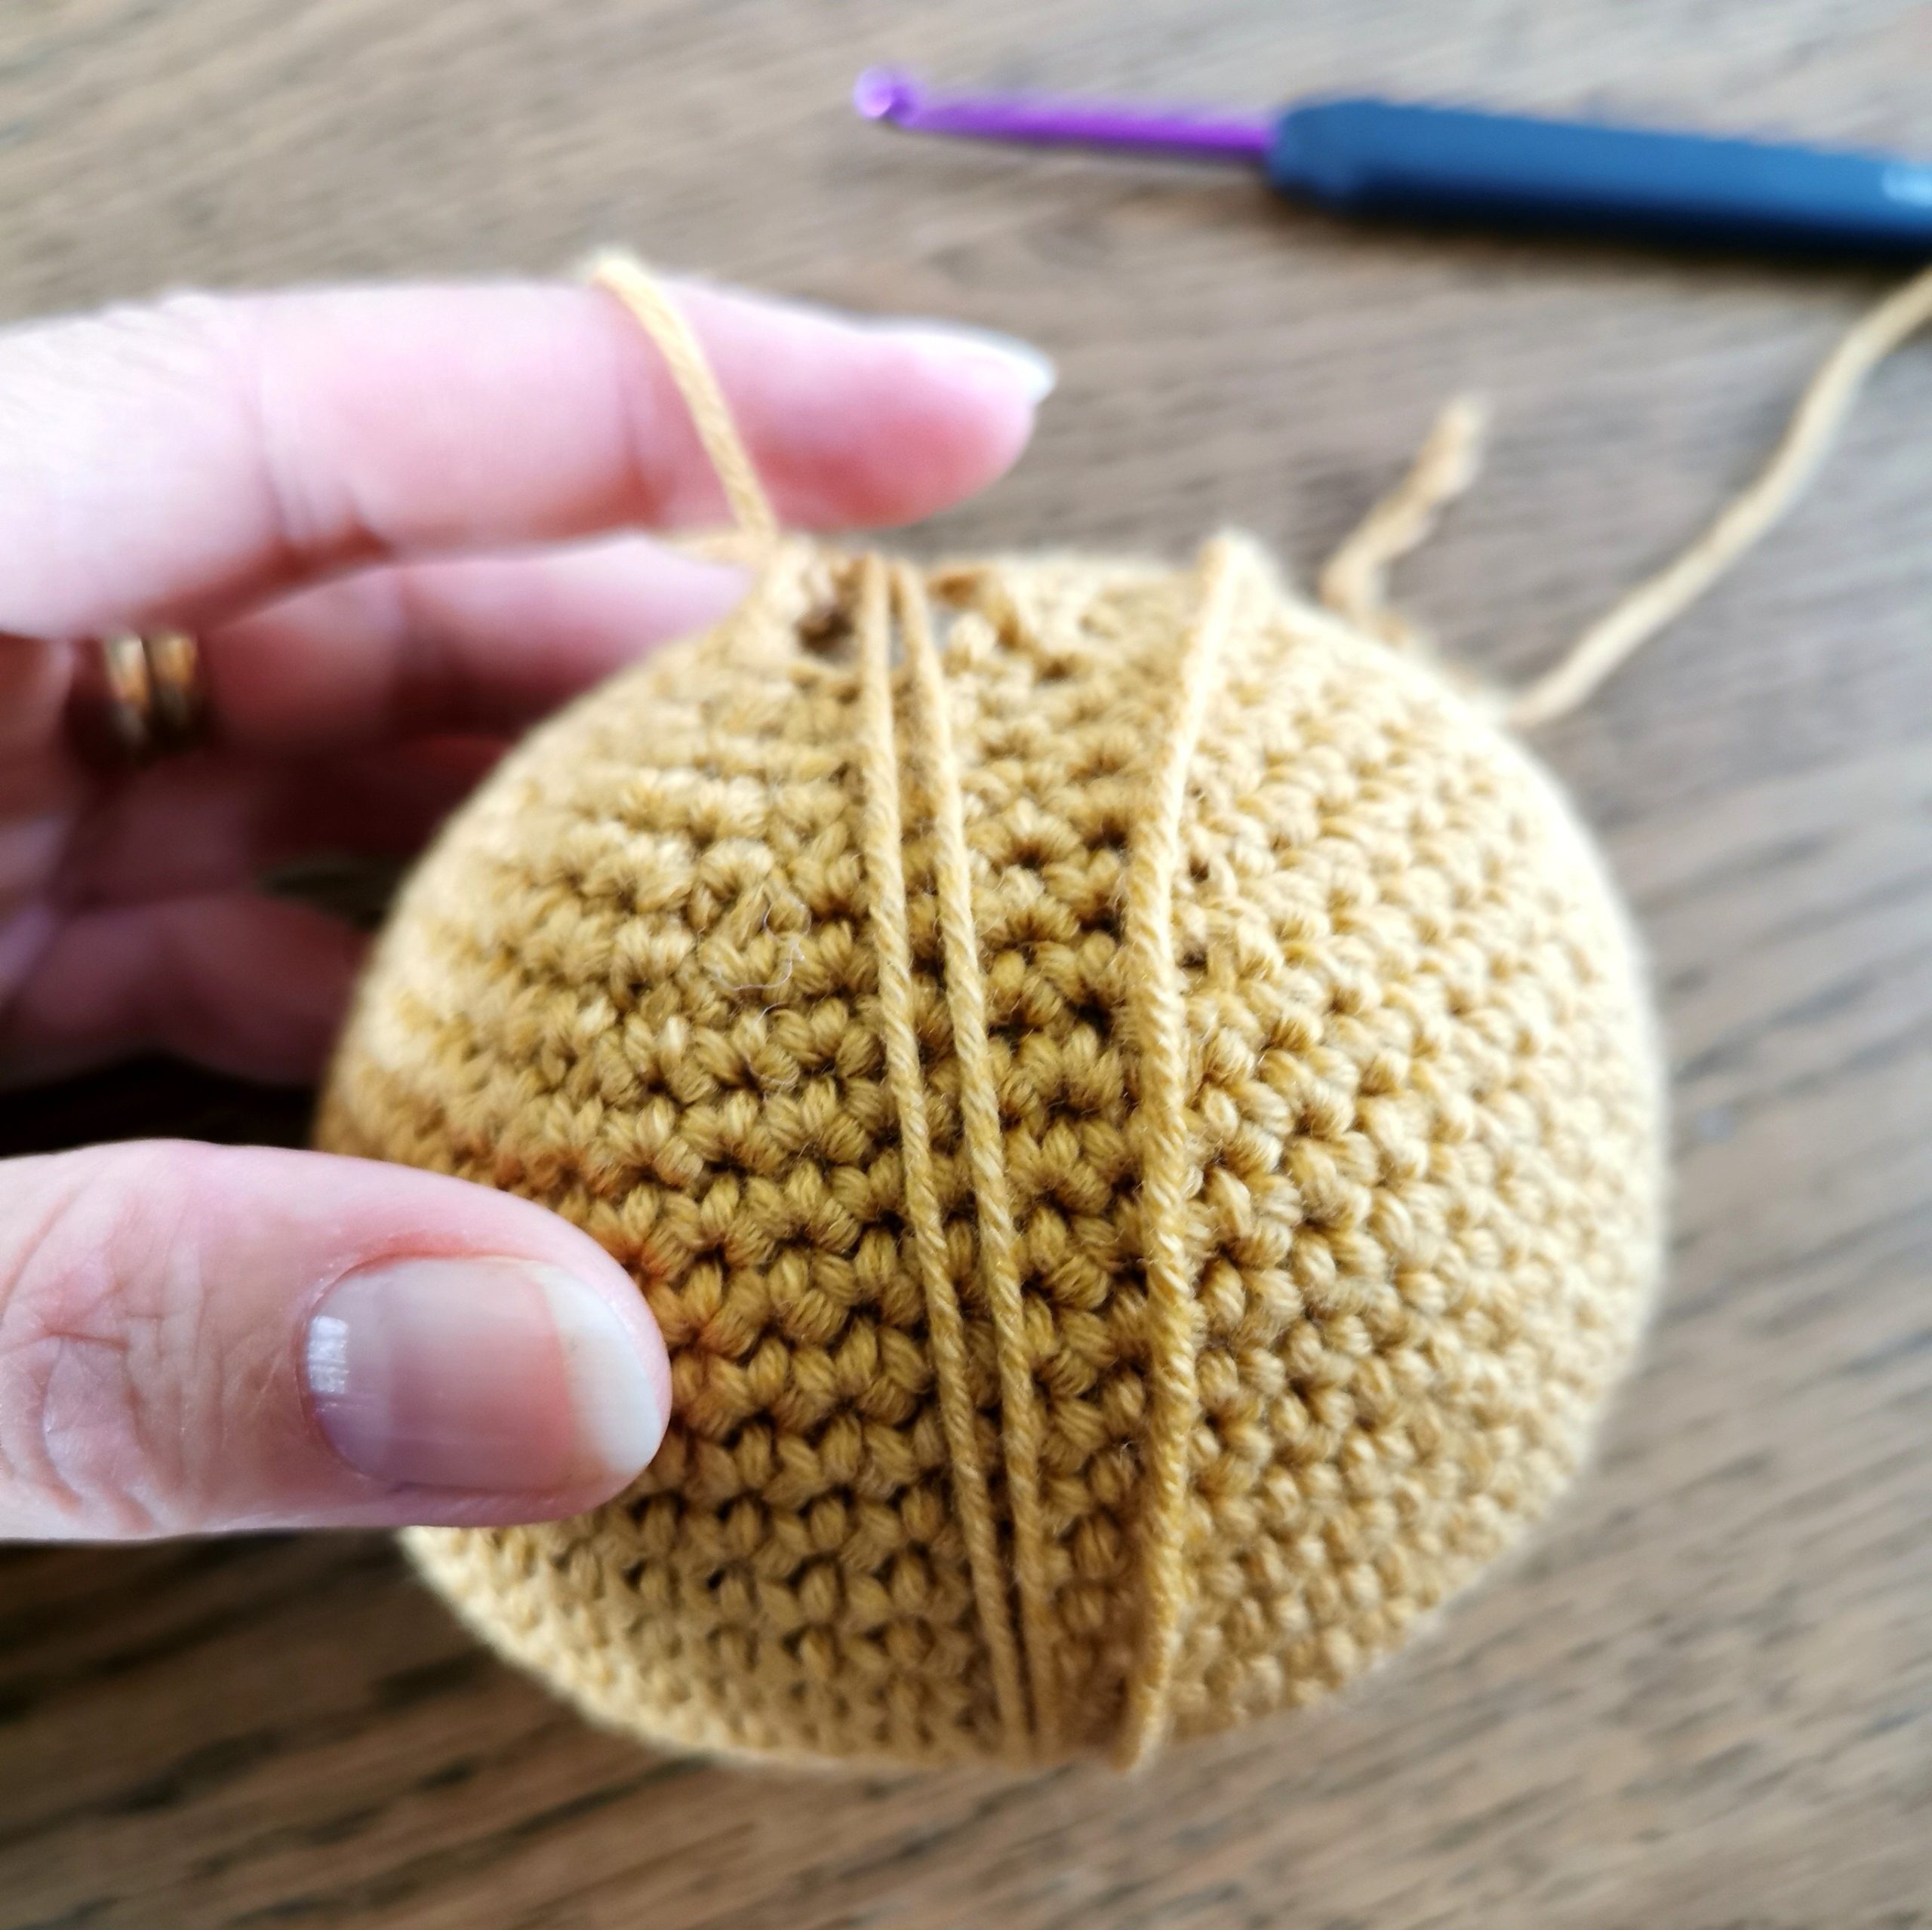
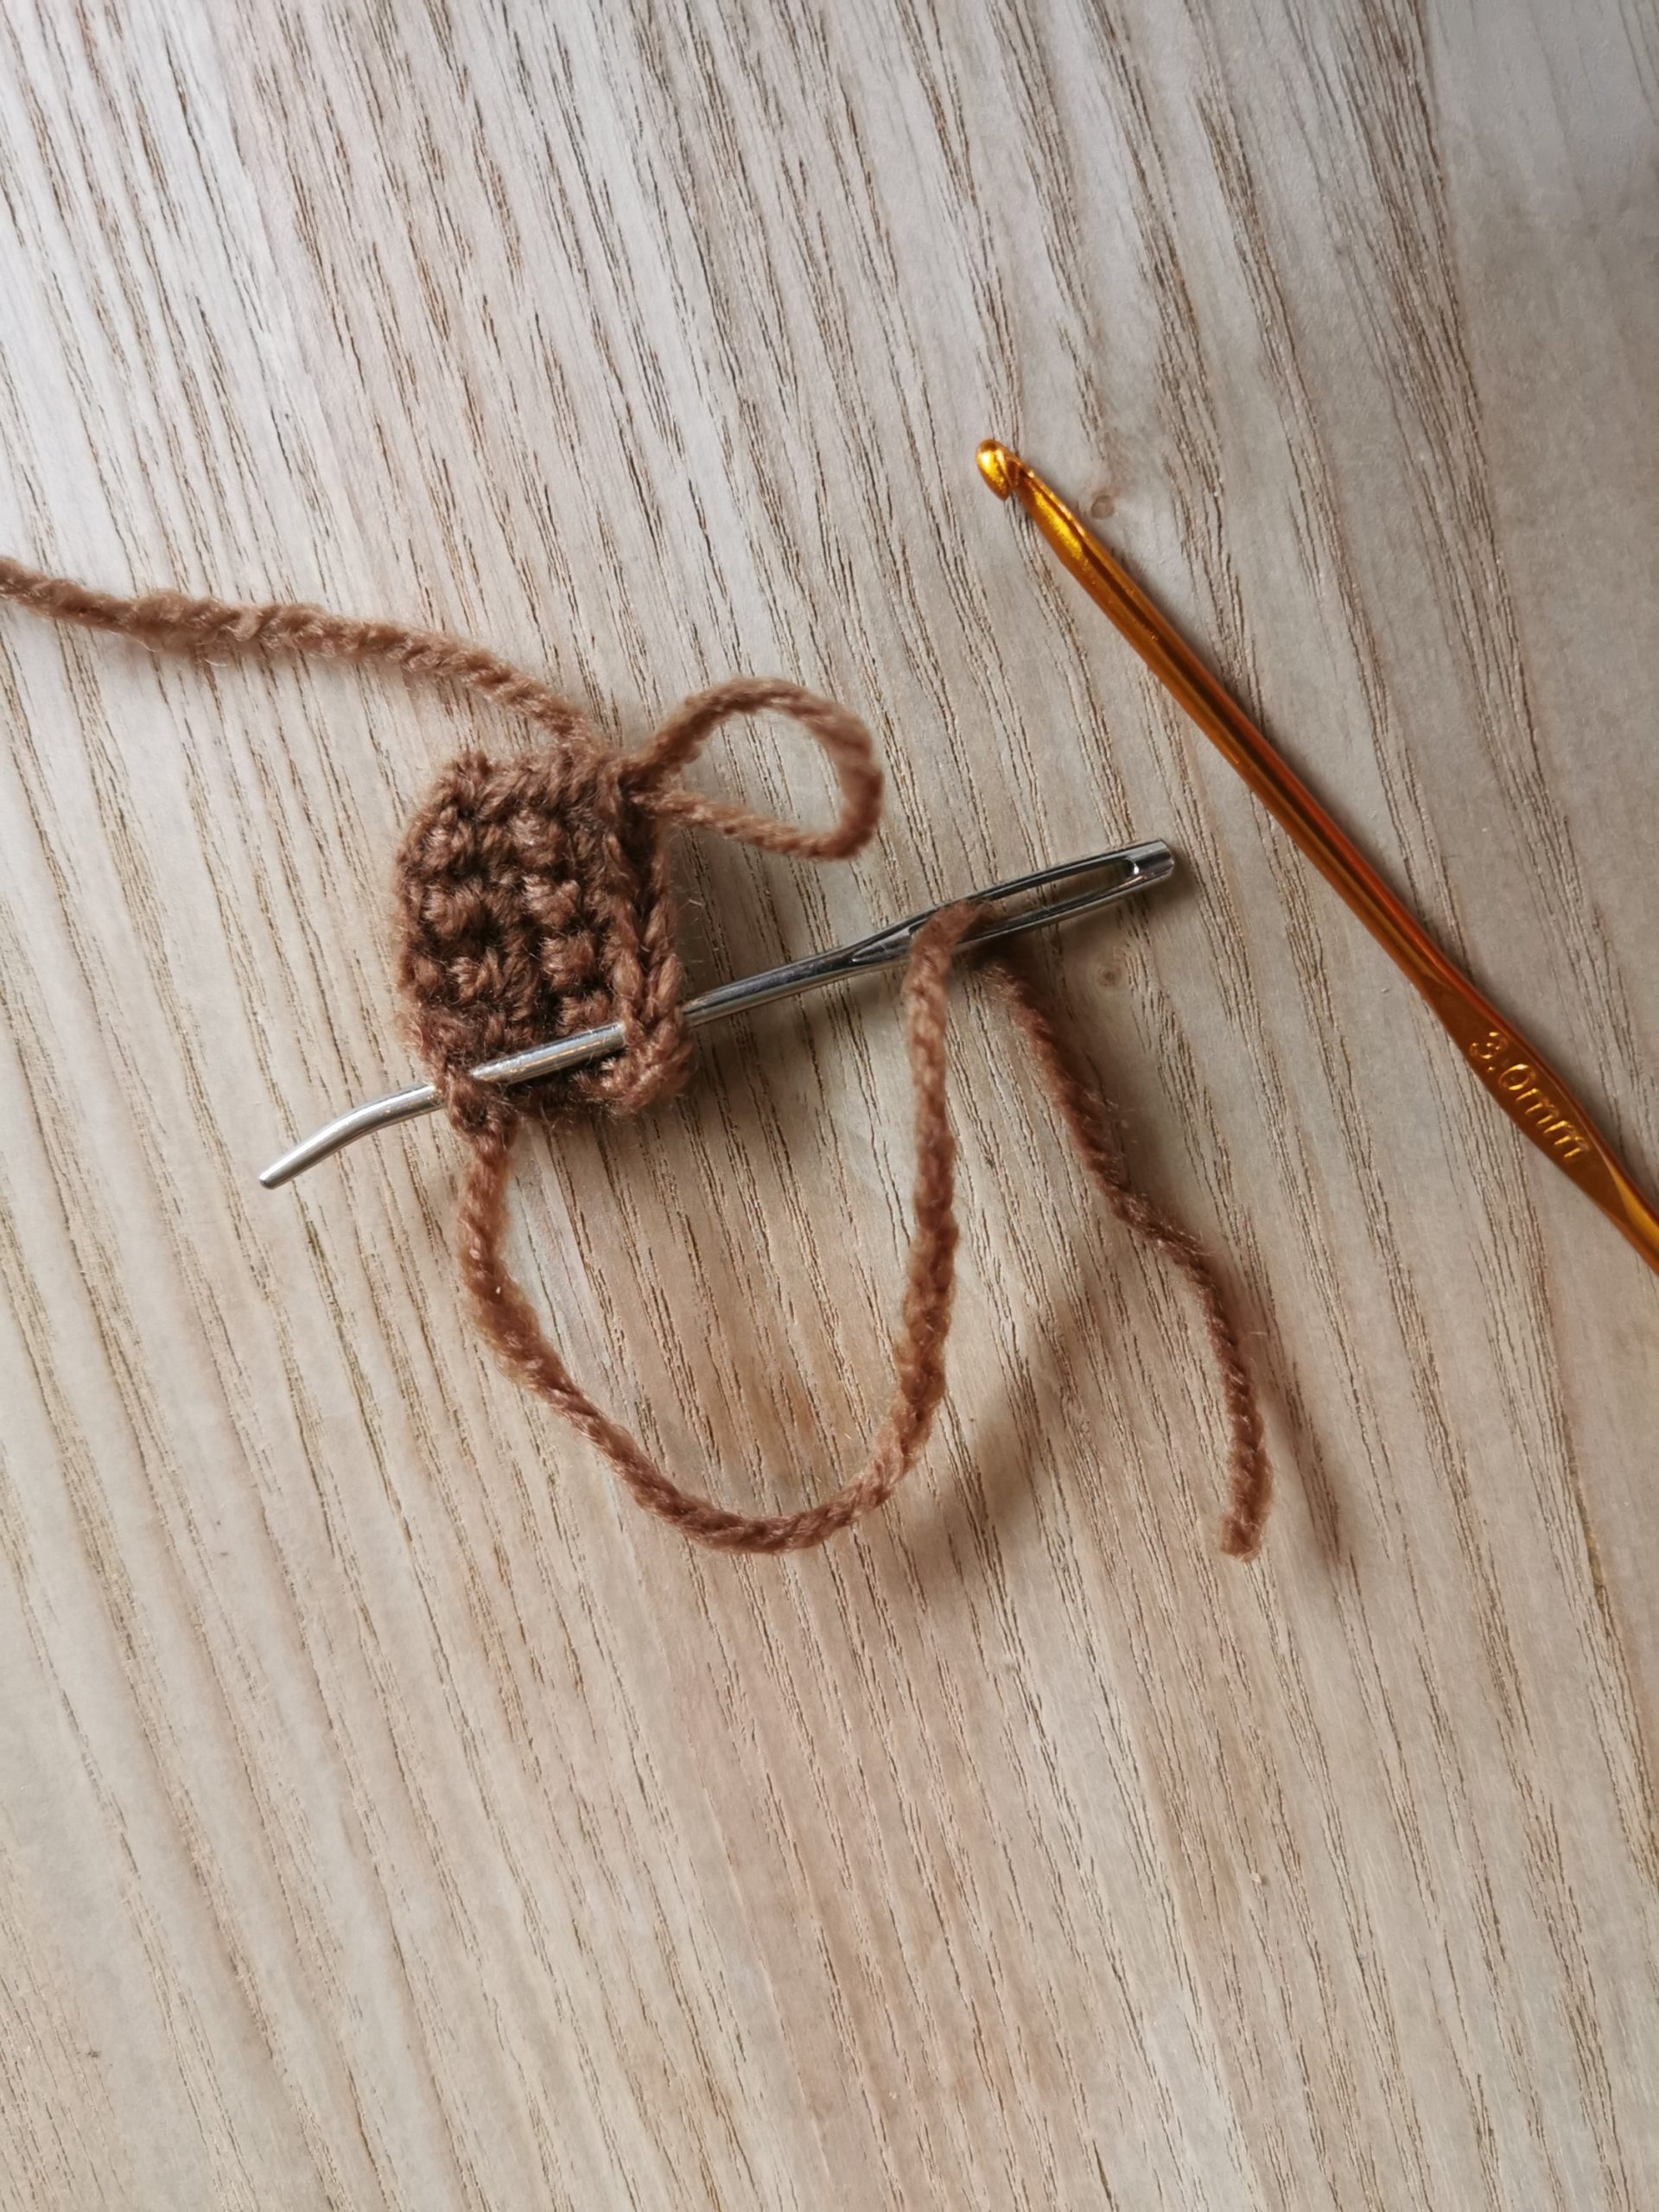
Don’t fasten the yarn, you’ll come back to it after you’re finished sewing the stem (photo 1). With the tail, sew 4 stitches down the side through the first and last row at the same time (photo 2). Weave in the end.
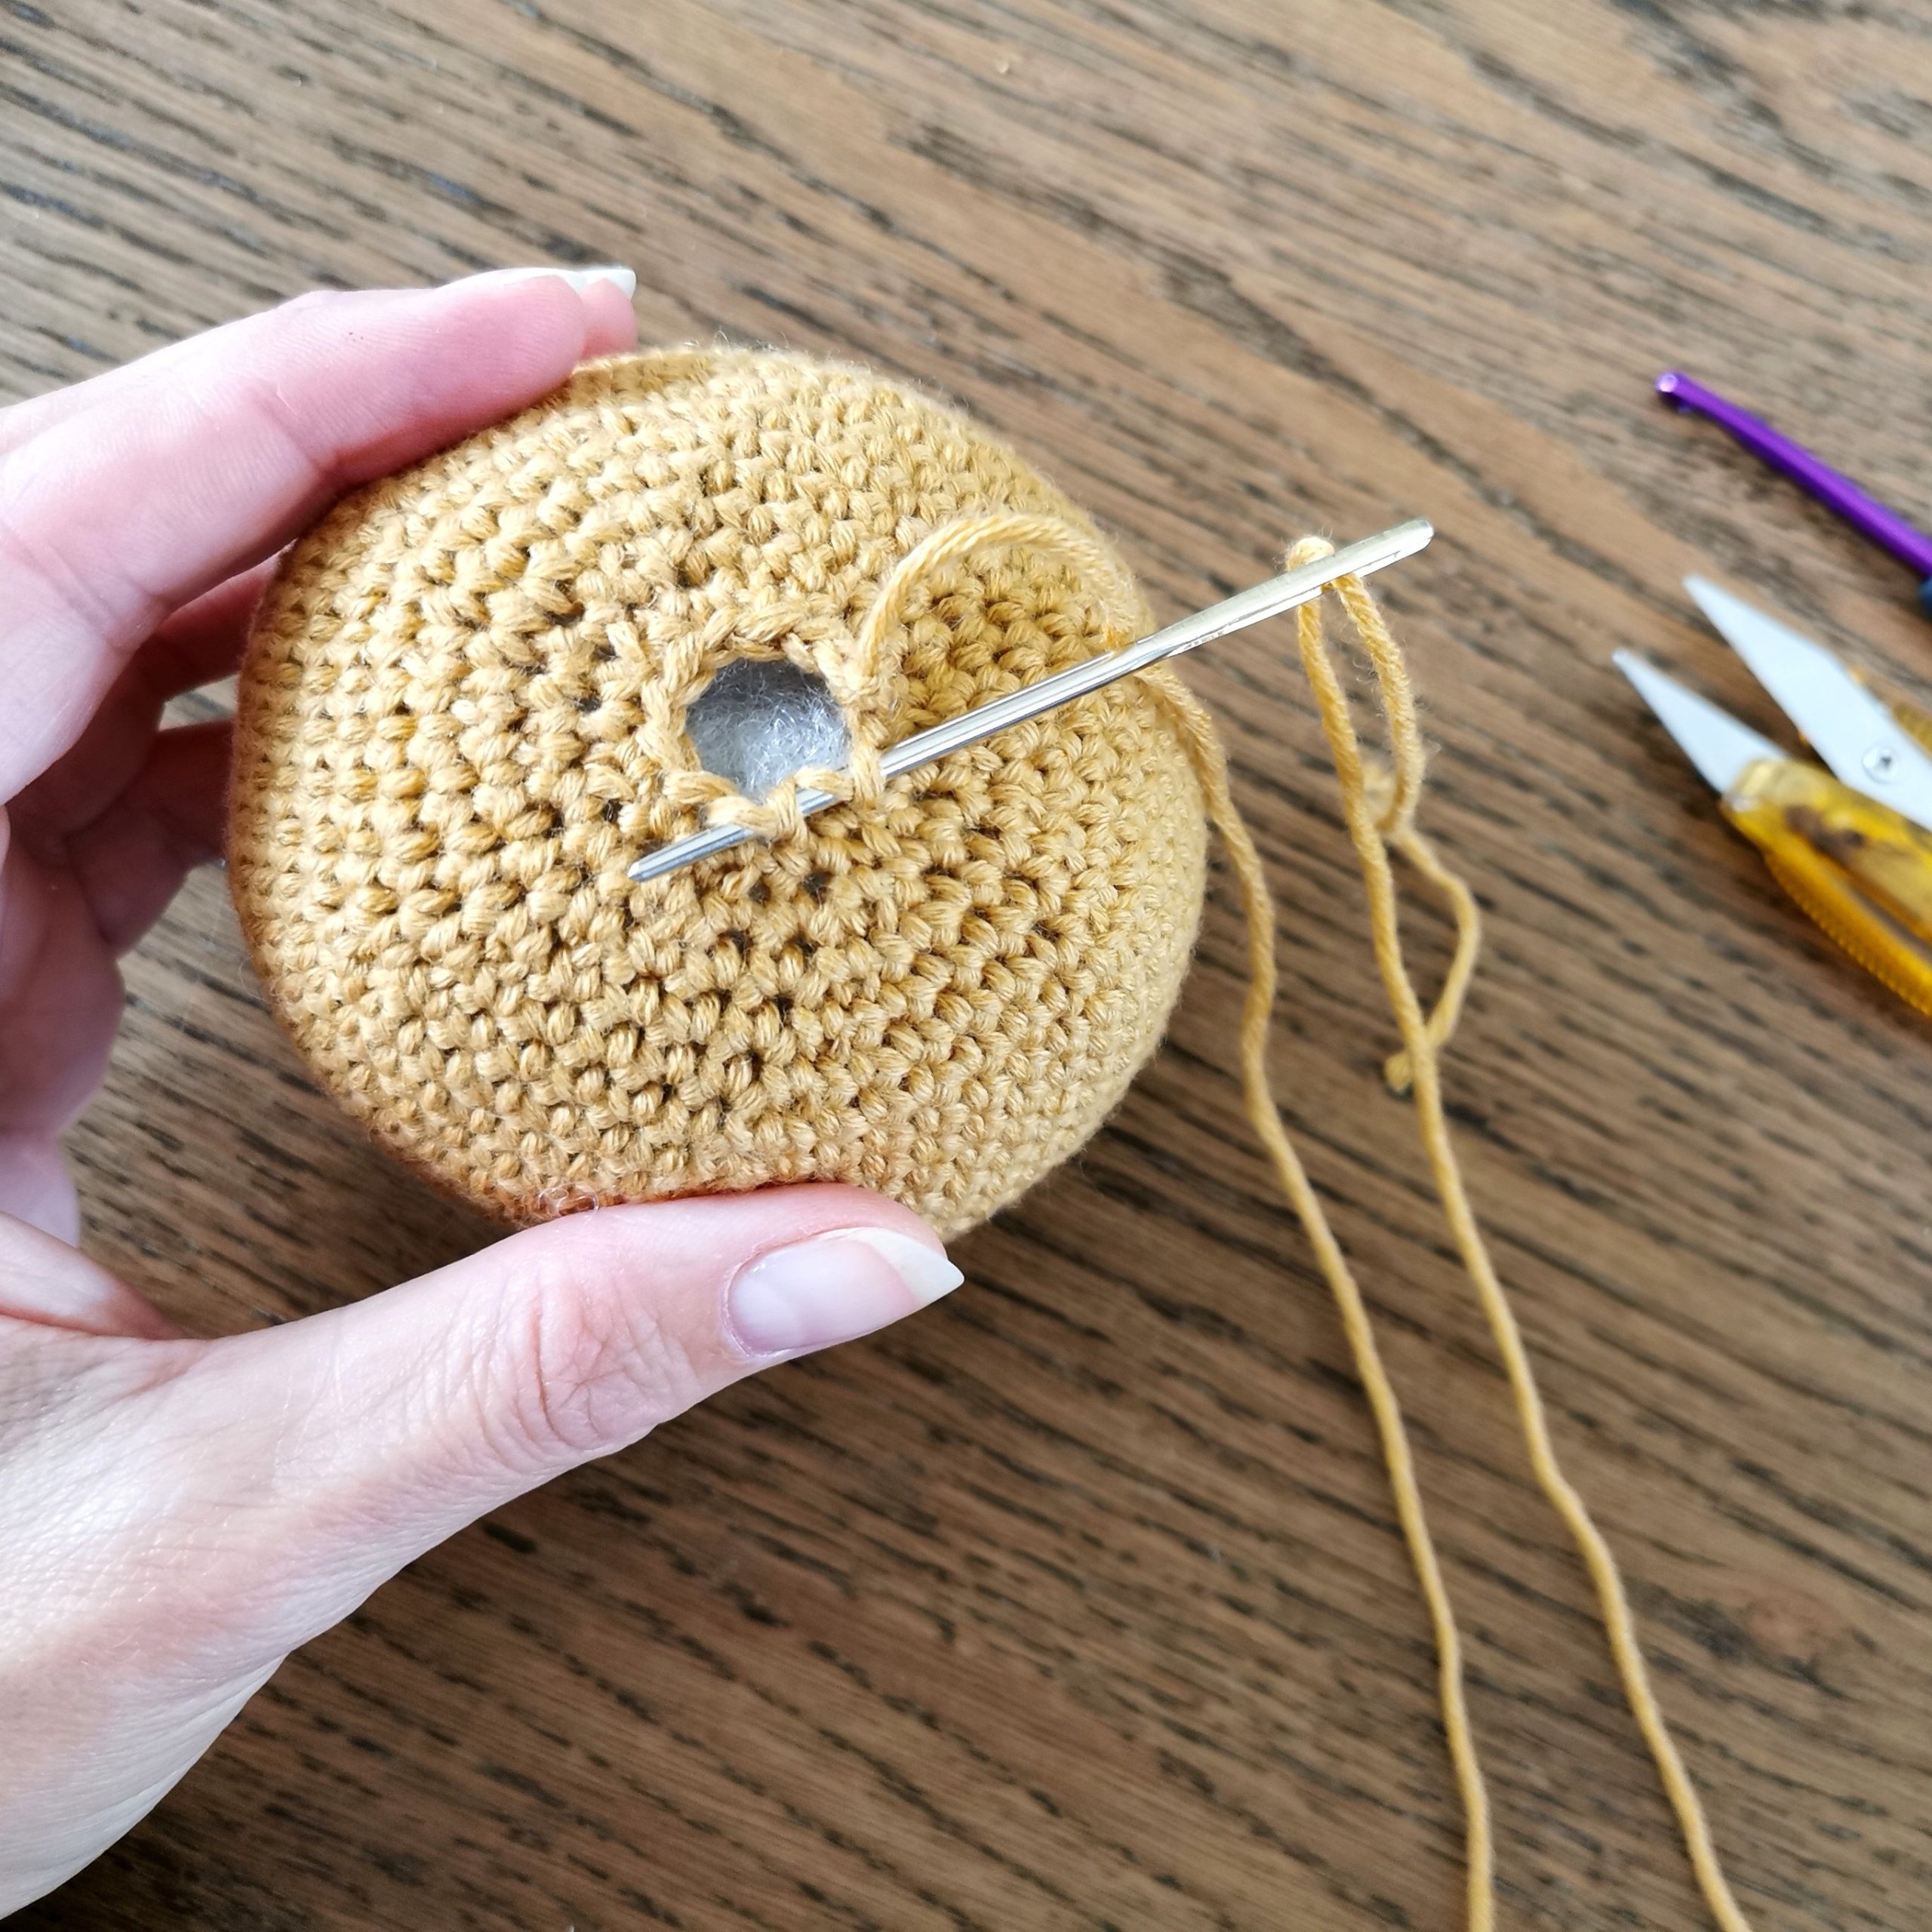
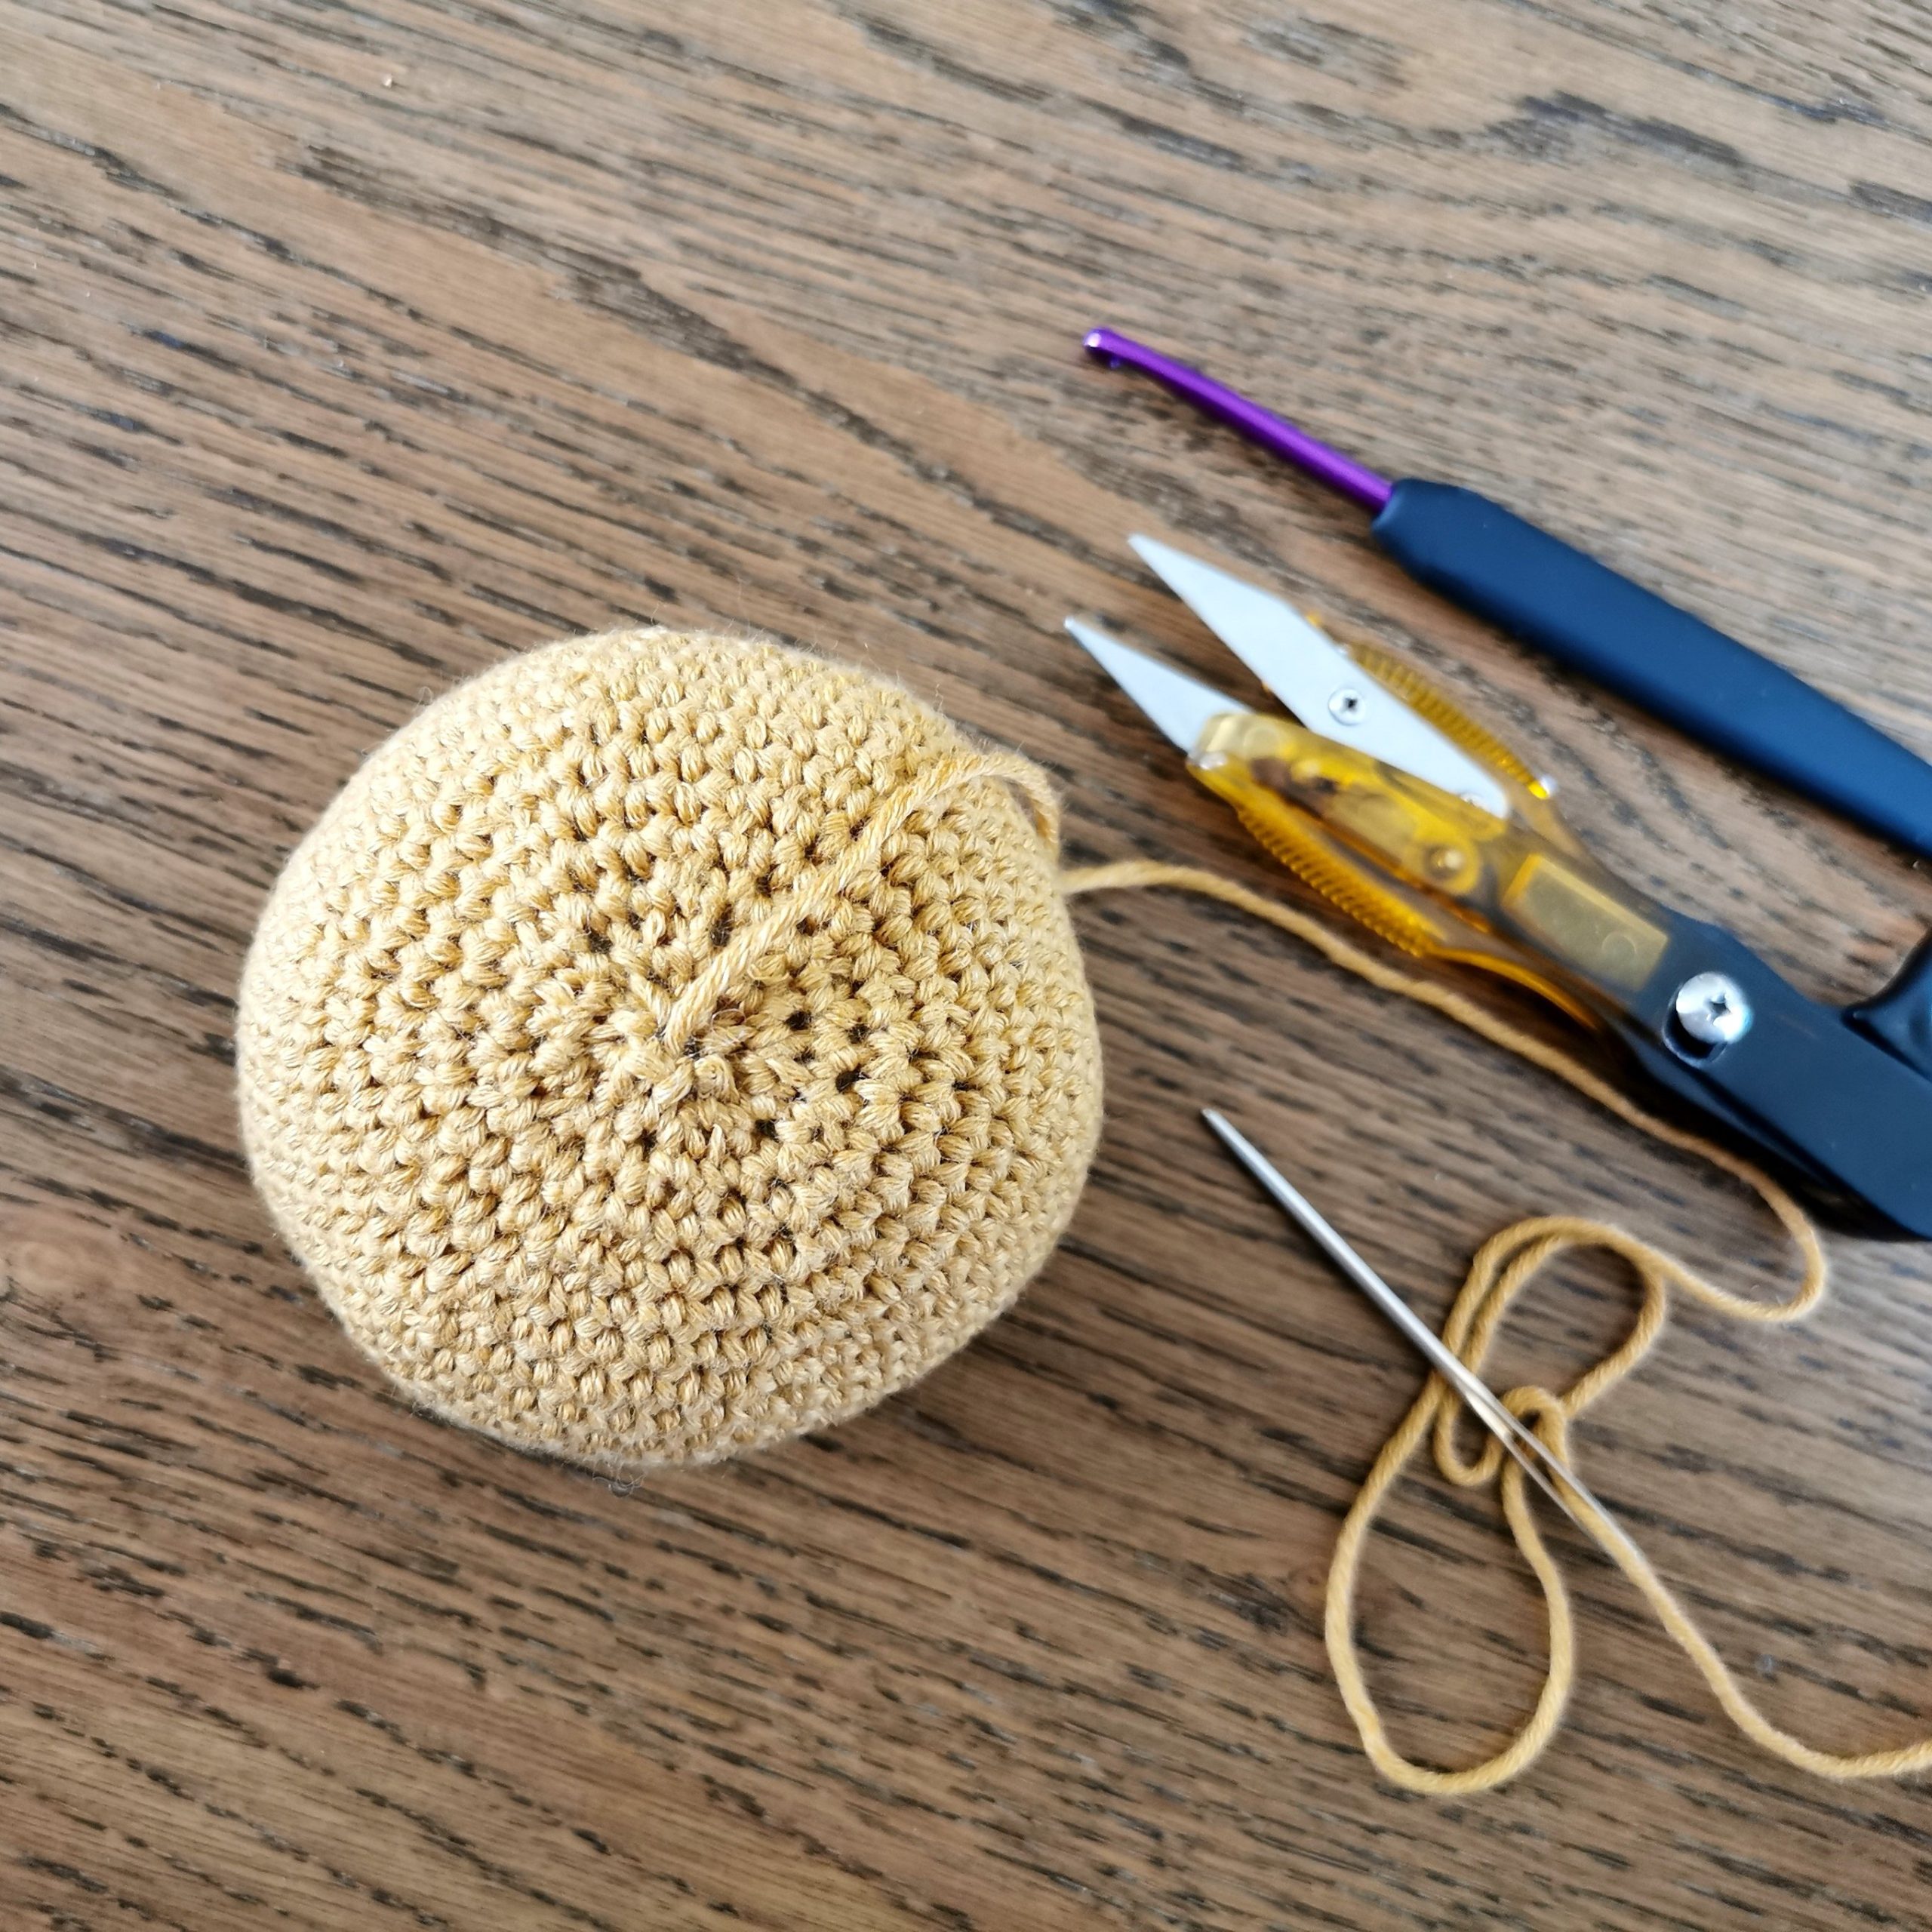
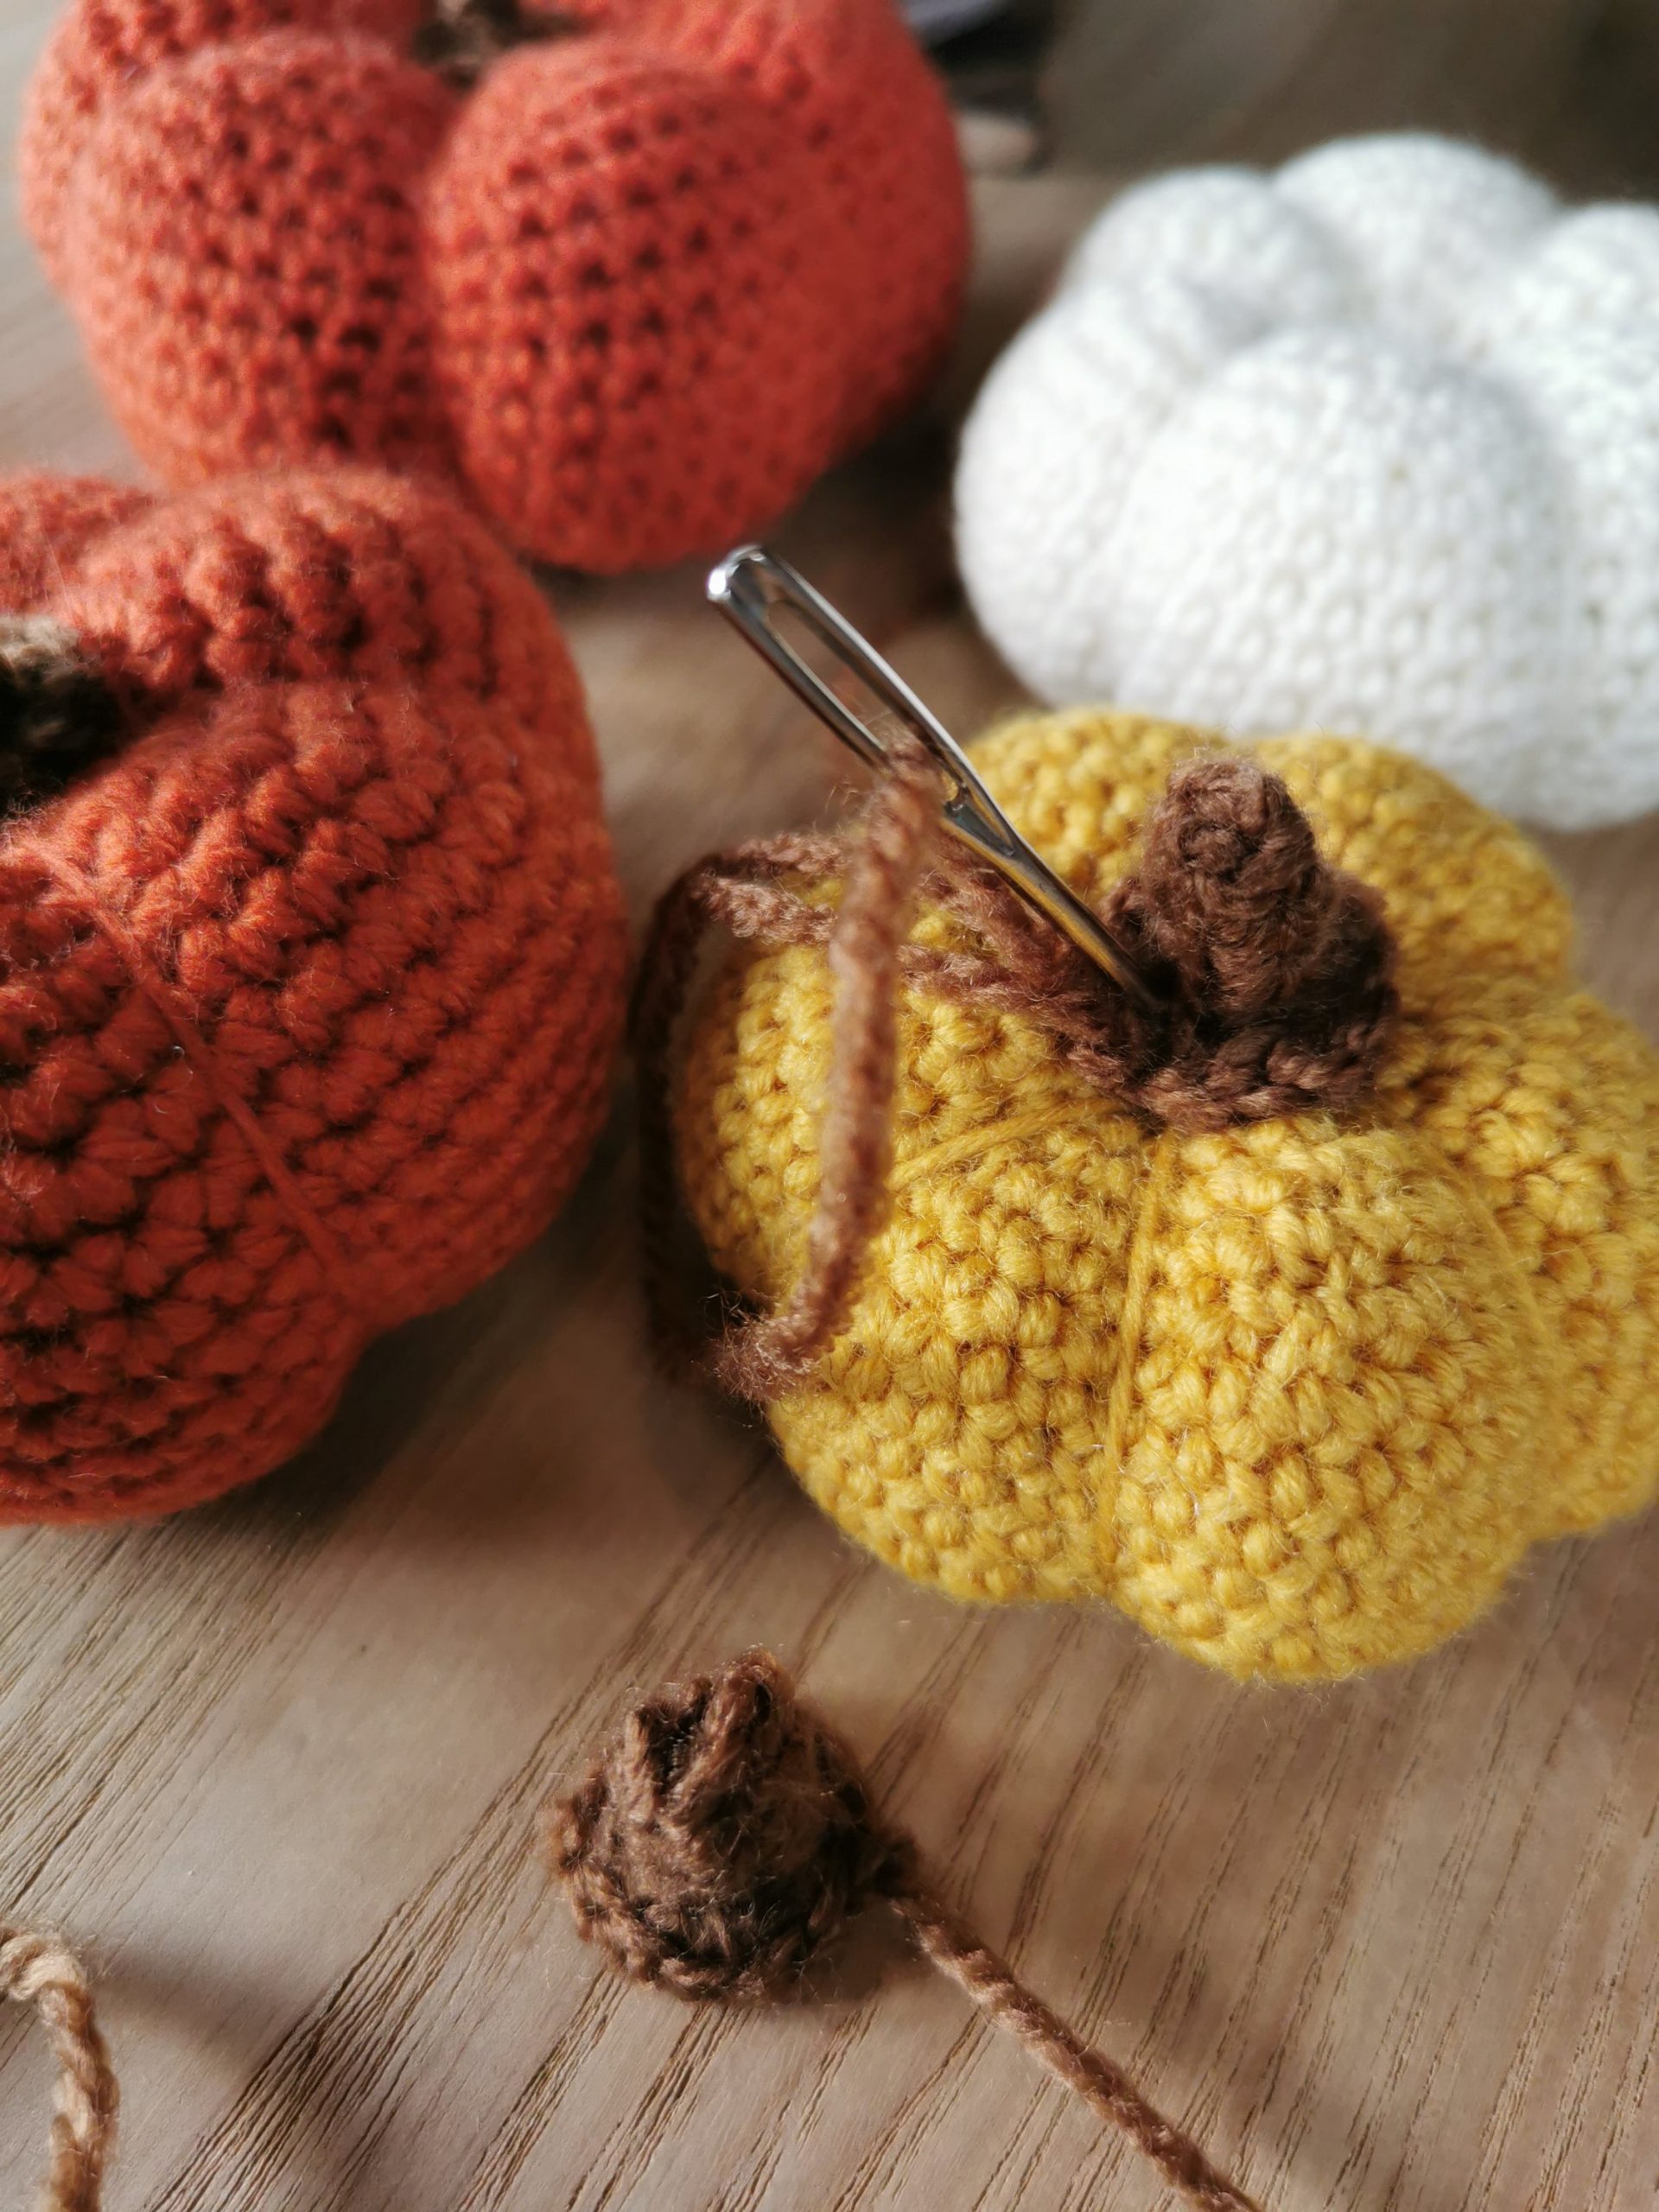
R5: Continue with the yarn from R4 (photo 3), 1 ch, 10 dc around the opening, fasten with sl st in first st (photo 4 and 5). Cut off the yarn, but leave a tail in order to sew the stem to the pumpkin (photo 6).


I hope you enjoyed my pattern, and that you now have one or more pumpkins to decorate your home with.
If you use my patterns please link back to www.HELdesign.com.
And I would love to see your finished pumpkins, so please tag me if you post on Instagram, with #heldesign_pattern and @heldesign_crochet 🙂


Please contact me if you have any questions.
Enjoy your crocheting! 🙂

Would you like to learn how to crochet?
Visit my YouTube channel, there you will find videos of the basic stitches and in time there will also come special stitches, various projects and requests.